

Adding Text Overlay Onto an Image in Elementor
There are three ways to add text overlays to images in Elementor. After exploring the three ways to add text overlays, we will talk about which way (if any) is best for SEO and site speed.
Using Heading and Image elements (Way 1)
First…add the image.
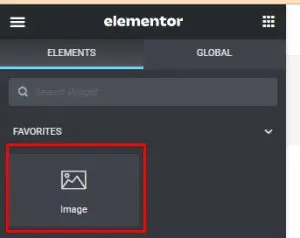
Step 1: Drag and drop an Image Widget into a column and select your image from the media library
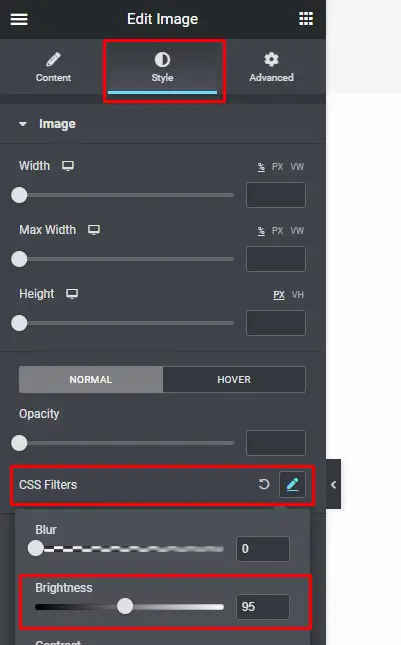
Before adding a Heading widget, let’s adjust the brightness of the image first, to emphasize the heading once we add it. To adjust the brightness:
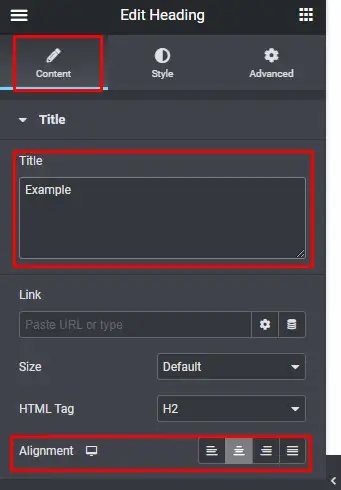
a. Click the image
b. Go to Style tab
c. Look for CSS filter and click the small pen icon
d. Go to Brightness and start adjusting
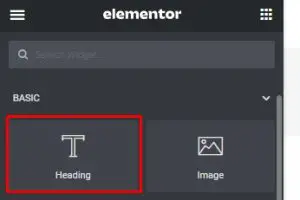
Step 2: Back to Widgets and then Drag and drop a Heading Widget below the image and edit your text
If you want to change the heading color, go to Style tab, under the “Text color” section, you can change the text color to whatever you like.
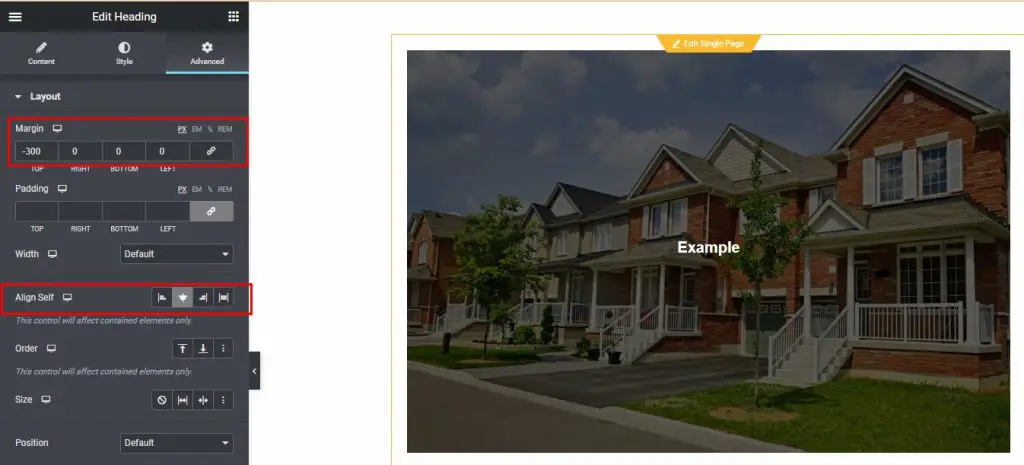
Step 3: In the Advanced Tab, unlink the margin properties and apply a negative top margin (example: -300pxor any number that you want to place the heading )
Step 4: Next, go to Align Self and set the alignment of the heading
Here’s the sample:
Now to add the text…
Step 1: Search on the Heading element and drag it to a section and edit the text
Step 2: From the container, go to Style Tab then Background and use the image option.
Step 3: Adjust your background size to Contain.
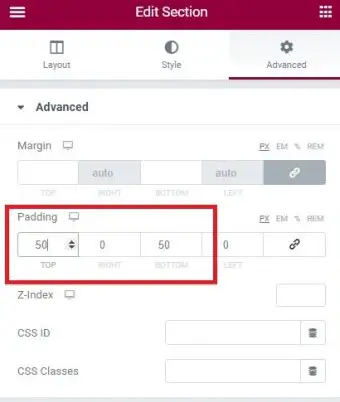
Step 4: Go to Advanced Tab, unlink the padding properties and adjust it according to your preferences. This is to retain the image to its shape for tablet and mobile responsiveness
Step 5: Add margin to increase the gap between the background image and the container.
Using Heading element and Container Background image (Way 2)
Step 1: Instead of dragging over an image, just click “Edit Container” (the gray rectangle on the left)
![]()
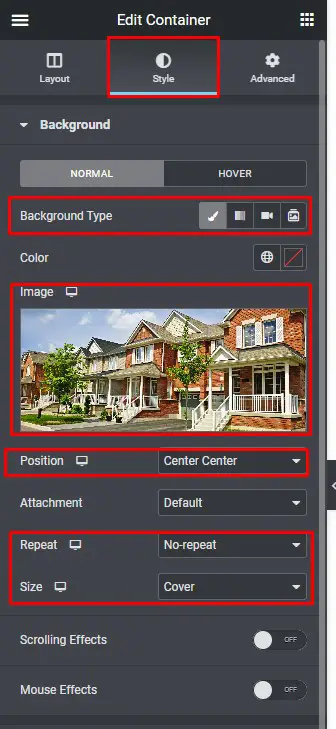
Step 2: Go to Style tab, under Background Type select the classic (paint brush icon)
Step 3: Go to Image and select the image from the media library.
Once the image is added, change the following:
- Position to Center Center
- Repeat to No-repeat
- Size to Cover
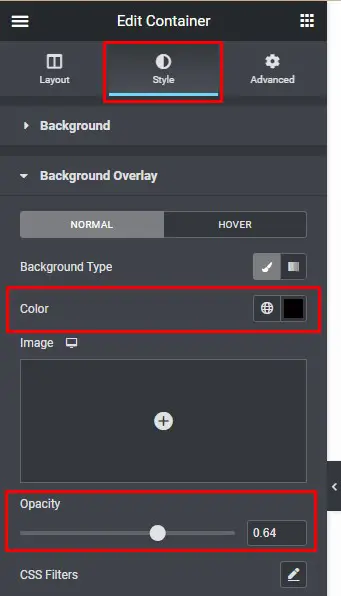
Then add a Background Overlay to whatever you like, so that the heading would be readable once we add it.
Go to Background Overlay, change the Color and adjust the Opacity.
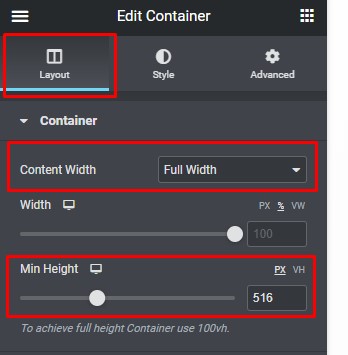
Step 4: Once all is set, go to the Layout tab, change Content Width to Full Width and then adjust the Min Height
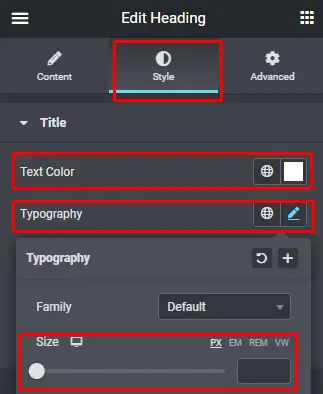
Step 5: Back to widget, search on the Heading Widget and drag it to a section and edit the text and the alignment under Content tab
If you want to change the heading color, go to the Style tab, under the “Text color” section, you can change the text color to whatever you like and you can also adjust the heading size under the Typography and look for size.
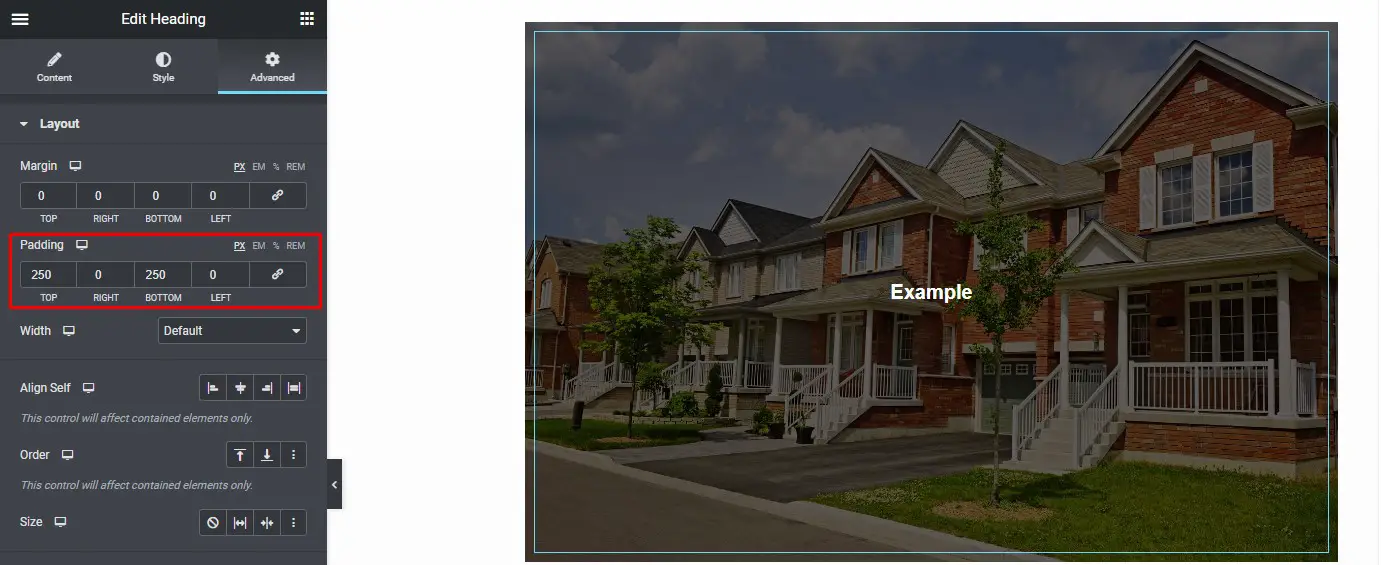
Step 6: In the Advanced Tab, unlink the padding properties and apply a top and bottom padding (example 250px).
Here’s the sample:
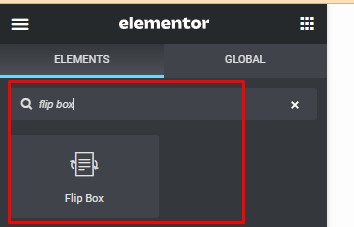
Using Flipbox Element to add Text Overlay to Image (Way 3)
The third way to add a text overlay in Elementor is to use the Flipbox element.
Step 1: Click on the container
Step 2: Go to the Widgets, search on Flip box and drag in into the section and make a few adjustments
Step 3: Go to the Content tab and under Front > Content, get rid of the icon, title and description because we don’t really need that for the front of the image.
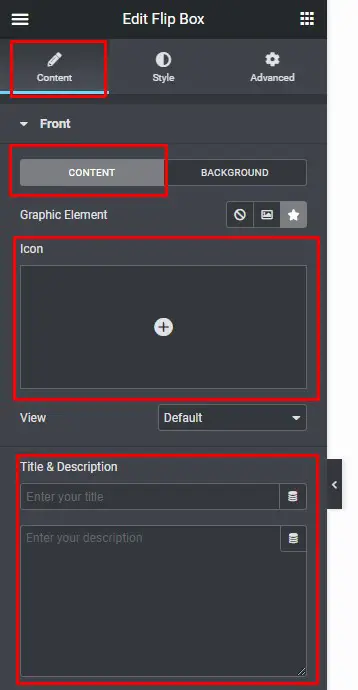
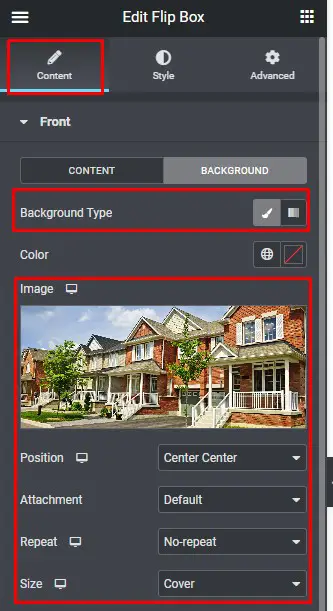
Step 4: Next, go to the Background, under Background Type, add the image. Once the image is added, change the Position to Center Center, and the Repeat to No-repeat and the Size to Cover.
Then add a Background Overlay to whatever you like so we can see the words a little bit better over top of the image.

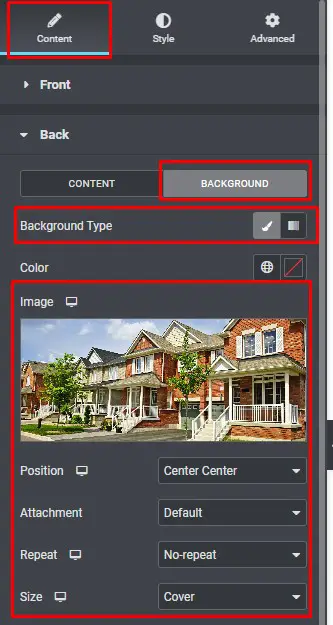
Step 5: After that, let’s adjust the Back of the Flip box, under Content, change the Title and remove the description completely and button text.

To change text color, go to Style tab, under Back tab, change the Text Color.
Step 6: To add some effects to the Back, go again to the background on the backside of this widget and add a background image again and still do the same effects.
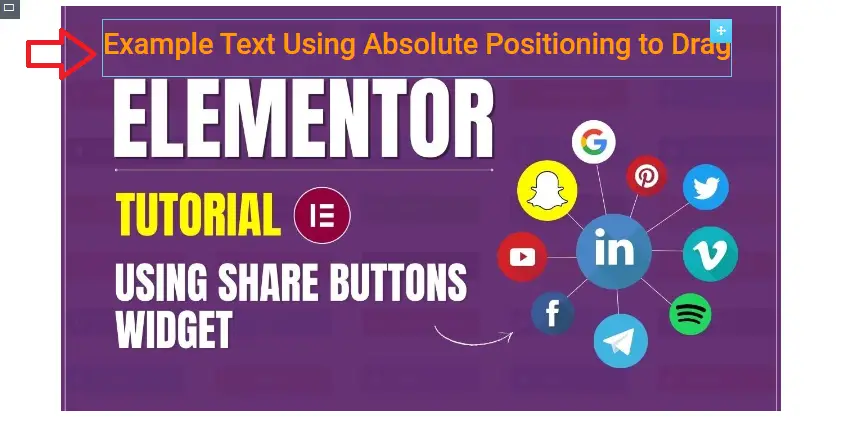
NEW: Alternative Way For Adding and Adjusting Text (SUPER EASY WAY)
Step 1: Add a text editor to the same container as your image.
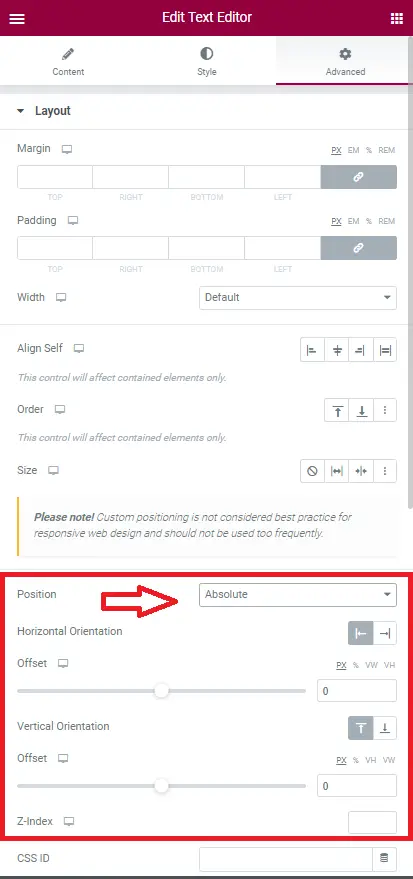
Step 3: Then use your mouse to move the Text Editor widget around on the screen to where you want.
How To Add Image Carousel With Text On It in Elementor
In addition to adding text overlays to a single image, you can do the same to an image carousel. Here’s how to do that in Elementor.
Step 1: Search for Image Carousel element and Drag it to the container the Add Image to display.
Step 2: Adjust the Container, go to Layout tab and select the Height, Then min. Height.
Step 3: Edit the Image Carousel and adjust the layout and change the image size, if you wish to display a single image per slide, select Slide to Show and choose 1.
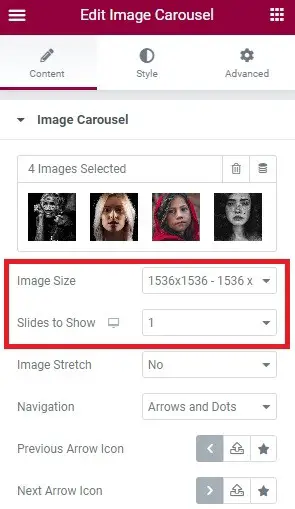
After choosing an image, use the Heading element to adjust the margins and overlay with your image carousel. Keep in mind that this method would overlay the same text on all your images. In order to overlay different text for different images, you would need a little bit of creative coding, or use something like the Carousel Anything plugin.
How to Create a Hero Image with Text Overlay?
Step 1: Add a new container, click the red + sign, go to the Advanced tab to access the Layout section of your container. See below.

Step 2: Click on Content Width, and choose Full Width (100%). Also adjust the Min Height. You can adjust the height using pixels, or vh (viewport height).
Step 3: Under Style Tab, select or upload an image for the background image. Then you can see an options below the uploaded image. For the position you may select the Center Center. Then on Repeat select No-repeat and then set the Size to Cover.
Step 4:Go back to your Elementor widgets menu and search the Image Widget. Drag and drop it into the container and add your text using the Heading element widget.
Step 5: You can also use the rest of the options from the Advanced if you want to customize your Heading further.
What is the Best Way to Add Text to Images in Elementor?
We ran a test, in all three ways to add a text overlay into images. Using the same text and the same image, we ran it through Google PageSpeed Insights using the three original methods. We did not run a speed test on the 4th method because it is just a slight modification of method 1.
Here are the results:
Method #1
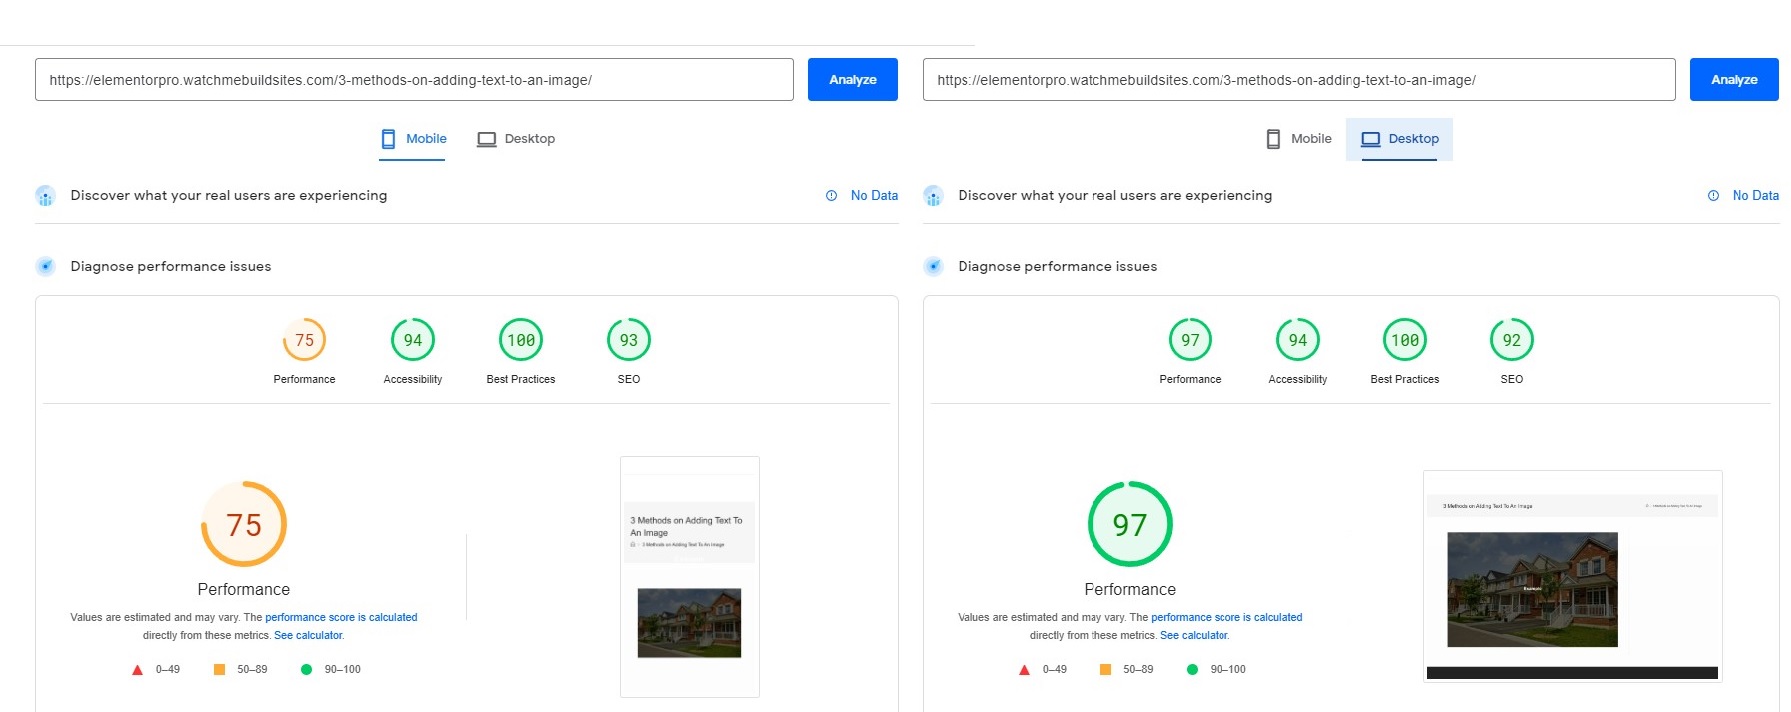
Method #2
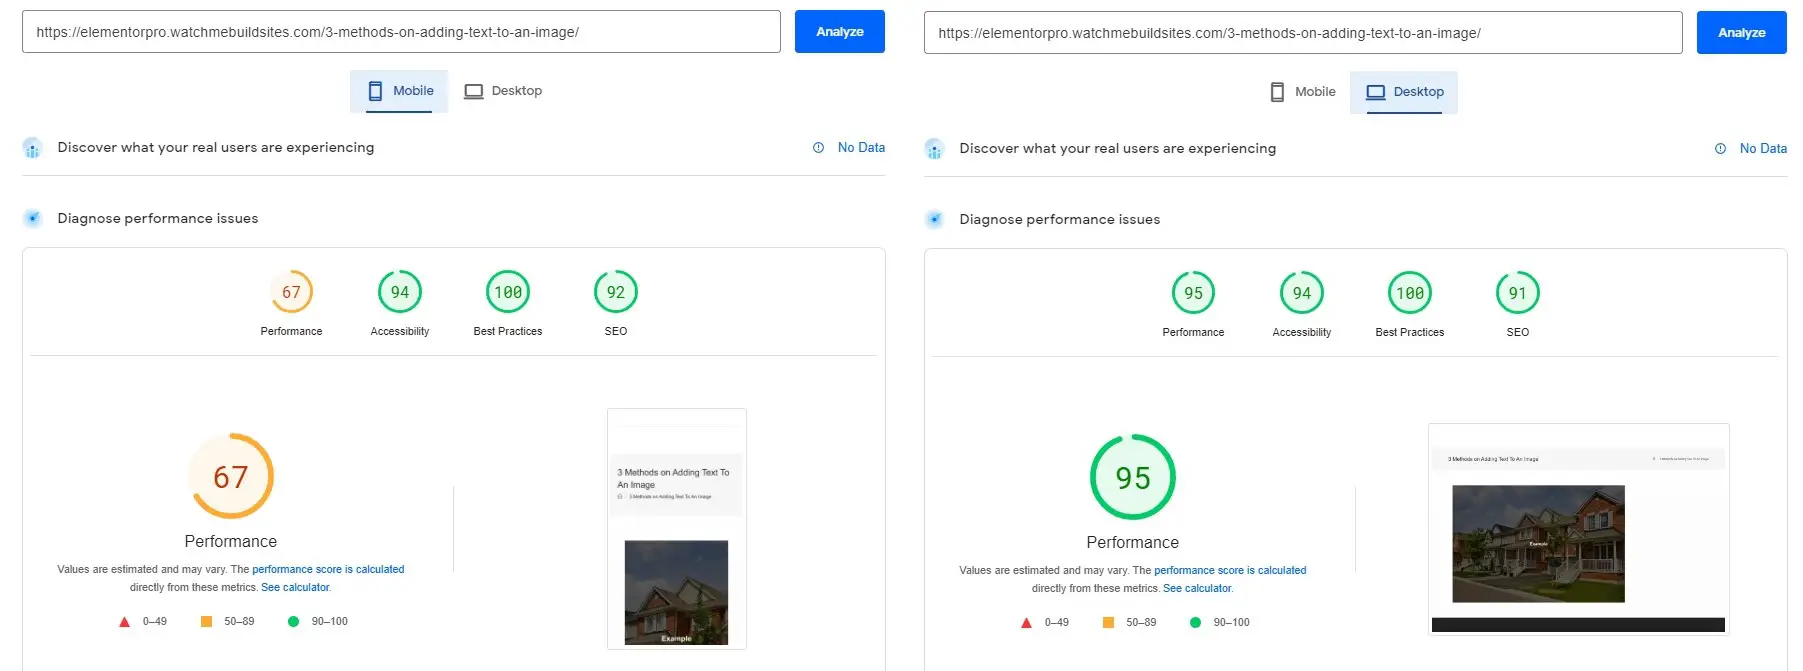
Method #3
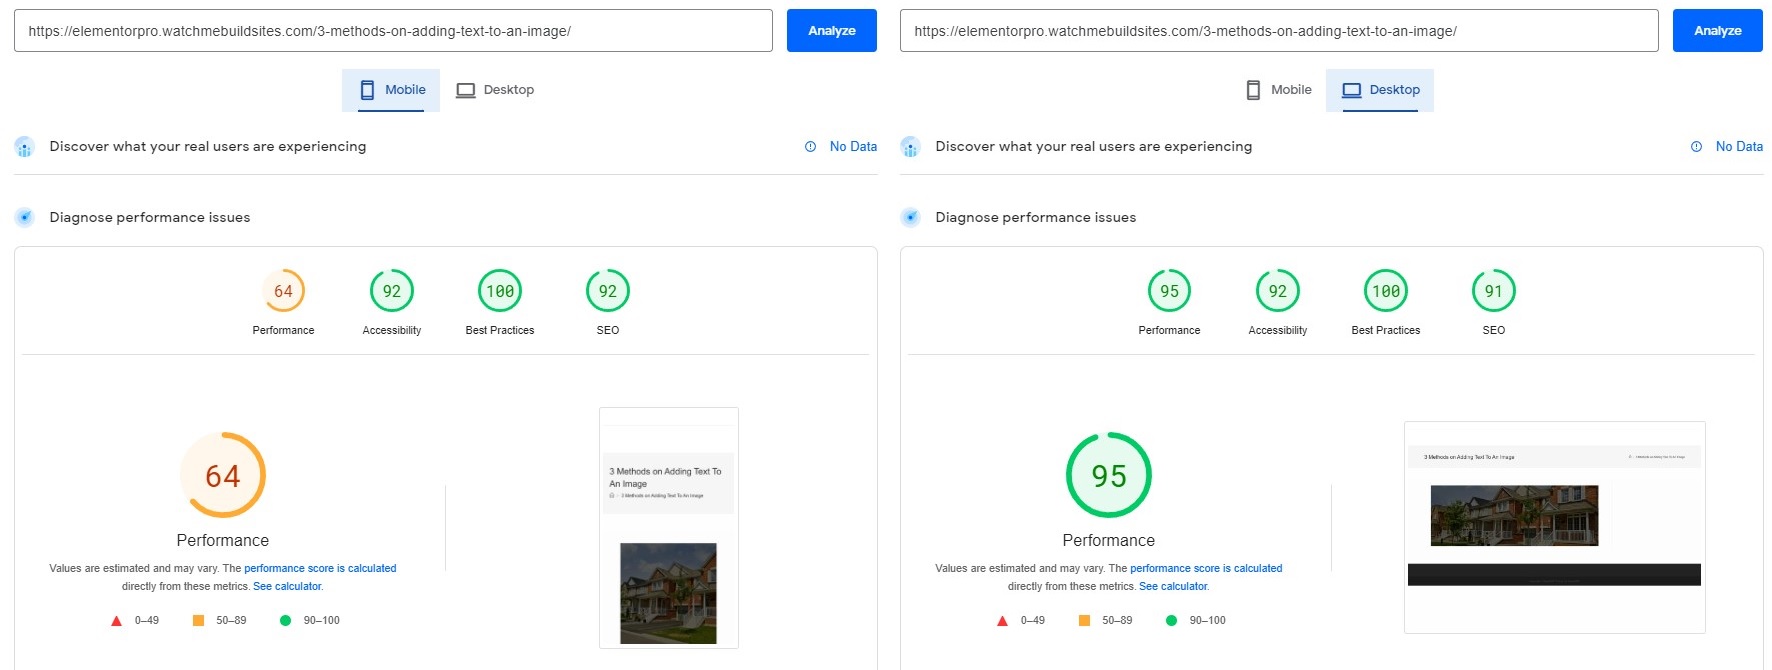
As you can see, the three methods did great on the desktop, scoring high-90s on the PageSpeed score. However, the method #1 on mobile (using separate headings and image elements) seems to be the fastest one, with a Google PageSpeed performance score of 75. If you want to add a text overlay to your image and you count on speed using mobile, then the first method is the best fit for Elementor. However, we will have to say that the difference between the three original methods in terms of speed aren’t all that drastic to really say that method 1 should always be used. But the new alternative way (Way 4) is definitely the easiest way.


