

Create Tables Using Elementor Third-Party Add-Ons (Method 1, The Hard Way)
There are a lot of third-party data table add-ons for Elementor. These add-ons power up your Elementor site by adding more elements and features. Essential Addons, ElementsKit, Elementor Addons, and Ultimate Add-Ons are just a few of the popular add-ons with a data tables element.
Each of these add-ons allow you to either create a table from scratch in your Elementor page or import data from a CSV file. They also all allow for the following:
- Sortable
- Allow for importing of data from CSV files and Google sheets
- Responsive
- Allows for images/icons in tables
- Making styling designs
- Apply advanced Elementor settings to it (motion effects, mask, hide content, hide, etc)
- Pagination
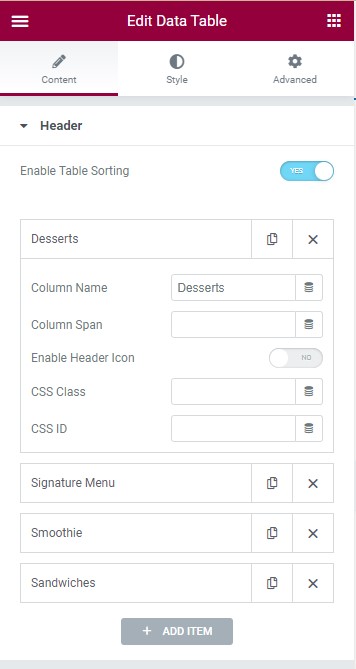
Step 1. Choose the EA Data Table or the EA Advance Data Tables element.
You will notice that the element has a Header section and a Content section.
In the Header section is where you create the header columns and make edits to it.
If you want to sort the items of your table in either alphabetical or numeric order, you can activate the Table sorting option. In the header section, you can duplicate, remove and add another table header if you want. Add another table header name. For example, the column span can also be changed to make it wider. Additionally, you are free to add our own CSS Class or ID to every Column.
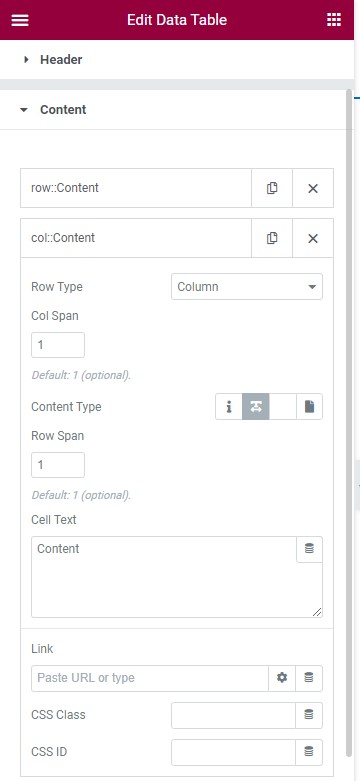
Step 2: Go to the Content section to modify the content under the header.
The following instructions works the same for any Elementor data table add-on (ElementsKit, Ultimate Addons, etc).
The first entry should be a row entry. After add a column entry to fill up the row. Confirm that the number of column entries after the first Row item corresponds to the number of Header columns. For instance, I need to add one row and four columns because I have four table Headers. Then if I want to start another row, it will be the same—one row entry and four column entries.
So, from this section you can change both the column and row span. Also, you can select a content type and customize. Add your cell text, you can add a link, CSS Class & CSS ID. Just follow the same steps in the other columns as you did in the first one.
This step took a little getting used to and it is not intuitive. We created a video walkthrough of creating a data table with Elementor if the instructions are not clear in this article.
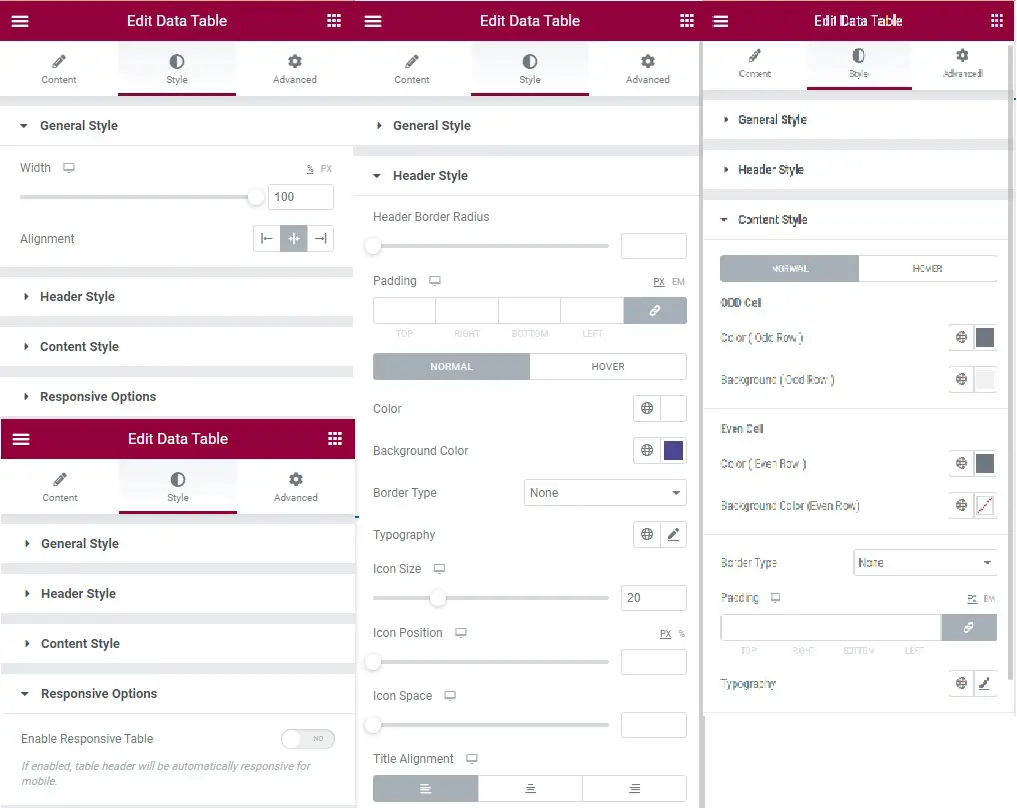
Step 3: Style it the table.
Under Style Tab, you can change the background color, header Style, content style, border, typography, among many other things.
In General Style, adjust the width by dragging the slider and choose the alignment for the table. In the header section change the border radius, padding, color and so on. You can also change the title alignment from this section.
In the Content Style section is where you style the cells below the header. So if you want to set different backgrounds colors for odd and even rows, this is where you do it.
After you’re done with styling the content, you can go to the Responsive section. Here, your table will automatically responsive to small screens if you use the Responsive Table option. You can adjust the width, color and also border type.
You can still use the rest of the options from the left sidebar and you can make use of some other general options in the Advanced Tab.
Using WordPress Table Plugin Shortcodes (Method 2, Easy Way)
Using shortcodes with compatible data tables plugin is actually our recommended method for doing feature comparison tables with Elementor. There are two big benefits to using shortcodes over Elementor third-party add-ons to create your tables.
Benefit 1: Creating a large table in a post with a lot of other Elementor elements will slow down the Elementor visual editor drastically and so will take much longer to edit your articles.
Benefit 2: The other big benefit of using shortcodes for your data tables—you can make the top row or first column sticky (freeze). You can’t do that (at least easily) with Method 1.
Aside from those two big benefits, using shortcodes allow you to easily duplicate, move, and edit the table without messing with your page.
Best Data Tables Plugin for Creating Feature Comparison Charts
There are a lot of great data tables plugins that are compatible with Elementor for you to use. Some of the most popular table plugins are TablePress, WP Data Tables, and WP Table Builder.
However for the specific task of building a feature comparison table, WP Table Builder is the best. It comes pre-loaded with templates, has a drag-and-drop interface, and can handle large tables without bloat.
So in this article, we will be demonstrating how to insert a comparison table into your Elementor page with WP Table Builder.
They have a free and a paid version. But if you are planning to create a lot of tables or want to modify the designs quite a bit, it is well worth it to get the premium version.
Here are the steps to creating a comparison table with WP Table Builder.
Step 1: Start by choosing from the available templates they have. Or if you prefer, start with a blank table.
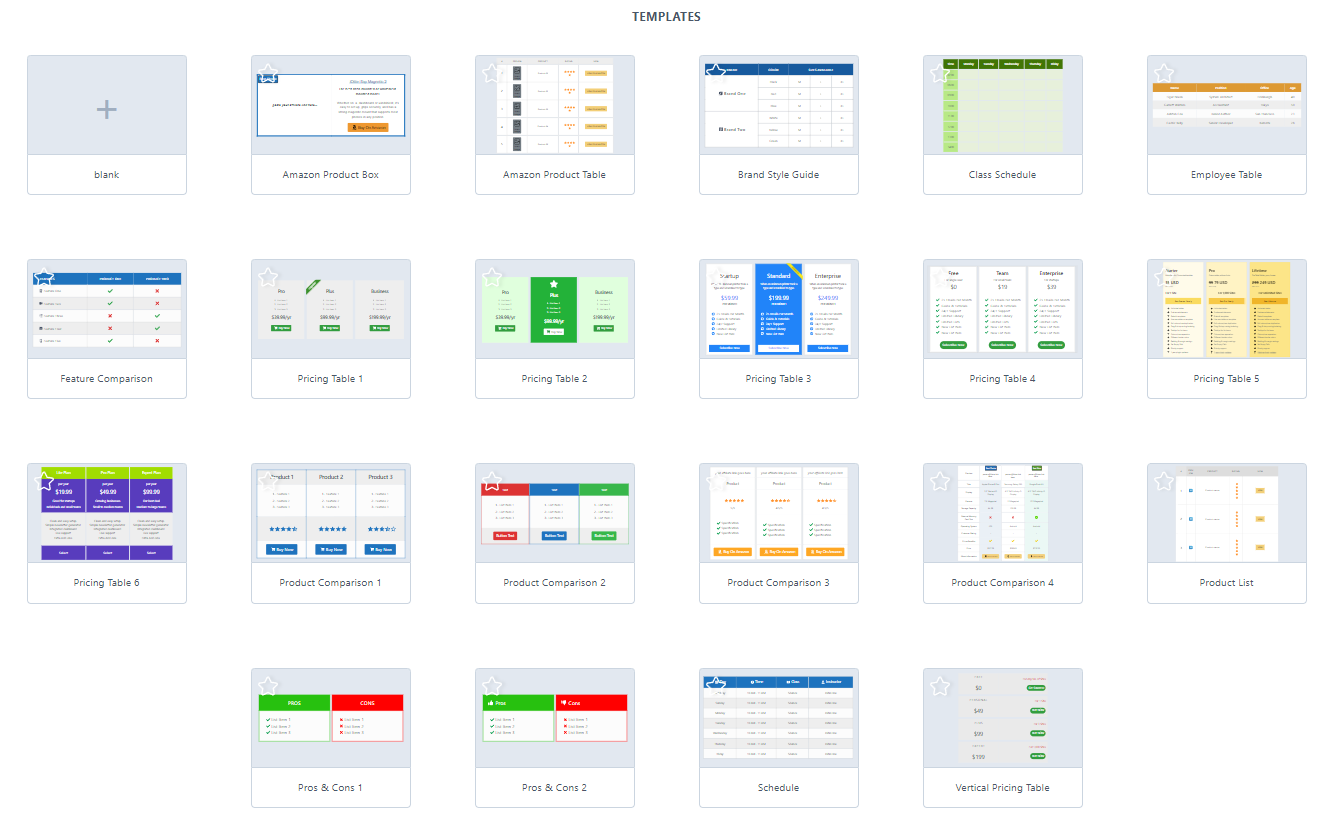
As of now, WP Table Builder has the following table templates:
- Amazon Product Box
- Amazon Product Table template
- Brand Style Guide template
- 6 Pricing Table templates
- 4 Product Comparison Table templates
- Product list template
- 2 Pros and Cons template
- Feature Comparison Table template
- Vertical pricing table template
- Class schedule template
- Employee table template
Step 2: Once you have your template, use the menu on the left to design your options.
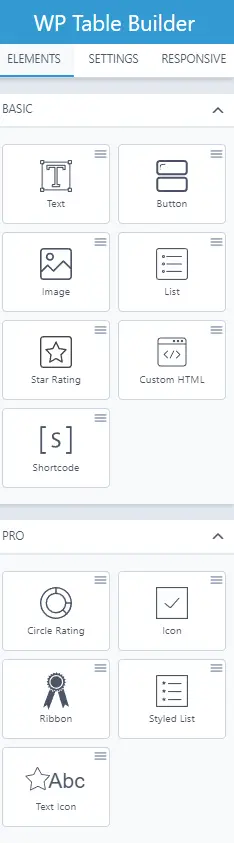
With the free version of WP Table Builder, you can use the following design options:
- Text
- Button
- Image
- List
- Star Rating
- Custom HTML
- Shortcode [inserting a short code of another plugin into the table]
With the pro version, it allows you the additional design options of:
In the Settings tab, you can set the cell padding and alignment, set sorting settings, borders, enable horizontal scroll, add custom CSS styling, and make the first row or first column sticky (freeze row/column).
In the Responsive tab, you can set how the form displays on mobile and tablet.
Then if you click on the cells, you can manage the cells by moving, add and deleting rows/columns, moving rows/columns, changing background colors of rows/columns.
Step 3: Save and copy the shortcode. Then insert shortcode into the page you want.
If you have done everything right, your table will appear seamlessly in your page.
Here is an example of a WordPress page builder comparison table we did with WP Table Builder.
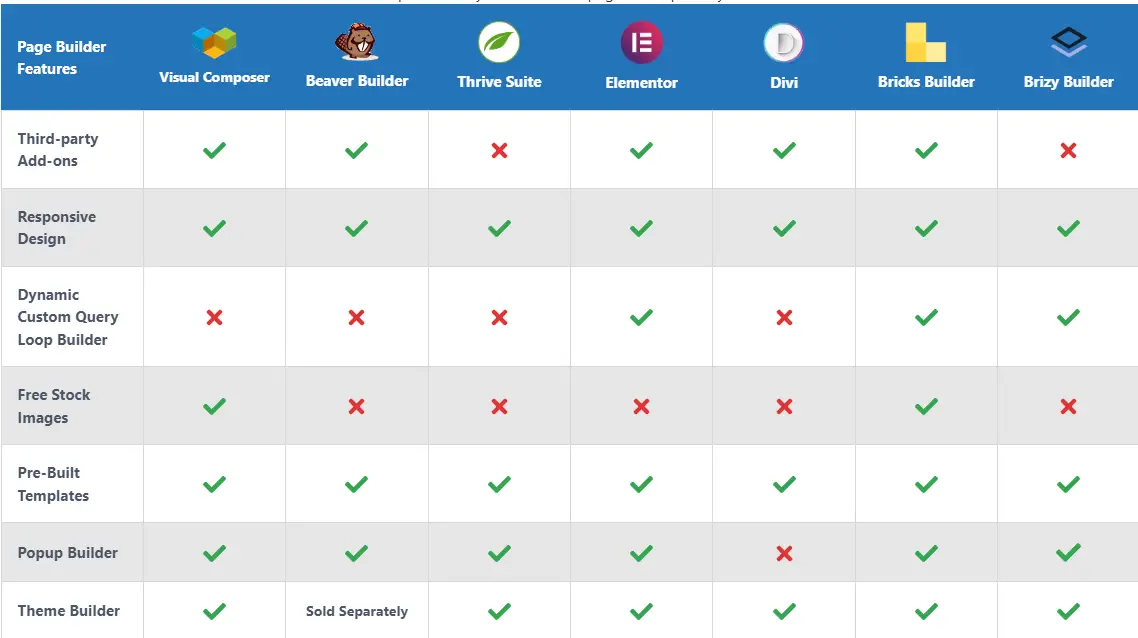
We did the same table using method 1 above. It took much less time doing it with WP Table Builder. Because the article had over 4,000 words and table had 8 columns and almost 40 rows, editing it using Method 1 big pain in the a$$. And we have to edit it often as the page builders were always coming out with new releases. So that’s why we ultimately made the change to using shortcodes via WP Table Builder. We are very glad we did because it works much better this way.
Hope this tutorial has been helpful. Let us know if you have any questions by shooting as a comment on our Youtube videos on this topic.


