How To Publish Elementor Page (Step-By-Step) And What to Do Before

Facebook
Twitter
LinkedIn

Table of Contents

So you’ve done it. You’ve installed your WordPress site and want to use the most popular visual page builder to design your site. In this article, we will show you step-by-step how to publish your first page using Elementor. We will also talk about a few things you should do before publishing your first page.

Publishing Your Fist Elementor Page

How To Add New Page or Post in Elementor

new1

Go to your site’s backend. Click on “New” in the Pages or Posts section, depending on which type of article you are publishing. If it is static content or general information about your business, most people use Pages. If it is content that is informative, will be categorized, time-based, or will be updated regularly, most people use Posts.

Once you’ve created your Post or Page, click “Edit with Elementor” to launch the Elementor editor.

Adding Content onto Your Elementor Page

Once you’ve opened up the Elementor visual editor, you can start adding content to the page. Choose from over 100 elements to start building your page. Just drag the element you want to use onto your page. 

If you want to just add plain text, use the Text Editor element.

Save Your Elementor Draft

If you aren’t ready to publish yet, click on the up arrow next to the green “Publish” button and click “Save Draft”
  1. Click the dropdown arrow next to Update / Publish
  2. Click Save Draft.

Publishing Your First Elementor Page

After you’ve finished designing your page, you may preview it and publish it.

  1. Go to the bottom panel, click on the eye symbol to get a preview.
  2. If you’re happy with the outcome, go ahead and press the publish button.
  3. If you want to see the published page, click the have a look.

What To Do Before Publishing Your First Elementor Page

Although doing the things below before publishing your first Elementor page is not necessary, it will make your life much easier because you are making sure you are building your site on a solid foundation.

Here are some things that we suggest you do before publishing your first Elementor Page.

  1. Change permalinks structure
  2. Setting Up Categories
  3. Installing Wordfence
  4. Installing analytics tools
 
Below, we will go over each one.

Changing Permalink Structure

Your permalinks structure is the url structure of your site. For instance, yoursite.com/my-first-elementor-post is the permalink to a page within your site titled “My First Elementor Post”

To do this, you need to go to your WordPress dashboard, under Settings, and select Permalinks.

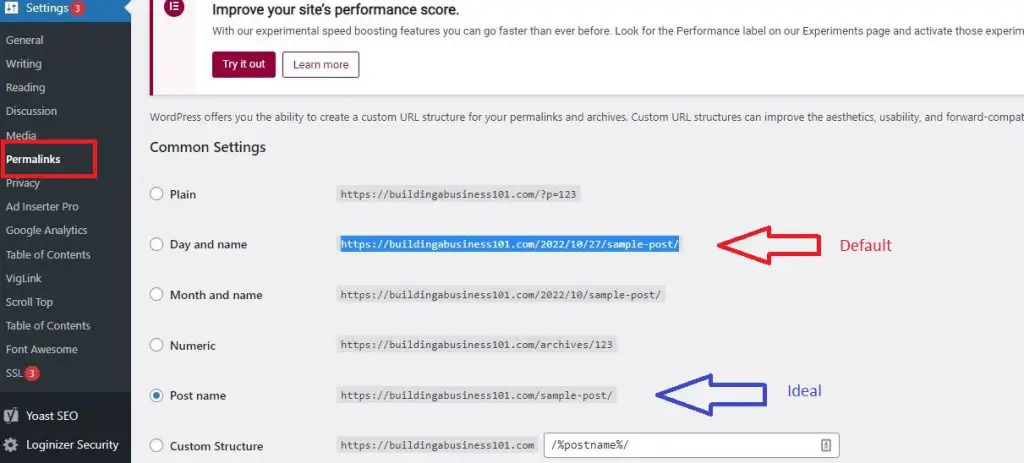
By default WordPress sets it to Day and name. That’s a horrible option. Most people prefer the Post name structure. It is much cleaner and doesn’t include the date—because a post can be edited many times so you do not want the date in the permalink.

Setting Up Categories

Categories tells your readers and search engine what your site is about, and the topical structure of your site. For instance, if you have a site dedicated to pets, you might have different categories for different pets (Dogs, Cats, Hamsters, etc).

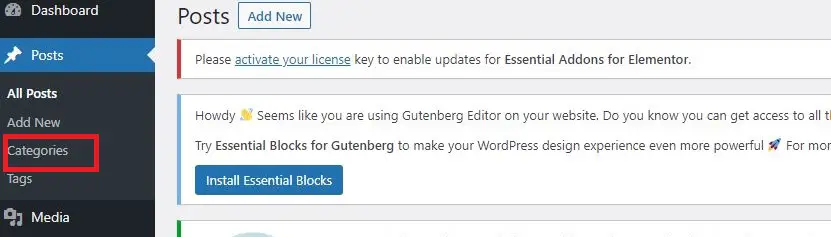
To add Categories, simply go to your WordPress dashboard and click on Posts, then Categories will show up in the submenu. 

Don’t create too many categories. Start with 1-3 at first and add more as you publish more content.

If you want to further organize your content, you can setup subcategories within the main categories also.

Installing Wordfence

Security is paramount. If you do not have a security plugin, there is a 100% certainty that your site will get hacked at some point. 

That’s where Wordfence comes in. It is the most comprehensive free security plugin available on WordPress. And it’s darn good too. Setting it up is very easy. Just install the plugin and install whatever default options they recommend.

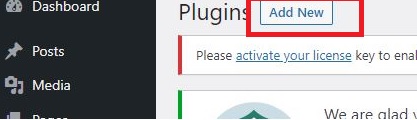
To install Wordfence, go to the “Plugin” tab and click “Add New”

Installing Google Analytics 

Google Analytics is the cream of the crop when it comes to web analytics. You will want to install it so you know all the details about the performance of your content when it comes to your visitors.

To install Google Analytics by signing up through their site.

One thing about Google Analytics is that it is not novice-friendly when you want to understand what all the numbers mean. They certainly don’t make it easy for you to measure unique conversion metrics.

However, there are several plugins that make it extremely user-friendly to understand the data from Google Analytics and track your content’s performance.

One such tool is Monster Insights. With the plugin, tracking how well your content is performing is as simple as a few clicks. After setting up Monster Insights, you will be able to go into the dashboard to track essentially anything you want.

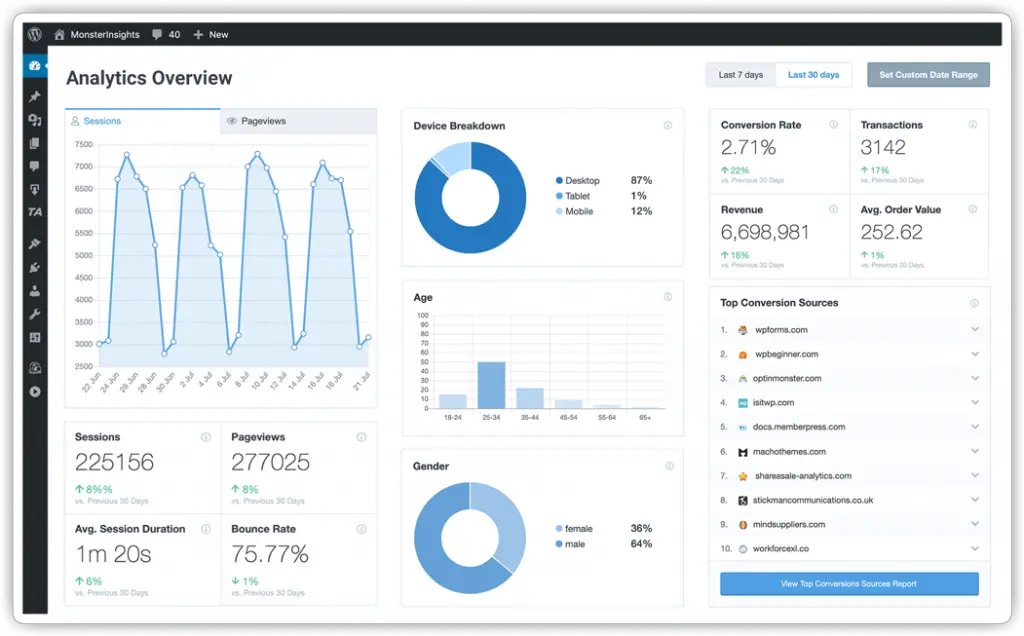
With Monster Insights’ simple dashboard, you can see:

A Note About Using Elementor and Pagespeed

Elementor is the most popular page builder for a reason. It is very versatile and has a lot of design elements to make your site look amazing.

But just because you can add as many elements you want to your page doesn’t mean you should. Elementor’s primary focus is not speed, but versatile drag-and-drop design. So the more elements you add to your page, the slower it will be.

So when designing your Elementor page, think of ways to reduce the number of Elements used on the page. For instance, you do not need to use the Headlines element everytime you write a headline. Using the Text Editor element for both headlines and regular text is fine.

There are many ways to accomplish the same task using page builders—so be sure to not pick the slowest way. Slow sites hurt the user experience.

Share on Facebook
Tweet this article
Share on LinkedIn
Email this article

More to explorer

Hiding Published Date on Blog Posts

Understanding the Date Display in Bricks Builder In Bricks Builder, the date display feature allows users to incorporate dates into their brick