
Introduction to Thrive Architect
Thrive Architect is a powerful and user-friendly WordPress page builder that allows you to create stunning web pages with ease. Whether you’re a professional web designer or a novice looking to enhance your website’s visual appeal, Thrive Architect is a valuable tool. In this tutorial, we will focus on one essential element of web design – tables – and guide you through the steps on how to use the Table Element in Thrive Architect.
Step-by-Step Guide to Adding a Table in Thrive Architect
Tables are not just about organizing content; they serve a crucial role in improving user experience. They provide a visual structure, making it easier for readers to absorb information efficiently. Moreover, search engines appreciate well-organized content, contributing to improved SEO.
Here’s a step-by-step guide on how to use the Table Element in Thrive Architect:
Accessing Thrive Architect
Step 1: Access the Element Menu
First, open your Thrive Architect project.
Click on the plus sign located in the right sidebar. This will open up a list of elements you can add to your page.
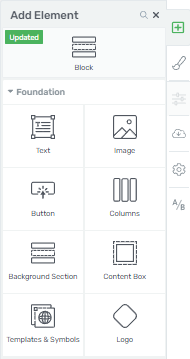
Adding the Table Element
Step 2: Add the Table Element
Scroll through the list of elements until you find the “Table” element.
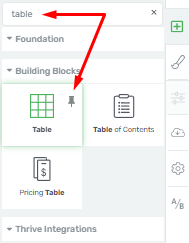
Once you’ve located the “Table” element, simply drag and drop it to the desired location on your page.

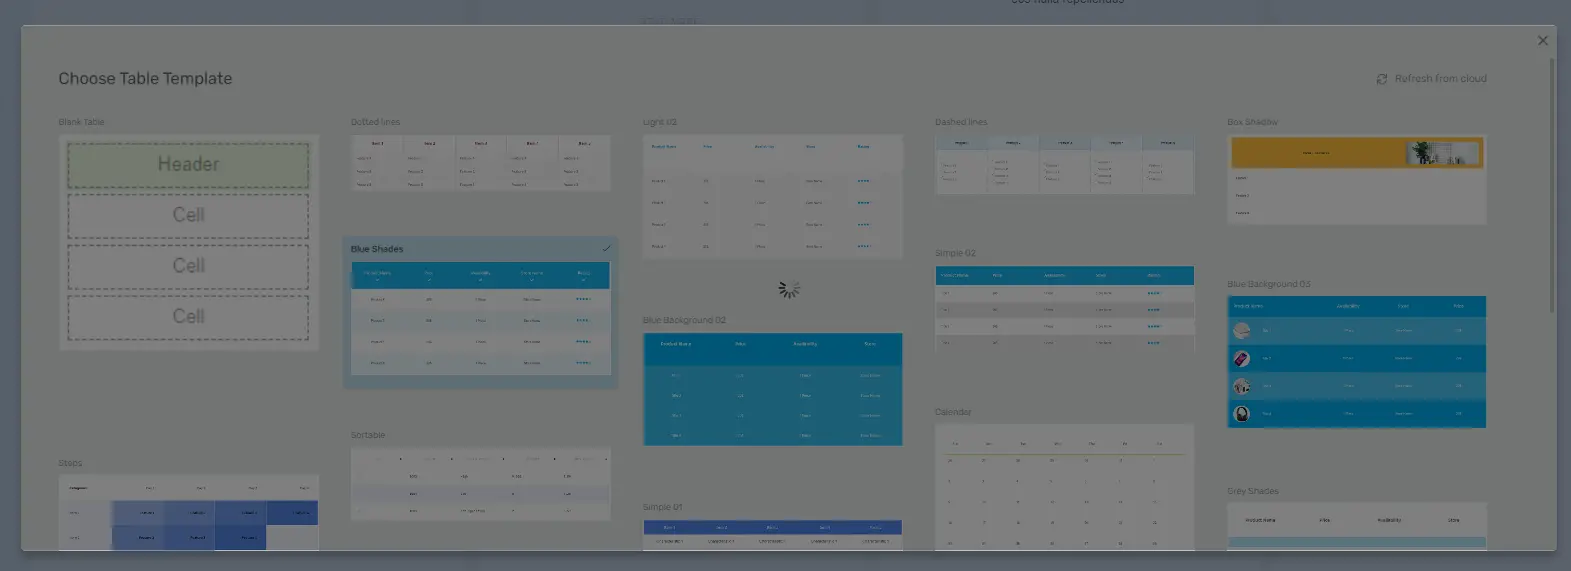
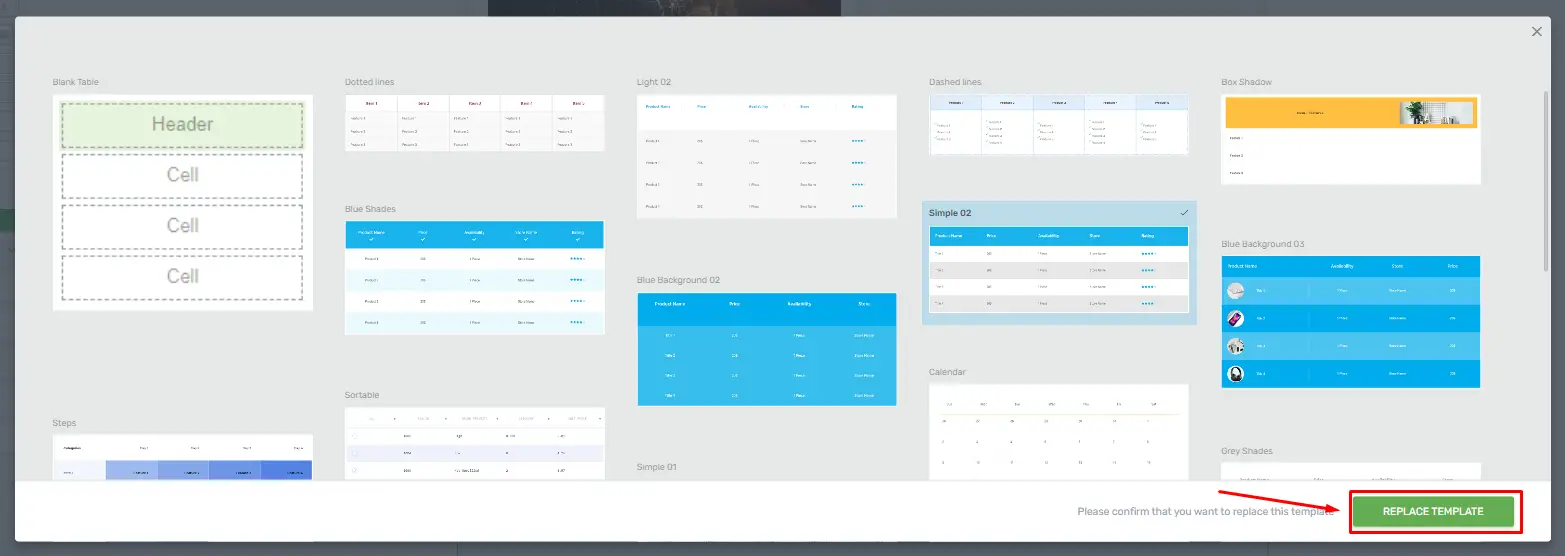
Step 3: Choose a Table Template (Optional)
Scroll down to view the available table templates.
Click on the template you want to use. If you choose a pre-styled template, it will come with default content.
Step 4: Personalize the Table Content
If you selected a template with default content, you’ll need to personalize it by replacing it with your own. Scroll down to find the template you’d like to use as a replacement.
Click on the template to select it, and then choose “Replace Template” from the drop-down menu.
Modifying Table Properties
Step 5: Modify Table Settings
Use the options in the left sidebar to further customize your table once your content is in place.

- Cell Padding: Adjust the padding of the cells in the table.

- Vertical Align: Align the content vertically within the cells.

- Text Align: Align the text horizontally within the cells.

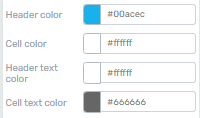
Step 6: Change Table Colors
To change the color of your table, including the header, cells, and text color, select the respective color options and click the “Apply” button.
Step 7: Make Tables Sortable (Optional)
If you want to make the table sortable, use the “Make Tables Sortable” option in the settings.
![]()
Customizing Cells
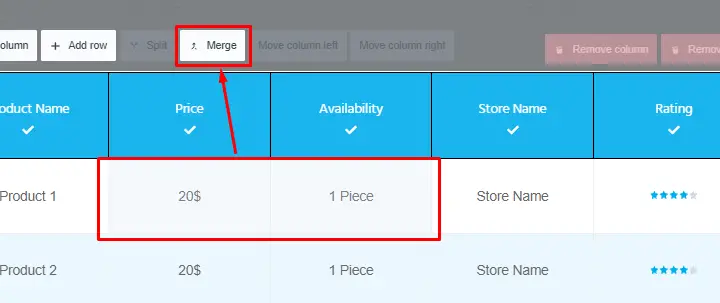
Step 8: Manage Cells
To customize your table further, click on “Manage Cells.”
![]()
If you want to merge cells, hold down the left mouse button on a cell and drag it over the cells you wish to select. Then, click the “Merge” option above the table.
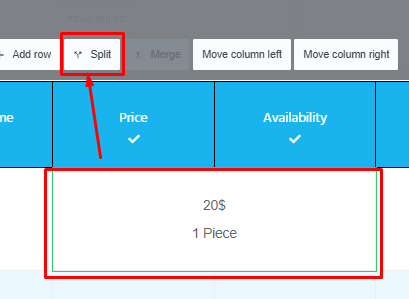
Splitting Merged Cells
If you want to split previously merged cells, click on the merged cell and select the “Split” option. This will separate the merged cells into individual cells.
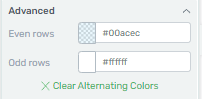
Step 9: Advanced Table Options
Under the “Advanced” option of the “Table” element, you can choose different colors for even rows and add rows as needed.
Step 10: Reset Cell Widths and Heights
When managing the cells, you can use the “Reset Widths” and “Reset Heights” options to remove any custom width and height settings.
![]()
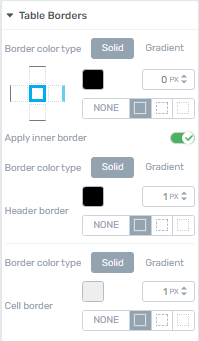
Step 11: Add Table Borders (Optional)
To add borders to your table, use the “Table Borders” option.
Step 12: Save and Finish
After customizing your table to your satisfaction, make sure to save your changes.
![]()
That’s it! You’ve successfully used the Table Element in Thrive Architect to create and customize tables for your web page. Thank you for following this guide.


