

Introduction
Elementor, a popular WordPress page builder, empowers users to create visually stunning websites effortlessly. Among its array of features, the divider element stands out as a powerful tool to enhance design aesthetics and improve overall page structure.
Getting Started the Divider Element
In the modern world of the internet, it’s super important to make a website that people like and find easy to use if you want to do well. Thrive Architect is a popular page builder that works with WordPress and helps people who make websites. It gives you a bunch of helpful things to make your website look great and easy to use. One good way to make your website look better is by using something called the Thrive Architect Divider Element. In this tutorial, we’ll show you step-by-step how to use it to make your website look nicer and work better.
Adding the Divider Element
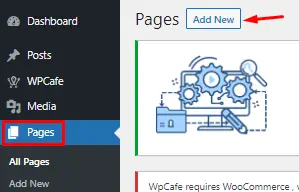
- Access Thrive Architect: First, make sure you are logged into your WordPress dashboard and have Thrive Architect installed.
- Open Your Post or Page: Navigate to the post or page where you want to add the divider element.
- Click the Plus Symbol: Look for the plus symbol in the right sidebar of the Thrive Architect editor. Click on it.
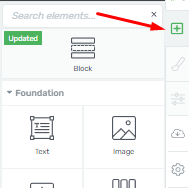
- Find the Divider Element: In the list of available elements, scroll down until you find the “divider” element. You can also use the search field to quickly locate it.
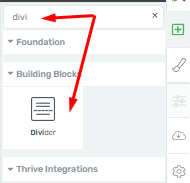
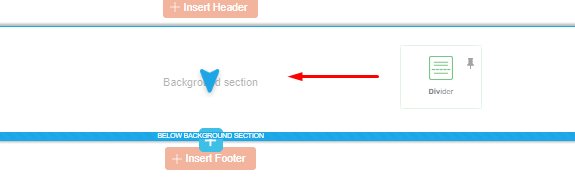
- Drag and Drop: Once you’ve found the divider element, simply drag and drop it onto your page where you want it to appear.
Customizing the Divider
Now that you’ve added the divider element to your page, let’s dive into customizing its appearance.
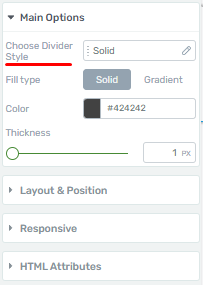
Choose Divider Style
- Access the Options Area: The main options area for the divider element will be displayed on the left sidebar once you’ve placed the element on your page.
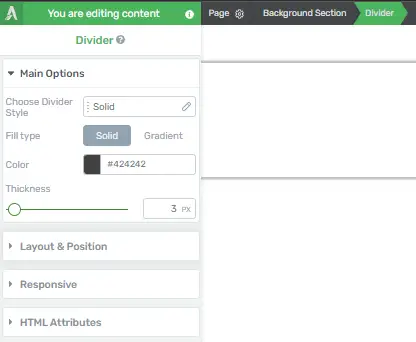
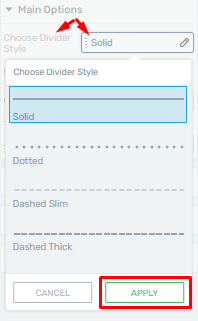
- Select a Style: In the “Choose Divider Style” section, you can change the element’s style by selecting one from the list of available styles. Click on the style you prefer, and then click the “apply” button to see the changes take effect.
Adjusting Color
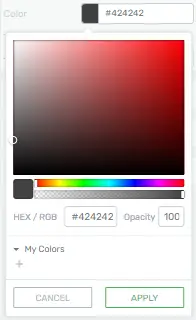
Change Divider Color: To customize the color of the divider, simply click on the color box next to the color option. A color picker will appear, allowing you to choose the perfect hue to match your website’s design.
Thickness Control
Customize Divider Thickness: The thickness of your divider is another aspect you can adjust. You can either move the slider to increase or decrease the thickness or enter a specific numerical value in the box next to the slider for precise control.
![]()
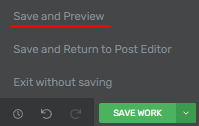
Don’t Forget to Save
Once you’ve finished customizing the divider element to your satisfaction, it’s crucial not to forget the final step:
Save Your Work: In the bottom-left corner of the Thrive Architect editor, you’ll find the “Save Work” button. Click on it to ensure that all your changes are saved.
![]()
Creative Ways to Customize Thrive Architect Divider Element
Dividers play a crucial role in web design, helping to separate content and create visual interest. In this guide, we will explore creative ways to customize dividers using Thrive Architect, a powerful WordPress page builder.
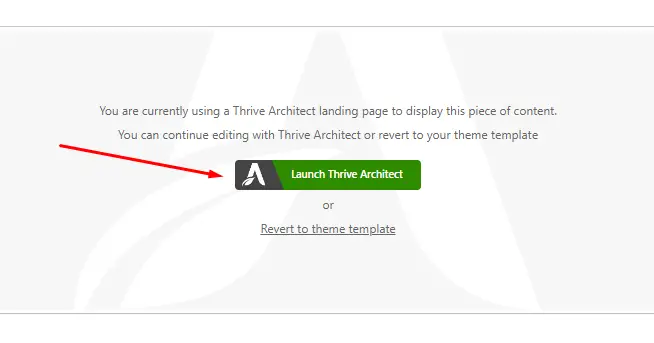
Step 1: Access Thrive Architect
Navigate to the page or post where you want to customize dividers. Click on “Edit with Thrive Architect” to launch the page builder.
Step 2: Select the Divider Element
Once in Thrive Architect, locate the section where you want to add or customize a divider. Click on the “+” icon to add a new element. Search for “Divider” and select it from the list of available elements.
Step 3: Basic Divider Customization
Click on the divider element to select it. In the left-hand sidebar, you’ll find options for basic customization:
Fill Type: Choose from a solid line, dashed line, or double line.
Color: Pick a color that complements your website’s design.
Thickness: Adjust the thickness of the divider.
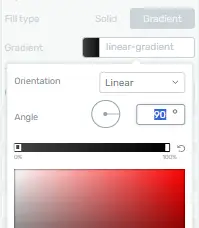
Step 4: Adding Gradients
To add a gradient effect to the divider, click on the “Background Style” option. Choose “Gradient” from the dropdown menu. Adjust the colors and angles to achieve the desired effect.
Step 5: Duplicating or Reusing Dividers
To save time, you can duplicate a customized divider and use it in other sections of your page. Right-click on the divider element and select “Duplicate” from the context menu.

Step 6: Preview and Save Changes
If you’re satisfied with the changes, click “Save Work” to update the page.
Enhancing Website Design with Elementor’s Divider Element
In today’s fast-paced digital landscape, having an attractive and user-friendly website is crucial for attracting and retaining visitors. Elementor, a popular page builder plugin for WordPress, offers a variety of tools and elements to help you create visually appealing websites. In this article, we will explore one such element: the Divider Element. We’ll provide a step-by-step guide on how to enhance your website design using Elementor’s Divider Element.
Benefits of Using the Divider Element
Before we dive into the step-by-step instructions, let’s explore the advantages of using Elementor’s Divider Element:
- Enhanced Visual Appeal: The Divider Element adds a touch of sophistication to your website, making it more visually appealing.
- Improved Readability: Dividers help structure your content, making it easier for visitors to read and understand.
- Better Engagement: A well-designed page with dividers can hold your visitors’ attention longer, increasing engagement.
- Customization: Elementor’s Divider Element offers extensive customization options, allowing you to tailor dividers to your specific needs.
Now, let’s get started with the step-by-step guide on enhancing your website design with Elementor’s Divider Element.
Step 1: Accessing Elementor
To begin, ensure that you have Elementor installed and activated on your WordPress website. If you haven’t already, you can download it from the official WordPress plugin repository.
Step 2: Adding a Section
Open the page you want to edit in the WordPress editor.
To access the Elementor editor, click the “Edit with Elementor” button.
Add a new section to your page by clicking the “+ Add New Section” button. Select the structure that best fits your content.
Step 3: Insert the Divider Element
Within the section, click the “+ Add Widget” button to open the widget panel.
In the widget panel, search for “Divider” and drag the “Divider” element into the section.
Step 4: Customizing the Divider Element
Click on the Divider Element you added to the section to open the settings panel.
In the Content tab, you can customize the divider’s style, width, and color. You can also add text or icons if desired.
Step 5: Styling Options
In the Style tab, you can further customize the divider’s appearance. Adjust the height, width, and margins to achieve the desired look.
You can also change the color, gradient, or image used for the divider.
Step 6: Advanced Customization
For those who want more advanced options:
In the Advanced tab, you can add custom CSS or apply custom positioning for the divider.
Step 7: Preview and Save
Before publishing your changes:
Click the “Preview” button to see how your divider looks on the page.
When you’re done, click “Save” to save your changes.
Tips for Effective Divider Element Usage
Use dividers to separate different sections of your webpage, such as headings, content blocks, and contact forms.
Experiment with different divider styles to find the one that best complements your website’s design.
Keep your dividers consistent with your brand’s colors and overall design.
Responsive Design Considerations
Remember that your website should be responsive. Ensure that your divider elements look good and maintain their functionality on various devices and screen sizes.
Conclusion
In conclusion, Elementor’s Divider Element is a valuable tool for web designers and site owners seeking to elevate their website’s visual appeal and user experience. With its customization options and ease of use, it allows you to create stunning and organized web pages. So, why wait? Give it a try and watch your website’s design transform.


