

Introduction
In the dynamic world of web design, creating a full-width page can enhance the visual appeal of your website and provide a seamless user experience, especially when using popular tools like Elementor. Whether you’re using WordPress or the Elementor page builder.
In this step-by-step tutorial, will walk you through various methods to achieve a full-width layout for your pages, sections, templates, and images.
Understanding Elementor Sections
Elementor organizes content into sections, forming the basic building blocks of a webpage. Each section contains columns, and within these columns, you can add various elements. Understanding this structure is crucial for designing effective full-width pages.
Method 1: Choosing the Target Container for Editing
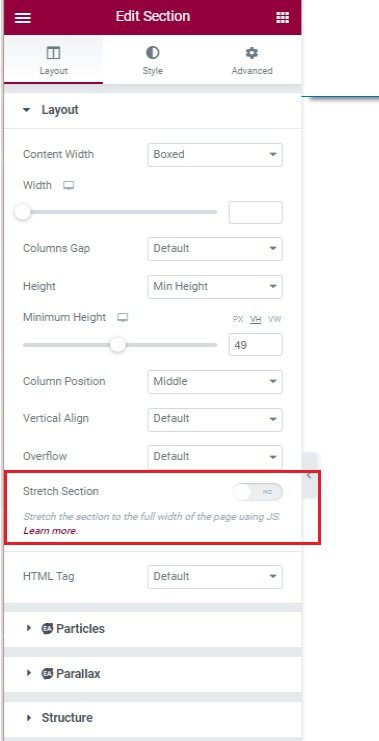
Click the Container
Begin by clicking on the container you wish to edit.
Navigate to the Layout Tab
In the layout tab, find the Layout section. Click on it to reveal options, and look for the Stretch Section at the bottom. This simple action will transform your container into a full-width masterpiece.
Method 2: Elementor Layout Width Customization for Better Design
Edit with Elementor
Open your page for editing with Elementor.
Access Settings in the Left Sidebar
Click on settings in the left sidebar, then choose Elementor full width. Don’t forget to update your work to make the changes effective.
How To Create A Full-Width Template?
When it comes to templates, a full-width design can make a powerful impact. Here’s how to create a full-width template effortlessly.
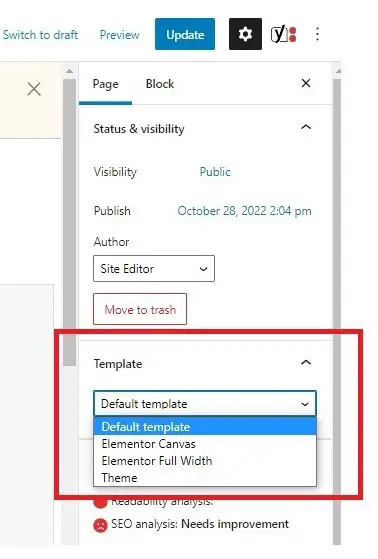
Access Edit Post
Instead of going straight to Edit with Elementor, click on Edit post.
Navigate to Page Tab
Go to the Page tab at the right corner.
Select Elementor Full Width
Under Templates, choose Elementor Full Width, and make sure to update your changes.
How To Create A Full-Width Section?
Optimizing the layout width of inner sections is crucial for achieving a full-width look. Here’s a detailed guide:
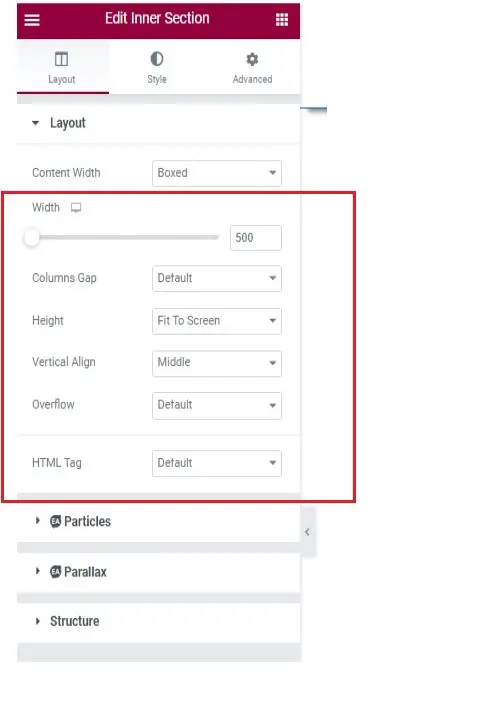
Step 1: Edit the Inner Section
- Navigate to Layout Tab: Drag down the layout in the Layout Tab.
- Adjust Inner Section Widget: Modify the width of the inner section widget to achieve the desired full-width effect.
Step 2: Adjusting Height
- Choose Minimum Height: Opt for Minimum Height.
- Adjust Using PX, VH, or VW: Fine-tune the height using pixels (PX), viewport height (VH), or viewport width (VW).
How To Create A Full-Width Image?
Images are central to web design, and having them span the entire width of your page can be visually captivating. Here are three methods:
Method 1: Access Page Editor
- Navigate to Pages on Dashboard: In your WordPress Dashboard, go to Pages and click Edit on the desired page.
- Page Attributes and Templates: In the right sidebar, under templates, select Elementor Full Width.
Method 2: Using Elementor’s Full Width Option
- Edit with Elementor: Click Edit with Elementor.
- Settings and Page Layout Dropdown: In the left sidebar, click the settings icon. In the page layout dropdown menu, select Elementor full width.
- Add a New Section: Click the + icon, select a single column section for a full-page-wide image.
- Upload Image: Upload your chosen image into the added single-column section.
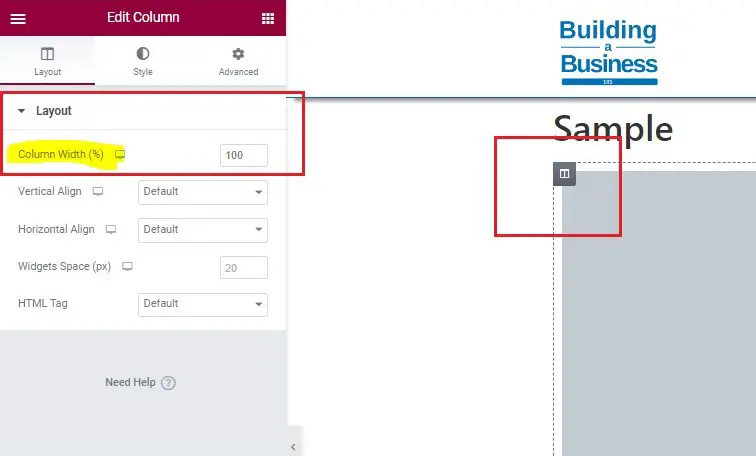
Method 3: Refining Image Width with Advanced Settings
- Open Image Settings: Click on the image in the left sidebar.
- Select Advanced Settings: In the advanced settings, under the margin, reduce the margin to a negative value until you achieve a full-width image.
Conclusion
Creating a full-width page, template, section, or image is a breeze with these step-by-step methods. Experiment with these techniques to elevate your website’s design and keep your audience engaged.


