Table of Contents
Introduction
Thrive Architect, a popular WordPress plugin, offers a robust Pricing Table Element that allows you to create visually appealing and functional pricing tables with ease. The pricing table is a key element that can significantly improve the functionality as well as the look of your website. A well-designed pricing table can help you effectively showcase your products or services while also encouraging visitors to take action.
This step-by-step tutorial will walk you through the process of using the Pricing Table Element in Thrive Architect, a popular tool for WordPress websites.
Understanding Thrive Architect
Thrive Architect is a user-friendly and feature-rich WordPress plugin designed to simplify the process of building and customizing websites. With its intuitive drag-and-drop interface, even those with minimal design experience can create professional-looking pages effortlessly.
Accessing the Pricing Table Element
Click on the plus symbol located in the right sidebar of the Thrive Architect editor.

Adding the Pricing Table Element
Look for the pricing table element among the available elements.
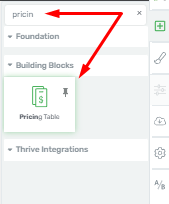
Drag and drop the pricing table element onto your page where you want it to appear.

Personalizing the Pricing Table
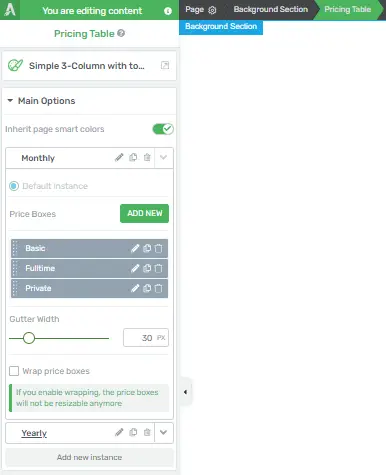
Use the sidebar options to personalize the pricing table according to your website’s needs.
Changing the Template
The first option in the pricing table section allows you to change the template of your pricing table at any time.
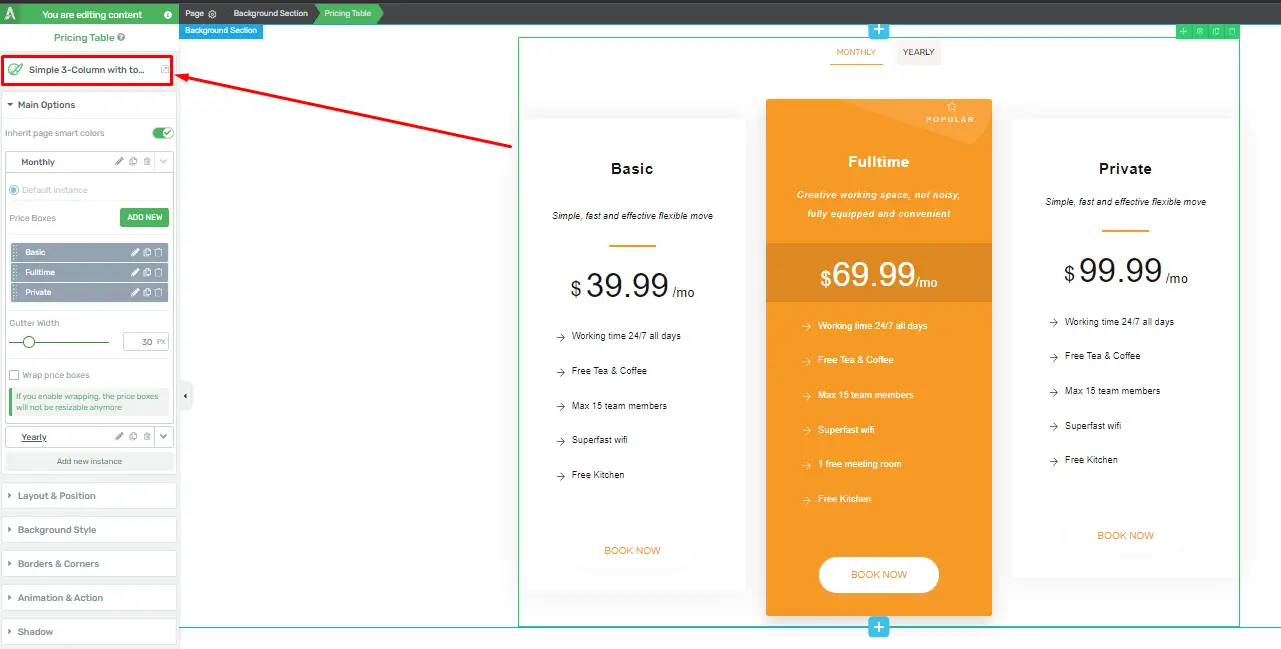
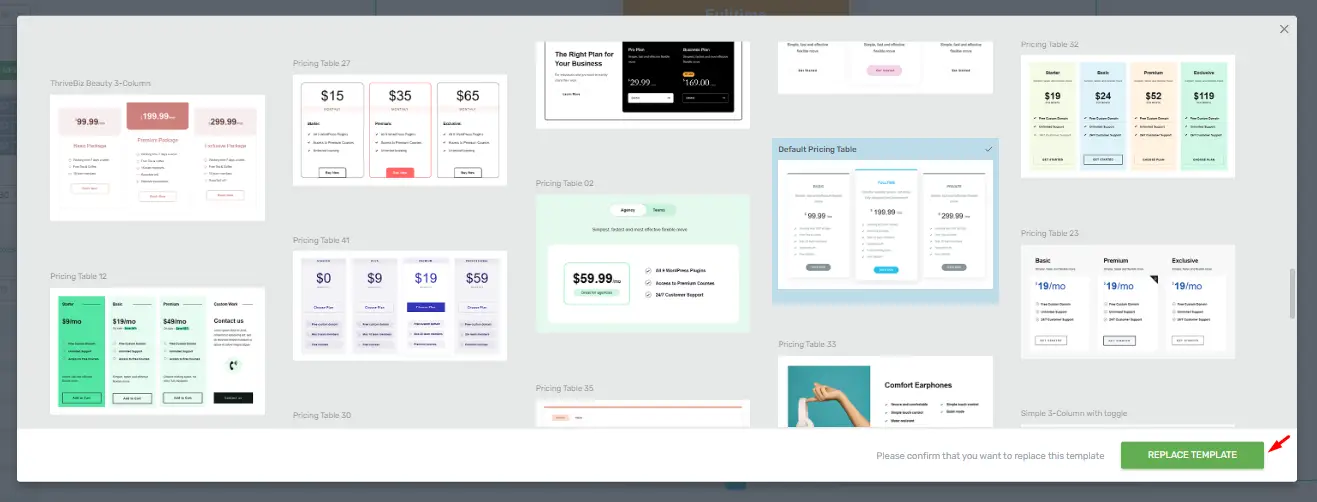
Click on this option to open a pop-up window containing multiple templates to choose from.
Managing Instances
- The “Pricing Table” element has a default instance, which is significant for offering different pricing options.
- To change the instance, use the following options next to it:
- Edit the instance’s name by clicking on the pencil symbol.

- Duplicate an instance to create variations.

- Remove instances using the delete button.

Adjusting Price Box Spacing
You can change the spacing between pricing boxes by:
- Dragging the slider under the spacing option.
- Manually entering a value in the box.

Rearranging Pricing Boxes
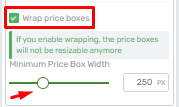
To position a pricing box behind others, use the “Wrap Price Boxes” option.

You can also use “Minimum Price Boxes” to place certain price boxes beneath others.
Adding New Instances
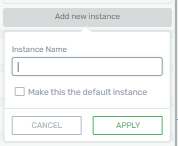
Add new instances by duplicating existing ones or creating new instances with the “Add New Instance” button in the lower right corner of the sidebar.
![]()
When using the “Add New Instance” button, a pop-up will appear where you can name the instance and set it as the default if needed.
Editing Pricing Table Content
To modify the content within the pricing table, click on each element (Titles, Prices, Descriptions, and Buttons) and replace the text with your own content.
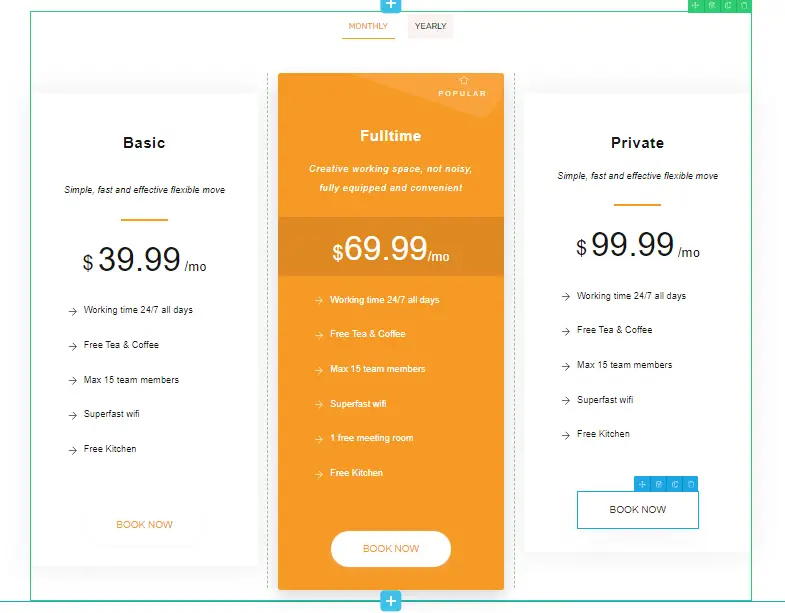
You can edit the appearance of each element within the pricing table by clicking on them and utilizing the available formatting options.
General Options
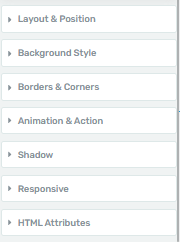
Besides the pricing table-specific options, you can also use general options available for other elements.
Follow these steps to effectively use the Pricing Table Element in Thrive Architect and customize it to suit your website’s requirements.
Tips for Creating Mobile-Friendly Pricing Tables
As more and more people access websites from their smartphones and tablets, mobile-friendly pricing tables are essential for providing a seamless user experience on your website. This guide will show you how to make pricing tables that are appropriate for mobile devices.
Accessing Thrive Architect
Select the page where you want to create or edit the pricing table.
Click the “Edit with Thrive Architect” button to launch the Thrive Architect editor.
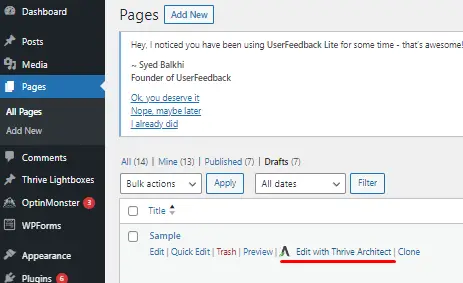
Create or Edit Your Pricing Table
If you’re creating a new pricing table:
- Click on the “+” button to add a new element to your page.

- Search for “Pricing Table” and select it.

- A default pricing table will appear on your page.
If you’re editing an existing pricing table:
- Locate the pricing table element on your page.
- Click on it to select it.
Customize the Pricing Table for Mobile Devices
Thrive Architect allows you to easily customize your pricing table to make it mobile-friendly.
Click on the “Mobile” icon or option at the bottom of the page (usually represented by a mobile phone icon).
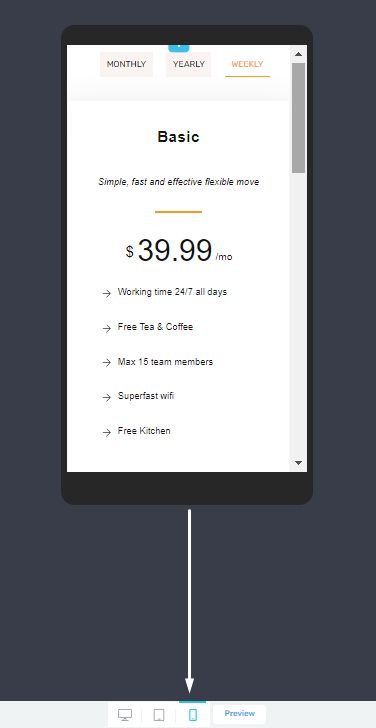
Adjust the following settings:
- Column Layout: You can choose to have fewer columns on mobile devices to make the table more readable. For example, if your desktop version has four columns, consider displaying only two on mobile.
- Font Size: Increase the font size slightly to improve readability on smaller screens.
- Spacing: Adjust the spacing between rows and columns to ensure content doesn’t appear cramped or too spread out.
Test your changes by switching between desktop and mobile views using the buttons at the bottom of the Thrive Architect editor.
Check for Responsiveness
- Preview your page by clicking the “Save and Preview” button.
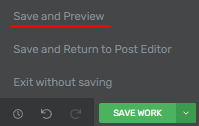
- Ensure that your pricing table adjusts and looks good on various screen sizes. Pay attention to column alignment, text readability, and overall aesthetics.
Click the “Publish” or “Update” button on your WordPress page to make the changes live on your website.
Test on Real Mobile Devices
To ensure your pricing table performs well on actual mobile devices:
- Open your website on different mobile devices, such as smartphones and tablets.
- Verify that the pricing table is responsive and looks appealing on all screen sizes.
- Test the functionality of any buttons or links within the pricing table to confirm they work as intended.
By following these steps, you can create mobile-friendly pricing tables that enhance the user experience for visitors accessing your website from mobile devices.
