

Introduction to Pro Gallery
In this step-by-step guide, we will show you how to create a professional image gallery using Elementor, a powerful and user-friendly page builder for WordPress. Elementor allows you to add and style complex and beautiful image galleries effortlessly. By following this tutorial, you’ll be able to set up a pro gallery that showcases your images in a visually appealing way. So, let’s get started!
Getting Started with Pro Gallery
Pro Gallery is a feature-rich image gallery solution integrated seamlessly into Elementor. It offers a range of advanced features, making it an indispensable tool for web designers and developers.
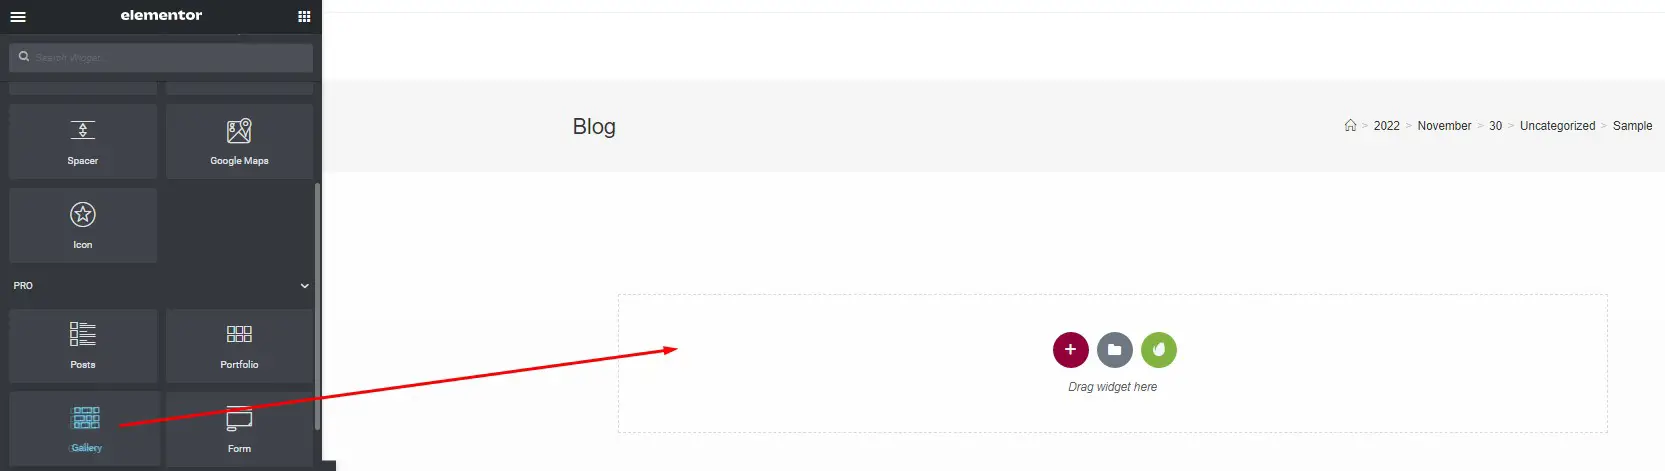
Step 1: Add the Gallery Widget
The first step is to add the Gallery Widget to your page. Follow these simple steps:
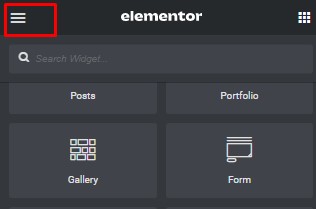
- Click on the gallery widget in Elementor.
- Drag and drop it into the desired section of your page.
Step 2: Configure the Elementor Pro Gallery
Now that you’ve added the Gallery Widget, it’s time to configure your pro gallery. Here’s how you can do it:
Settings
- Choose Gallery Type: Select either “Single” or “Multiple.” If you choose “Multiple,” you can add multiple galleries to your page.


- Add Images: To add images to your gallery, select them from the media library.
- Image Details: Add captions, descriptions, and titles for your images.

- Create Gallery: Click to create your gallery. You can add captions if desired. Afterward, select “Insert Gallery.”

Ordering: Choose between default or random order for your images.
Lazy Load: Enhance loading speed by enabling lazy load (set to “Yes”).
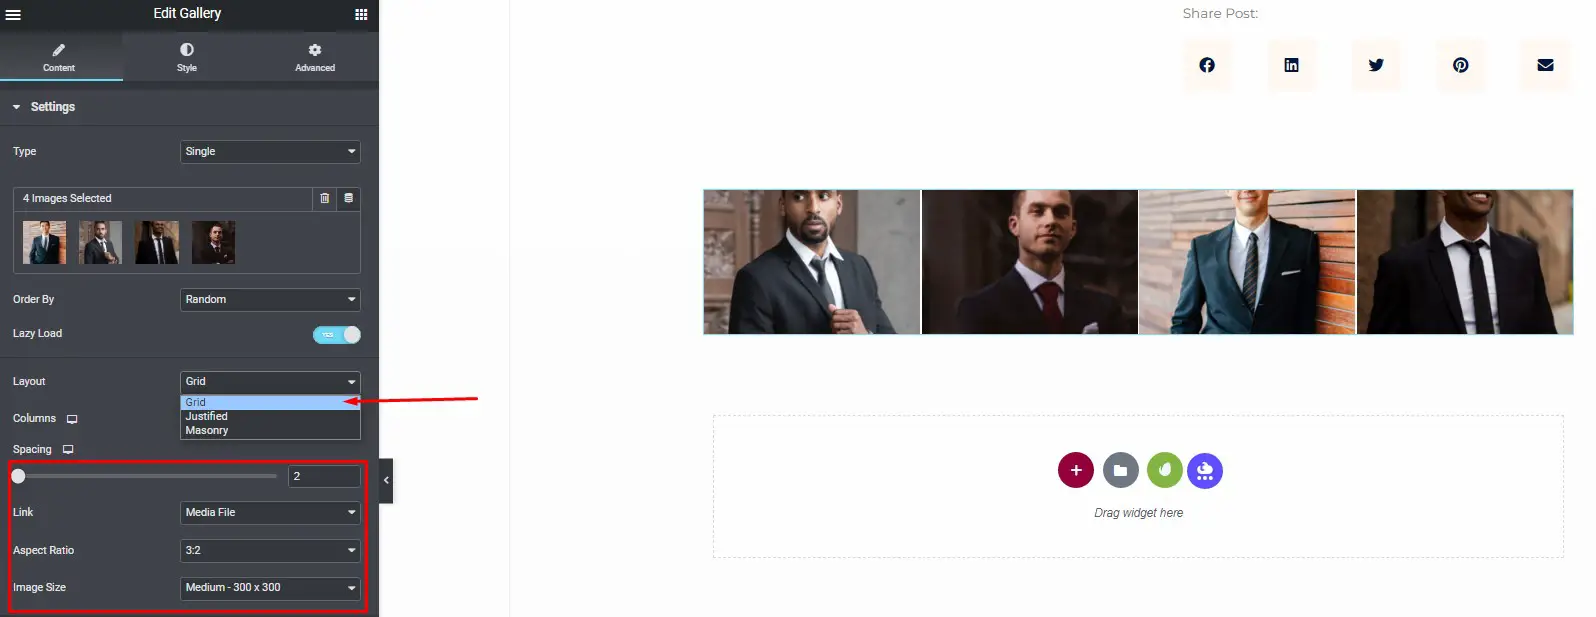
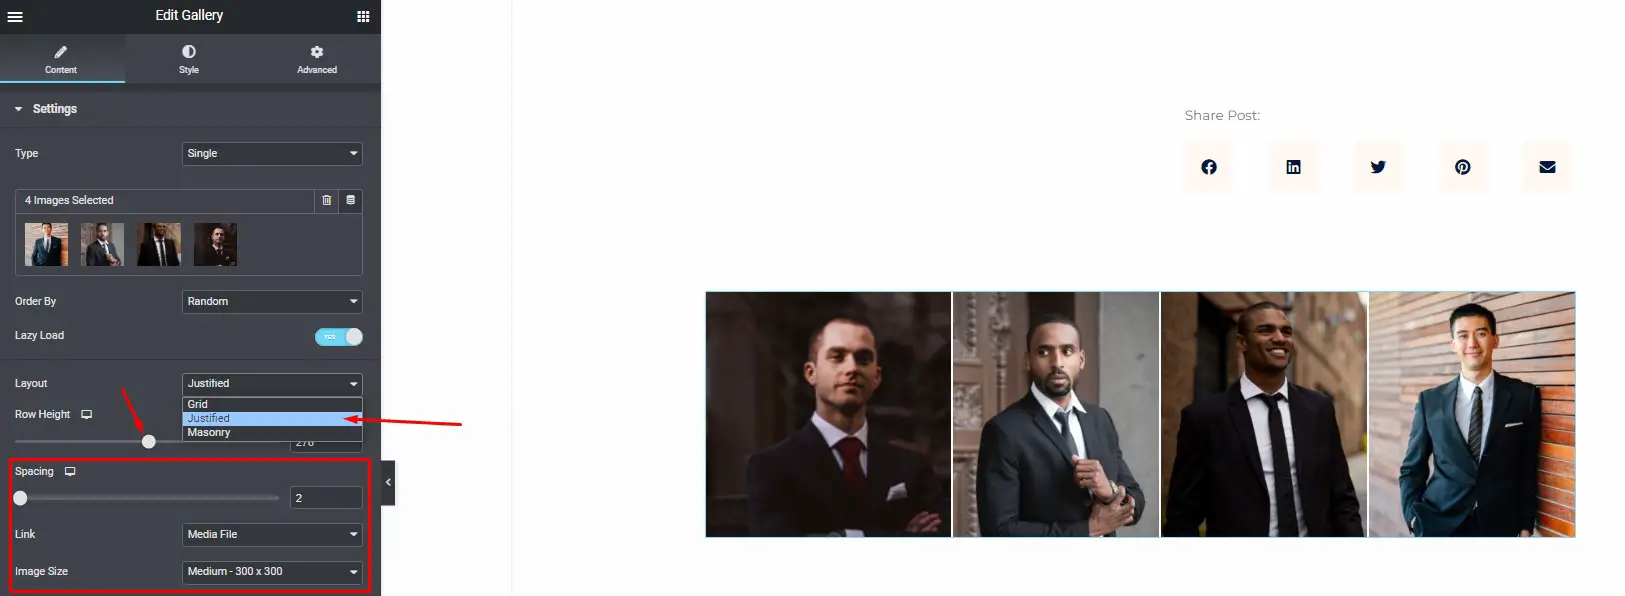
Gallery Layout: Choose from “Grid,” “Justified,” or “Masonry.”
- Grid: Based on a chosen aspect ratio.
- Justified: Allows adjustments to different image widths and row heights.
- Masonry: Keeps image width the same while making height adjustments.
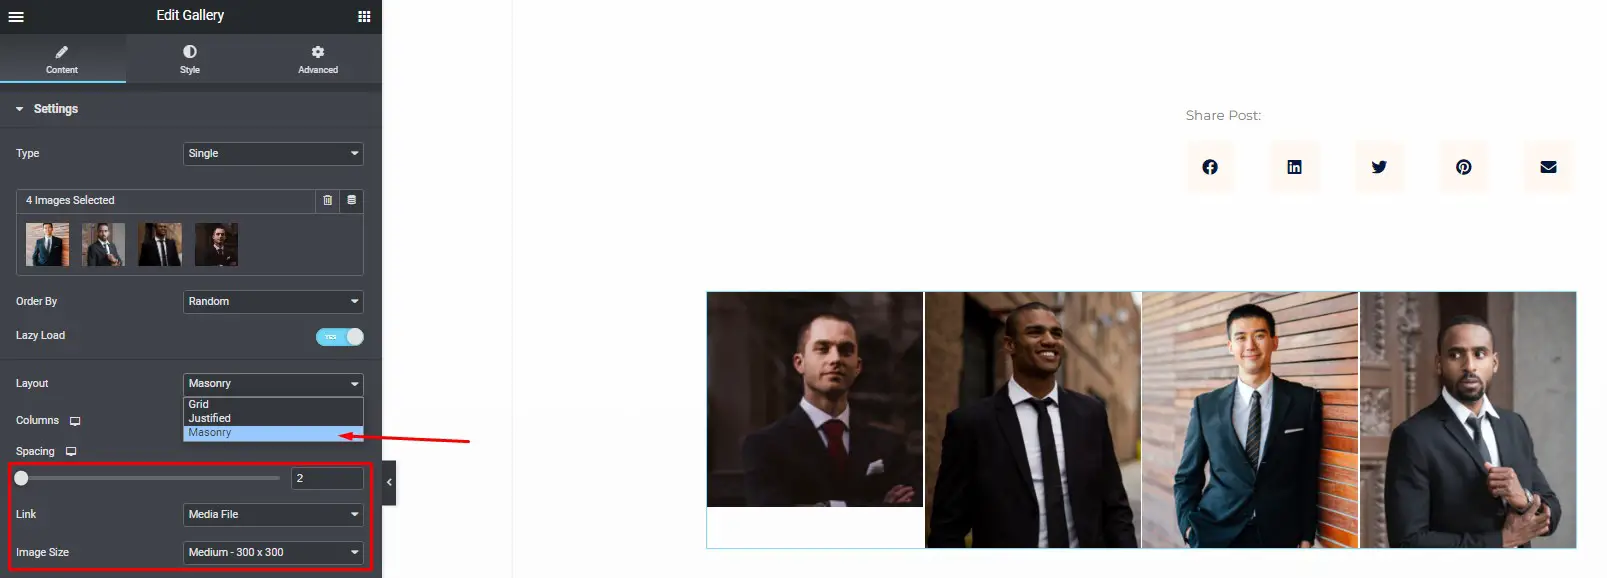
Columns: Select the number of columns to be shown in each row (1 to 24). This option is unavailable if “Justified Layout” is selected.
Row Height: Set the pixel height for each row. Only accessible if “Justified Layout” is selected.
Spacing: Control the space between each image in a row.
Image Links: Choose from “None,” “Media File,” or “Custom URL.”
Aspect Ratio: Choose from various ratios (e.g., 1:1, 3:2, 4:3, 9:16, 16:9, 21:9). Available only in a “Grid” layout.
Image Size: Select image size (thumbnail, full size, or custom size).
The following extra Filter Bar choices become available if Type Multiple is selected
If Multiple types are selected, the Filter Bar will only be available.
Filter Bar
If you choose “Multiple” as your gallery type, you can configure the Filter Bar settings:
- Include “All” Filter: Choose “Yes” to include or “No” to exclude the “All” filter.
- Label: Enter the label for the “All” filter or utilize Dynamic Tags if “Yes” is selected. “All” is the default setting.
- Pointer Style: Choose the pointer style for filter labels (None, Underline, Overline, Double Line, Framed, Background, or Text).
- Pointer Animation: Set the animation style for the pointer (Fade, Slide, Grow, Drop In, Drop Out, or None).

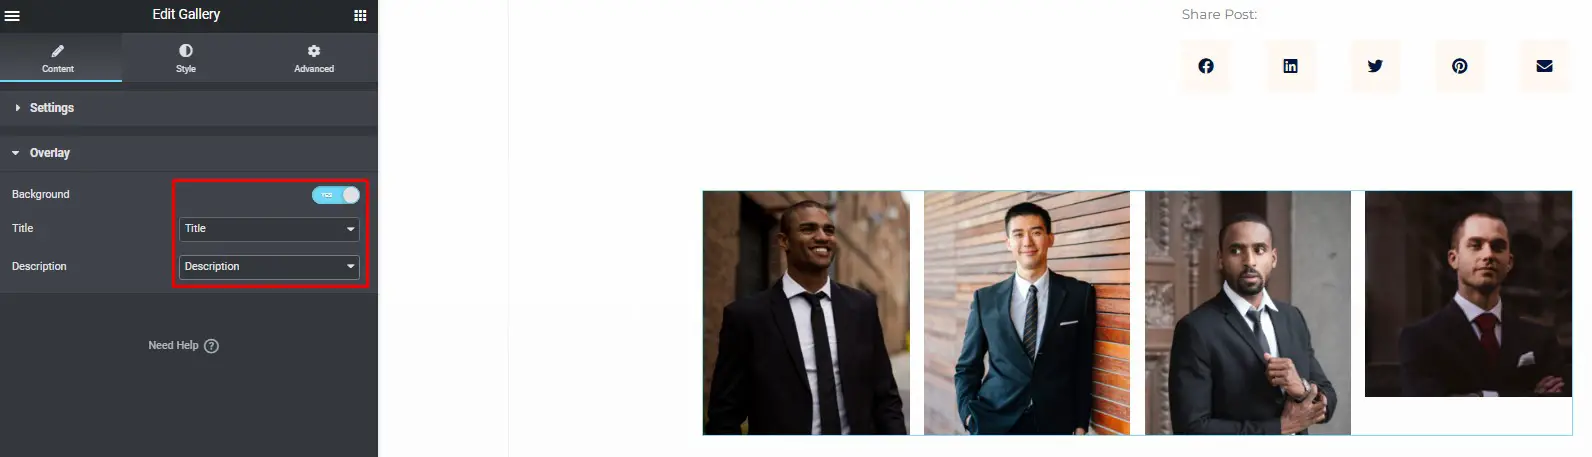
Overlay
Overlay Type: Choose between “Classic” or “Gradient” for Normal and Hover states.
Overlay Colors: Set colors for the overlay in Normal and Hover states.
Layer Effects: Apply layer effects (Normal, Multiply, Screen, Overlay, etc.).
Hover Animation: Choose a hover animation for the image.
Animation Duration: Set the animation duration in milliseconds.
Step 3: Customize Pro Gallery Styles
Now, let’s customize the styles for your pro gallery:
You can change the styles of the image, overlay, and content under the Style tab.
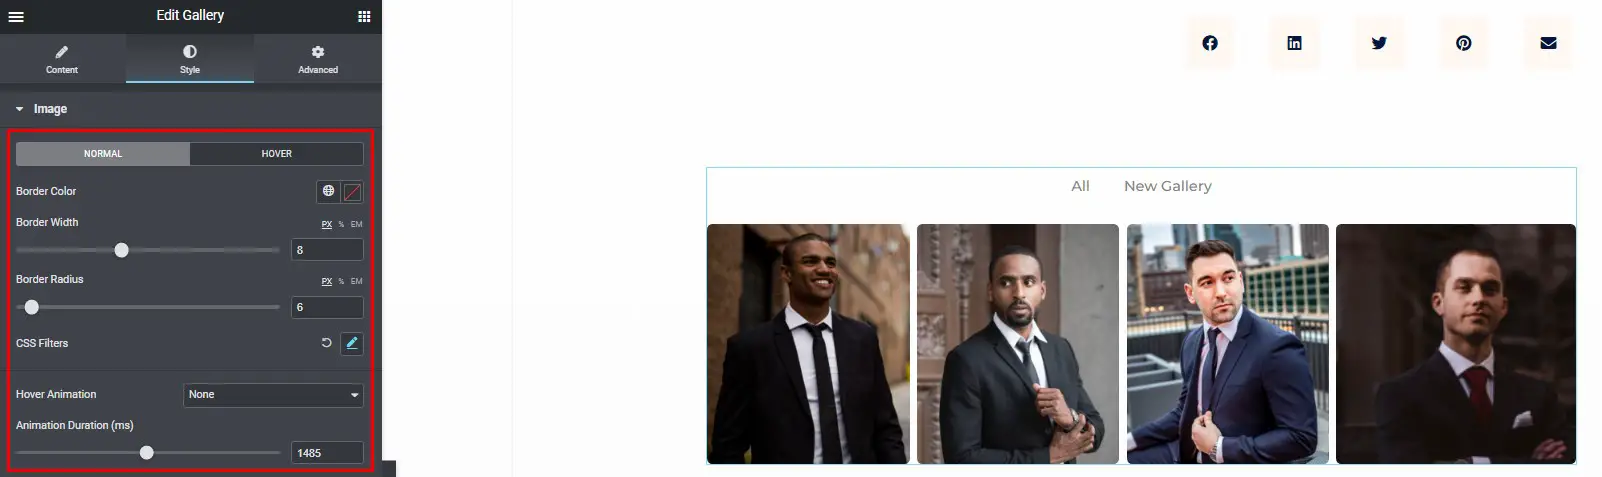
Image
For image customization:
- Image Border Color: Choose colors for Normal and Hover states.
- Border Thickness: Set the border thickness for the Normal state.
- Corner Roundness: Control the corner roundness of the image border for Normal and Hover states.
- CSS Filters: Apply filters for Normal and Hover states (Blur, Brightness, Contrast, Saturation).
- Hover Animation: Select a hover animation (None, Zoom In, Zoom Out, Move Left, Move Right, Move Up, Move Down).
- Animation Duration: Set the animation duration in milliseconds.
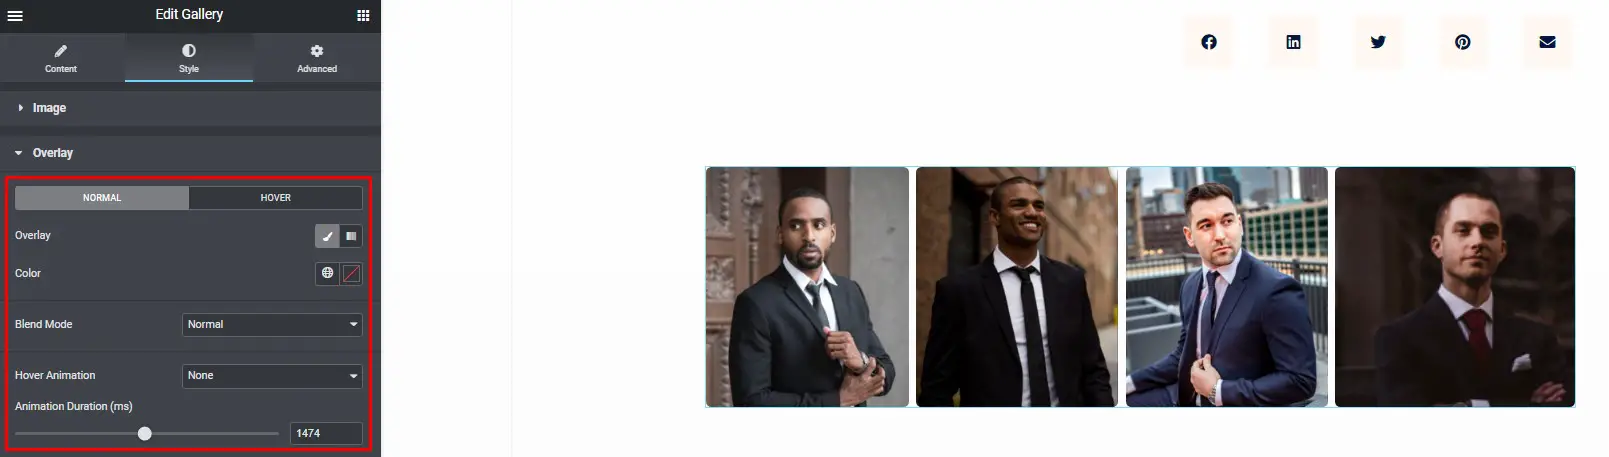
Overlay
Customize overlay styles:
- Overlay Type: Choose between “Classic” or “Gradient” for Normal and Hover states.
- Overlay Colors: Set colors for the overlay in Normal and Hover states.
- Layer Effects: Apply layer effects (Normal, Multiply, Screen, Overlay, etc.).
- Hover Animation: Choose a hover animation for the image.
- Animation Duration: Set the animation duration in milliseconds.
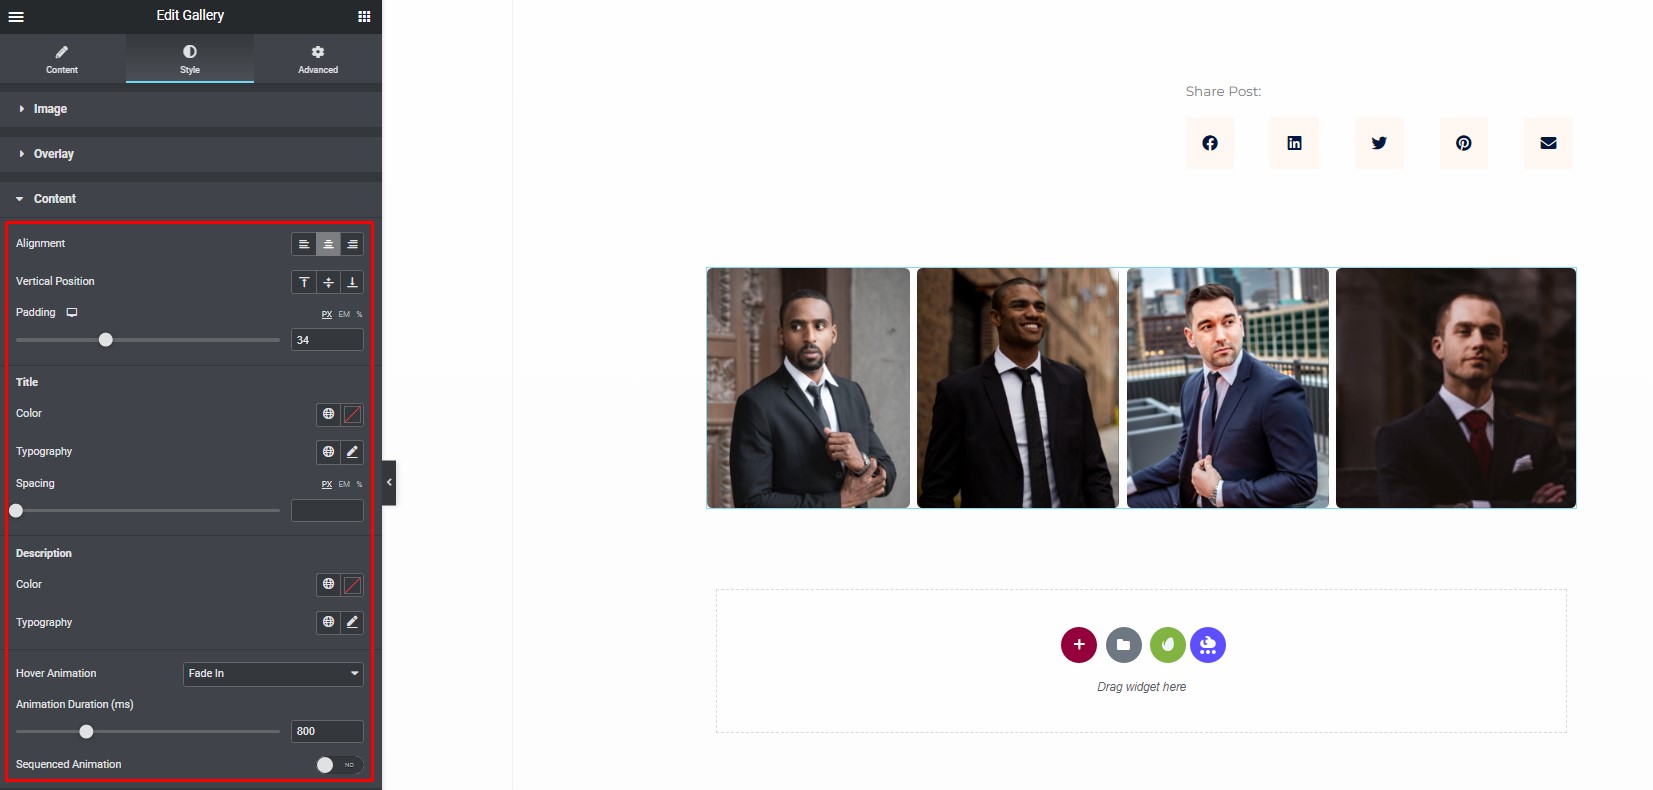
Content
Customize content styles:
- Alignment: Set the content alignment (left, right, or center).
- Vertical Position: Choose the vertical position for the content (top, middle, or bottom).
- Padding: Adjust the content’s padding.
- Typography: Define the color, typography, and spacing for the title and description.
- Hover Animation: Select a hover animation for the content.
- Animation Duration: Set the animation duration in milliseconds.
- Animation Sequence: Choose whether the title and description animate sequentially or simultaneously.
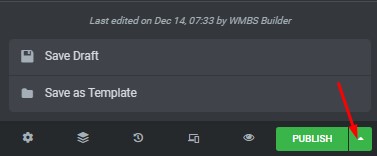
Remember that you can save your work as a draft to prevent any unintended changes to your published page. Simply click the arrow next to “Update/Publish” and select “Save Draft.”
Creating a professional image gallery with Elementor is a breeze, thanks to its user-friendly interface and versatile customization options. Follow the step-by-step instructions and make your website’s images shine with a stunning pro gallery.
Customizing Image Galleries with Pro Gallery in Elementor
In today’s digital age, the visual appeal of a website is paramount. Images play a crucial role in capturing the attention of your audience and conveying your message effectively. If you’re using Elementor for your WordPress website, you have a powerful tool at your disposal – Pro Gallery. In this article, we’ll walk you through the steps to customize image galleries with Pro Gallery in Elementor, enhancing the visual impact of your website.
Accessing the Pro Gallery
Step 1: Create a New Page or Edit an Existing One
Create a new page or edit an existing one using Elementor. This is where you’ll be adding and customizing your image gallery.

Adding an Image Gallery
Step 2: Add a Section to Your Page
In the Elementor editor, you can add a new section by clicking on the “+ Add New Section” button. Choose the structure that suits your needs for displaying the image gallery.

Step 3: Add a Gallery Widget
Within the section you’ve just created, click on the “+ Add Widget” button. In the search bar, type “Gallery” and select the “Pro Gallery” widget. This widget is part of the Elementor Pro package.
Step 4: Customize Your Gallery
Now, it’s time to customize your gallery. You can upload images, adjust the layout, and apply various styles to make it visually appealing. Pro Gallery offers numerous customization options, allowing you to create a unique gallery that aligns with your website’s design.
Advanced Customization
Step 5: Add Filters
To make your image gallery more interactive and user-friendly, you can add filters. This allows users to sort and view images based on specific criteria, enhancing the overall user experience.
Step 6: Implement Lightbox
Pro Gallery also offers the option to enable a lightbox feature. When a user clicks on an image, it opens in a lightbox, providing a larger view and a smoother user experience.
Step 7: Image Optimization
While customizing your image gallery, don’t forget about SEO. Optimize your images by providing descriptive alt text and relevant file names. This can help improve your website’s search engine rankings.
Step 8: Mobile Responsiveness
Ensure that your customized image galleries are mobile-responsive. Test your gallery on various devices to guarantee a seamless user experience for all visitors.
Conclusion
Customizing image galleries with Pro Gallery in Elementor is a fantastic way to enhance your website’s visual appeal and engage your audience effectively. With these step-by-step instructions, you can create stunning image galleries that will leave a lasting impression on your visitors.


