

Introduction
It’s simple to add testimonials if you’re using Thrive Architect for your website. They give your audience social proof and increase trust. References are precious in the world of digital marketing. We’ll take you step-by-step through the process of adding a testimonial to your page using Thrive Architect in this tutorial.
Getting Started with Thrive Architect:
Before diving into testimonials, it’s essential to have Thrive Architect installed. This user-friendly plugin can be easily added to your WordPress site through the plugins section.
Accessing Thrive Architect
Before you start, make sure you’re logged into your WordPress website and have Thrive Architect installed and activated. Once you’re in the WordPress dashboard, follow these steps:
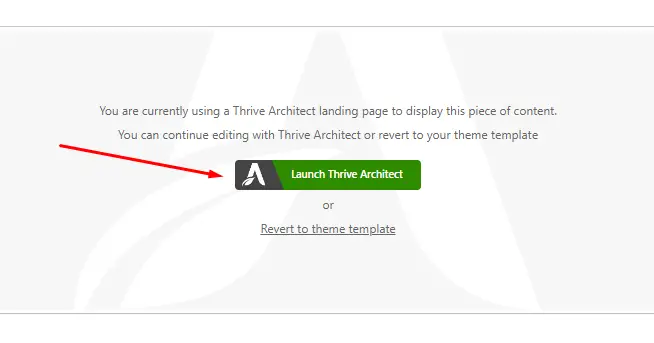
- Click the “Launch Thrive Architect” option on the page you want to edit.
Adding the Testimonial Element
Now that you’re in the Thrive Architect editor, follow these steps to add a testimonial to your page:
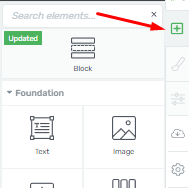
- In the right sidebar, click the plus symbol (+) to open the list of available elements.
- Look for the “Testimonial” element.
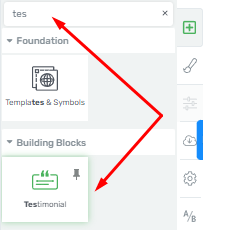
- Drag and drop it onto the page where you want the testimonial to appear.

Choosing a Template
Thrive Architect offers various testimonial templates to choose from. To select a template that suits your page, follow these steps:
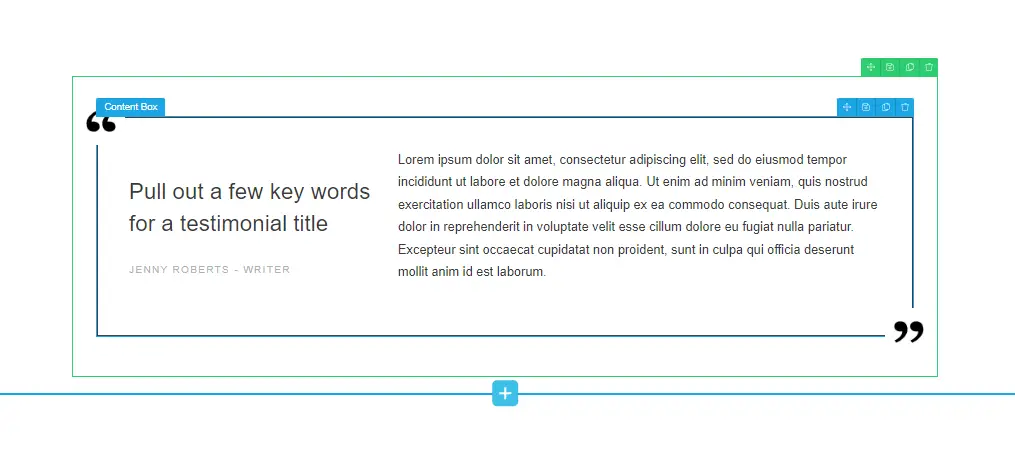
- A popup will appear with template options when you add the testimonial element.

- Click on a template to select it, and it will be applied to the element.
Customizing Text
The default text in the template is a placeholder and should be replaced with genuine testimonials from your customers. To do this, follow these steps:
- Select the first accessible field from the left sidebar to change the template text.
Changing the Template
If you decide to change the template after adding content, be aware that it will result in the loss of initial content and modifications. To change the template, follow these steps:
- Make sure to change the template before adding content or modifying existing content in the testimonials element.
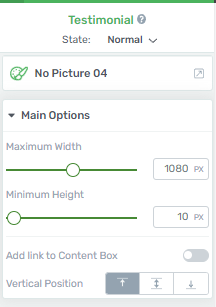
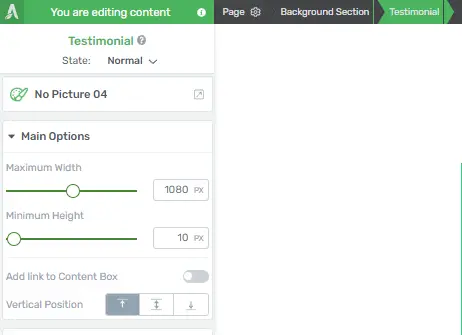
Further Customization
Thrive Architect offers additional customization options for your testimonials. You can:
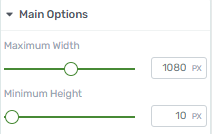
- Modify the maximum width and minimum height of the testimonial content.
- Add a link to the content box.

- Adjust the vertical position of the testimonial elements.

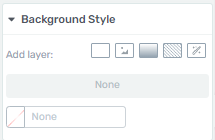
- Customize the testimonial element’s appearance by adding background styles, borders, corners, or shadows.

Using Thrive Architect to add testimonials to your website is a simple process that can significantly boost your site’s credibility. You’ll be able to incorporate authentic testimonials that build trust with your audience if you follow the steps outlined in this guide.
Effective Strategies for Gathering Testimonials in Thrive Architect
Testimonials play a crucial role in building trust and credibility for your website or product. With Thrive Architect, you have a powerful tool at your disposal to showcase these testimonials effectively. In this guide, we’ll walk you through step-by-step strategies for gathering and displaying testimonials using Thrive Architect.
Step 1: Identify Your Target Audience
Understand who your ideal customers are.
Determine the specific features or benefits they value most.
Step 2: Reach Out to Satisfied Customers
Contact satisfied customers who have had a positive experience with your product or service.
Use personalized emails or messages to request their feedback.
Step 3: Provide Clear Guidelines
Clearly outline what you’re looking for in their testimonials.
Ask them to focus on specific aspects like the problem they faced, how your product helped, and any outstanding results achieved.
Step 4: Offer Incentives (Optional)
Consider offering incentives like discounts, freebies, or exclusive access to premium content in exchange for testimonials.
Step 5: Utilize Thrive Architect for Testimonial Collection
Open Thrive Architect and navigate to the page where you want to display testimonials.
Add a “Testimonials” element to the page.
Step 6: Add Testimonial Entries
Click on the testimonial element to open the settings panel.
Add individual testimonial entries one by one, including the customer’s name, photo (if available), and testimonial text.
Ensure each testimonial is concise, authentic, and impactful.
Step 7: Choose an Appealing Layout
Select a layout that complements the overall design of your page.
Experiment with different styles to find the one that best showcases the testimonials.
Step 8: Incorporate Visual Elements
Add images of your customers (with their consent) alongside their testimonials to increase credibility.
Consider using icons or graphics to highlight key points in the testimonials.
Step 9: Format and Style
Customize the font, color, and size to ensure the testimonials blend seamlessly with your page’s design.
Ensure the testimonials are easily readable and visually appealing.

Step 10: Testimonial Placement
Strategically position the testimonial section where it’s most likely to catch the visitor’s attention.
Consider placing them near key conversion points, such as call-to-action buttons.
Step 11: Regularly Update Testimonials
Continuously gather new testimonials to keep your content fresh and relevant.
Swap out older testimonials with newer ones to demonstrate ongoing customer satisfaction.
By following these steps, you’ll be able to effectively gather and showcase testimonials using Thrive Architect. Remember, authentic and compelling testimonials can significantly influence potential customers’ decisions and build trust in your brand or product. Keep refining your testimonial collection process for continued success.


