

In the world of web design and content creation, the ability to create engaging and visually appealing pages is crucial. Thrive Architect, a powerful WordPress plugin, is a tool that can help you achieve this with ease. In this comprehensive tutorial, we will walk you through the process of accessing and using Thrive Architect to add a Guarantee Box to your WordPress page. Let’s get started.
Introduction to Thrive Architect
Thrive Architect is a dynamic page builder for WordPress that offers a wide range of elements and templates, allowing you to create stunning web pages with minimal effort. In this guide, we’ll focus on adding a Guarantee Box to your page, a useful element for displaying trust signals and guarantees to your audience.
Access Thrive Architect from Your WordPress Dashboard
Navigate to the page where you want to add the Guarantee Box using Thrive Architect. You have the option of selecting an existing page or creating a new one.
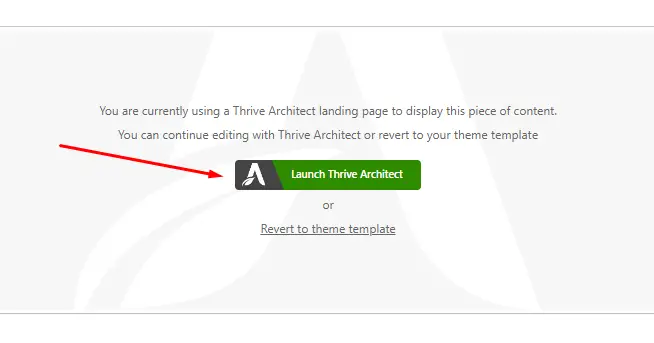
Launch Thrive Architect
After selecting your desired page, look for the “Launch Thrive Architect” button. It’s usually located near the top of your page editing screen. Click on this button to enter the Thrive Architect editor.
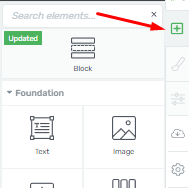
Access Elements
Once inside the Thrive Architect editor, you’ll notice a sidebar on the right-hand side. This sidebar contains various elements that you can add to your page. To proceed, locate and click on the plus sign (+) within this sidebar.
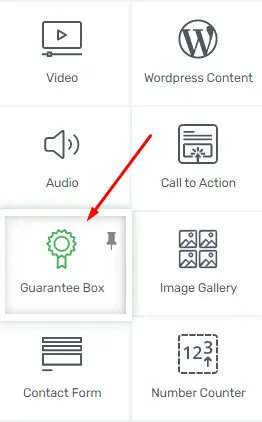
Find the Guarantee Box Element
In the list of available elements, you can either scroll through the options or use the search bar to locate the “Guarantee Box” element. This is the feature that will allow you to add a trust-building Guarantee Box to your page.
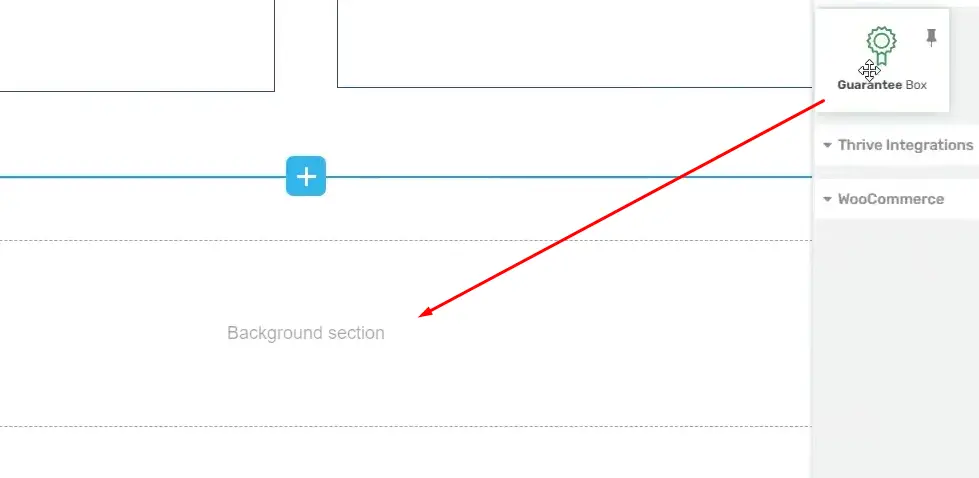
Adding the Guarantee Box to Your Page
Once you’ve found the Guarantee Box element, you can simply click on it and drag it onto your page. Position it wherever you want it to appear on the page.
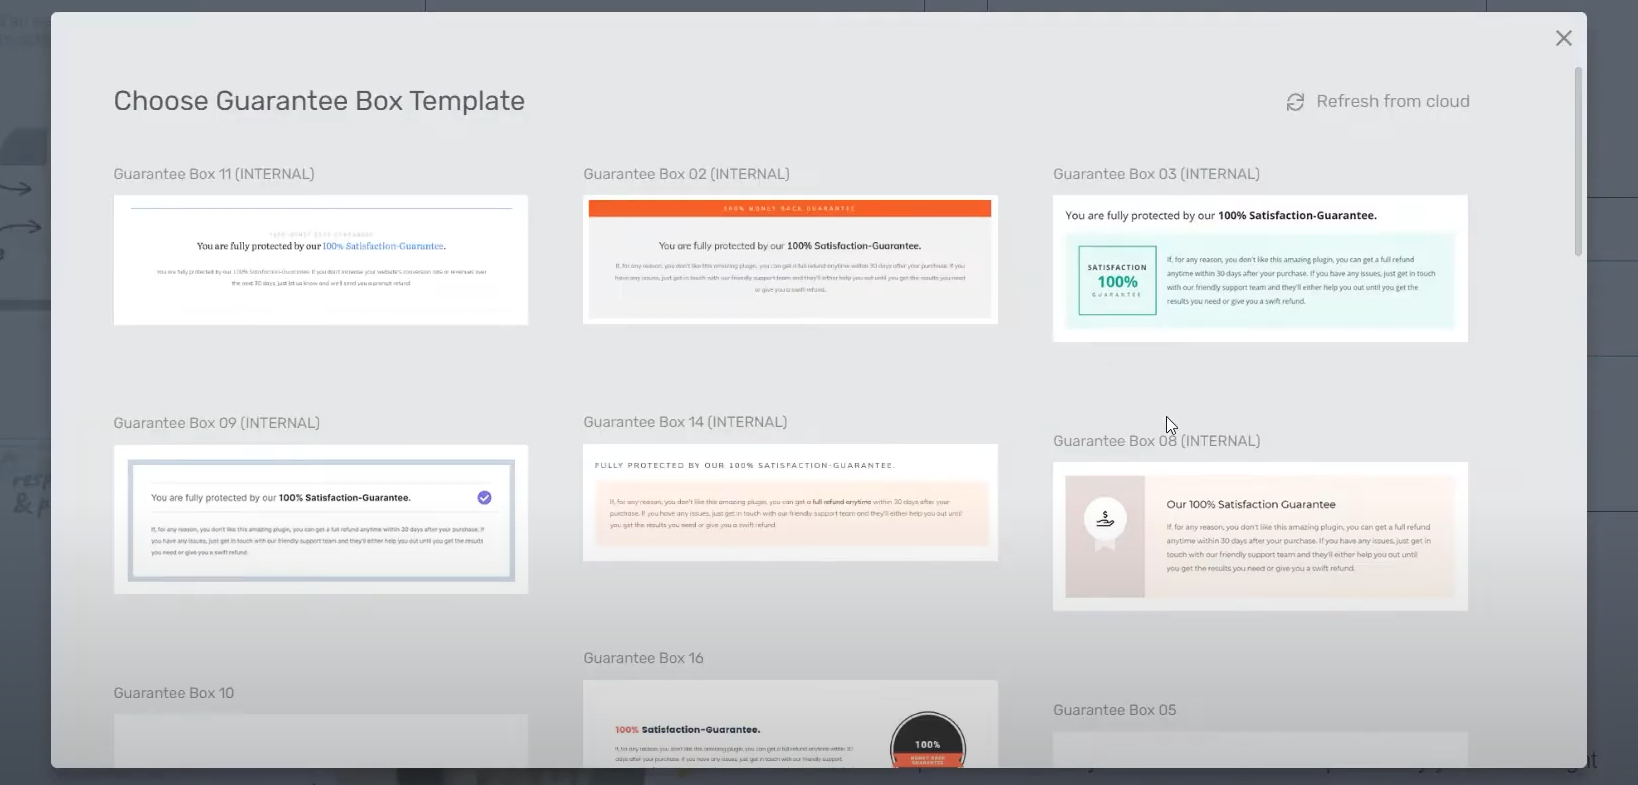
Selecting a Template
After placing the Guarantee Box element on your page, a pop-up window will appear. This window presents you with a selection of pre-designed templates for the Guarantee Box. Scroll through the available options and choose the template that aligns best with your design preferences. This template will be applied to the Guarantee Box element.
Changing Templates
If you change your mind about the template you’ve selected, you can always choose a different one from the left sidebar where the element settings are located. It’s important to note that changing the template will reset all initial content and modifications, so do this before adding any content or making customizations.
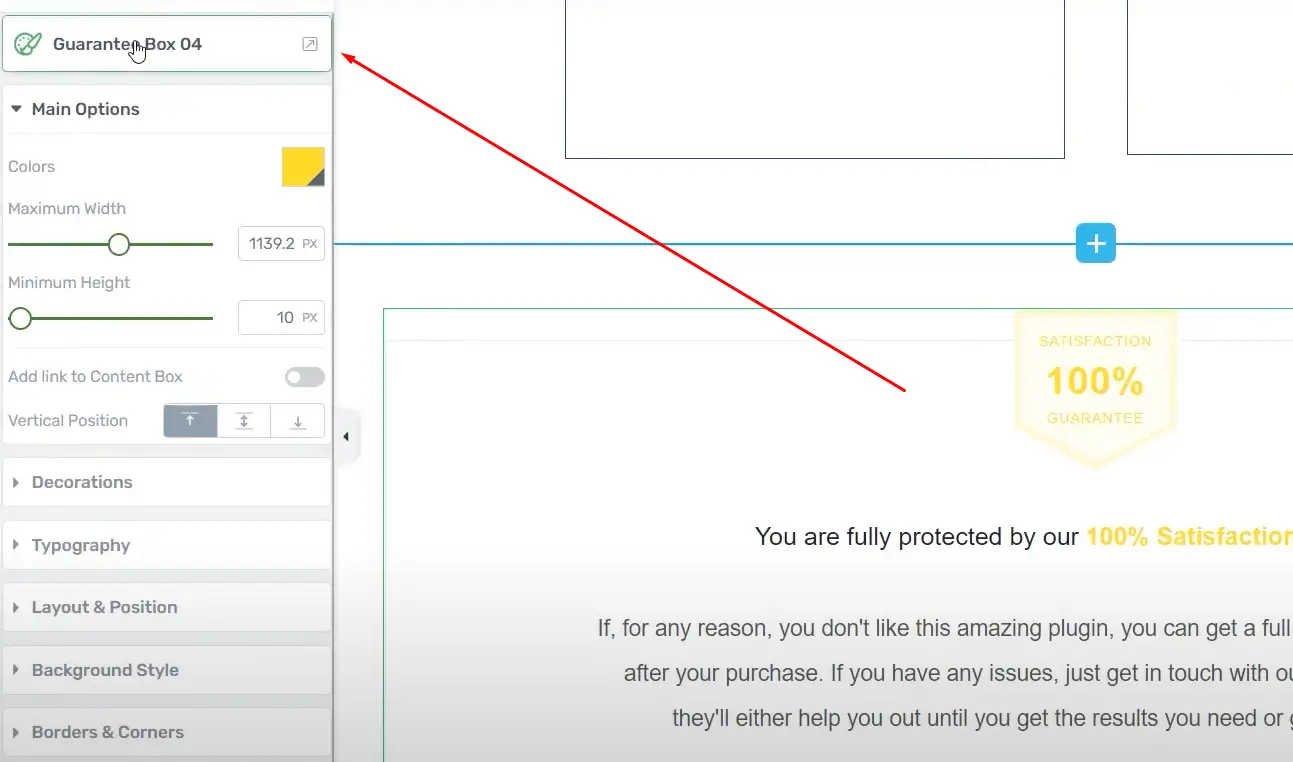
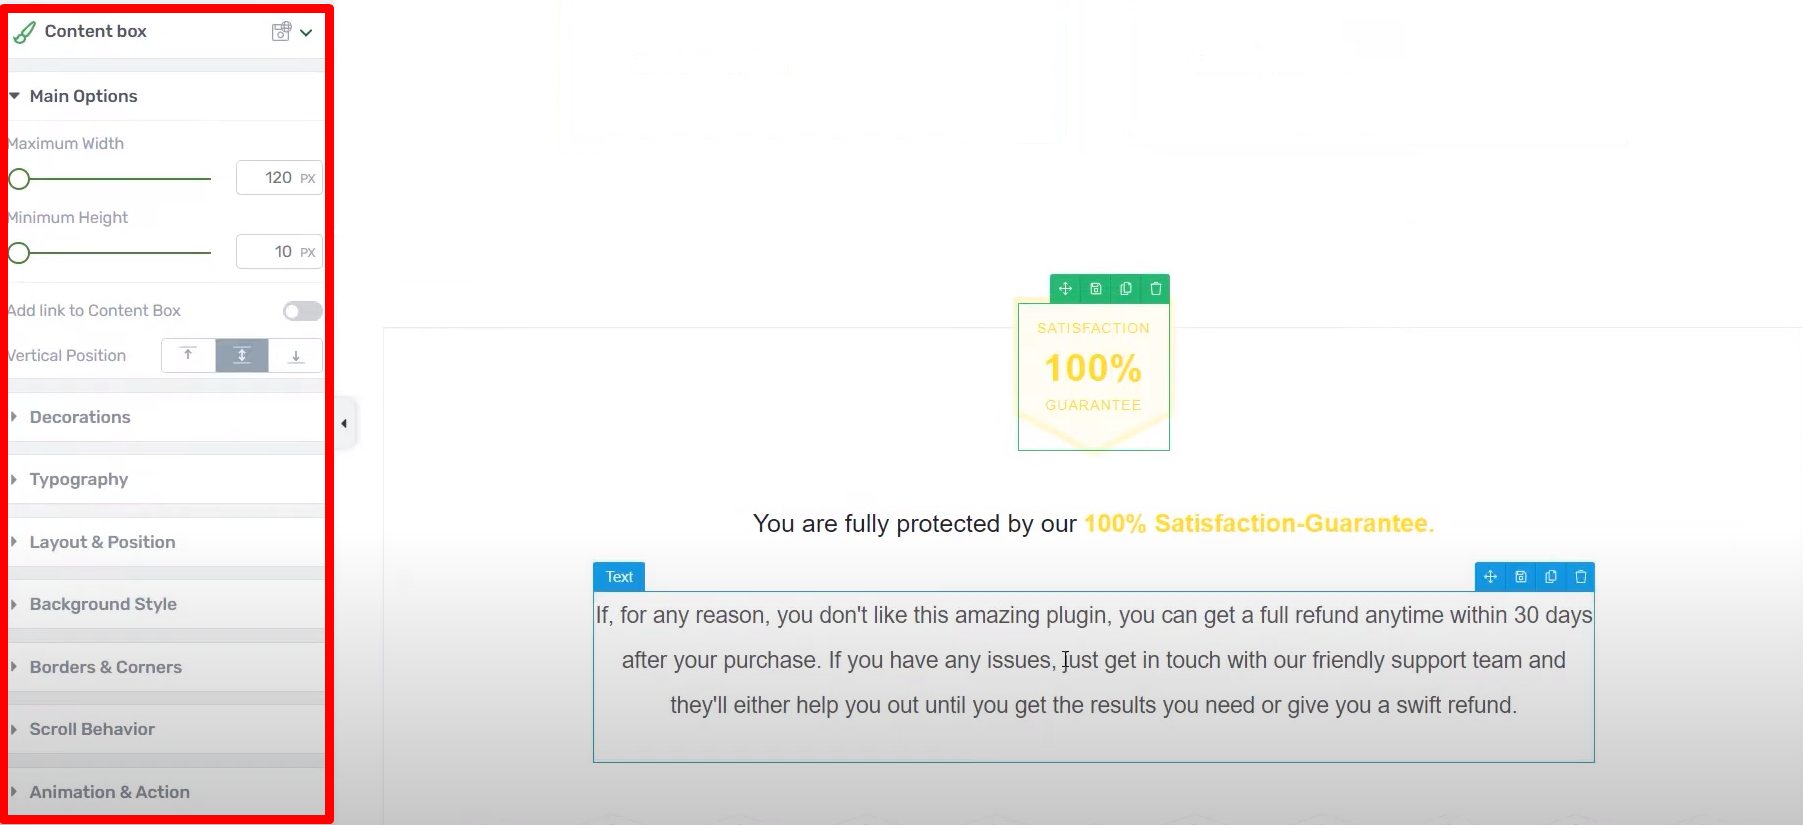
Customizing Your Guarantee Box
With your chosen template in place, you can further customize the Guarantee Box to match your design preferences and the specific needs of your content. Here are some changes you can make:
- Adjust the box’s color to align with your brand’s color scheme.
- Modify the maximum width and minimum height of the Guarantee Box to fit your layout.
- Add a link to the Guarantee Box if you want to direct users to a specific page or offer.
- Fine-tune the vertical position of the Guarantee Box to ensure it appears exactly where you want it on your page.
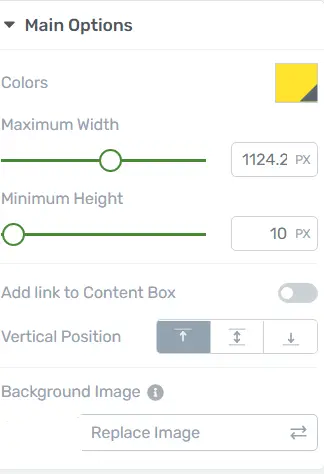
Additional Customization
If you want more advanced customization options, look through the other options in the left sidebar. These options allow you to refine the appearance and behavior of your Guarantee Box element, ensuring it integrates seamlessly with your website’s design.
![]()
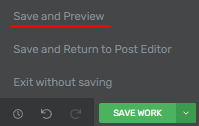
Save Your Changes
Once you are satisfied with the appearance and settings of your Guarantee Box, make sure to save your changes within the Thrive Architect editor. This ensures that your customized Guarantee Box will appear on the published page as intended.
Responsive Design: Ensuring Your Guarantee Box Looks Great on All Devices
It is essential for online success to have a visually appealing and functional website. Responsive design is one aspect of web design that is frequently overlooked. Your website will look great on all devices, from desktop computers to smartphones if you use responsive design. In this article, we’ll show you how to use Thrive Architect to make your guarantee box look great on all devices.
What is Responsive Design?
Responsive design is a web design approach that aims to make web pages render well on a variety of devices and window or screen sizes. It involves using flexible grids and layouts, images, and CSS media queries to create a seamless and consistent browsing experience for users, regardless of whether they are on a desktop, tablet, or smartphone.
Why is Responsive Design Important?
With an increasing number of people accessing websites via mobile devices, neglecting responsive design can lead to lost opportunities and frustrated visitors. A guarantee box that looks great on all devices not only enhances your website’s aesthetics but also contributes to better user engagement and higher conversion rates.
Access the Thrive Architect
- Open Thrive Architect: Navigate to the page or post where you want to add your guarantee box and click on the “Launch Thrive Architect” button.
- Choose a Layout: Select a layout that suits your design needs or start from scratch.
Designing Your Guarantee Box
Now, let’s design your guarantee box:
- Add a New Element: Click on the “+” button to add a new element to your page.
- Select “Guarantee Box”: Search for “Guarantee Box” and click to add it to your page.
- Customize Your Box: Customize the box by adding text, and images, and adjusting the design to match your website’s style.
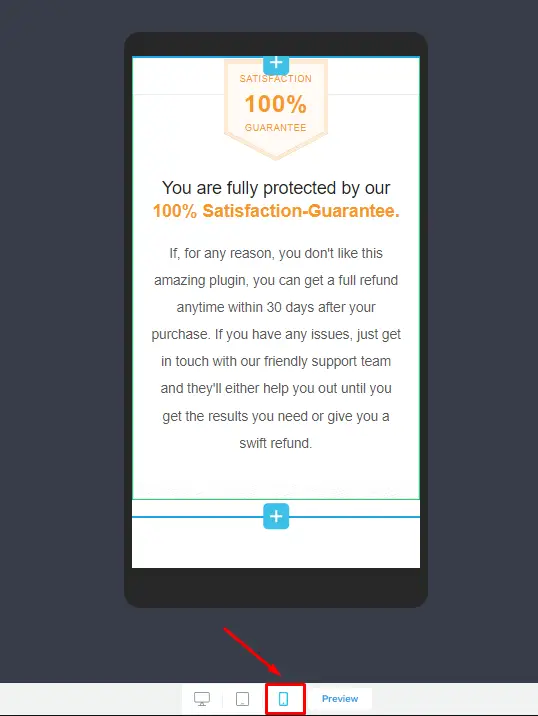
Testing Your Design
- Preview Your Page: Use Thrive Architect’s preview feature to see how your guarantee box looks on different devices.
- Make Adjustments: If necessary, make adjustments to ensure that the guarantee box appears correctly on various screen sizes.
Tweaking for Mobile Devices
Mobile Optimization: Click on the mobile icon in the Thrive Architect editor to optimize your guarantee box specifically for mobile devices.
Finalizing Your Guarantee Box
Save and Publish: Once you’re satisfied with the design, save your changes and publish your page.


