
Introduction
In the realm of website design, the Thrive Architect page builder stands out as a powerful tool, offering a myriad of features to enhance your pages. One such feature is the Video Element, a dynamic tool that allows you to seamlessly integrate videos into your content. In this step-by-step tutorial, we’ll explore the ins and outs of using the Video Element in Thrive Architect, unlocking new possibilities for engaging and visually appealing web pages.
Understanding Thrive Architect’s Video Element:
Thrive Architect’s Video Element is a versatile tool that comes packed with features. From basic video embedding to advanced customization options, this element is designed to cater to various needs. It supports popular video platforms like YouTube and Vimeo, making it a flexible choice for content creators.
Adding the Video Element
Open your Thrive Architect editor.
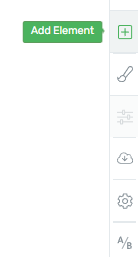
Click on the plus sign in the right sidebar to add a new element.
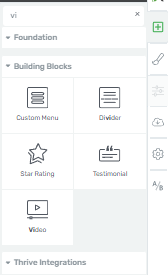
Search for the “Video” element or find it in the elements list.
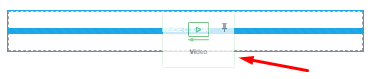
Drag and drop the “Video” element onto your page.
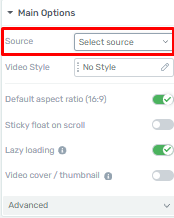
Use the Main Options
After adding the “Video” element, you’ll find various customization options in the left sidebar. Under the “Main Options” section, you’ll first encounter the “Source” selection.
Static Source
If you don’t want to use custom fields, select “Static” and proceed with your video source selection.
Dynamic Source
To use a custom field, choose “Dynamic.” This option allows you to use a video assigned as the value of the custom “Video” field.
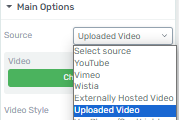
Source Options
Thrive Architect provides multiple video source options:
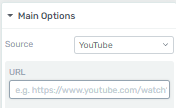
YouTube
Select this if your video is on YouTube.
Paste the video URL into the URL field to add it to your page.
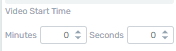
Specify the video start time if needed.
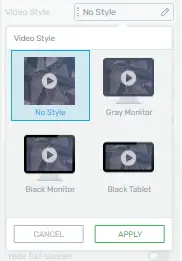
Choose a video style from the available list.
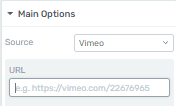
Vimeo
Choose this option for videos hosted on Vimeo.
Paste the Vimeo video URL into the URL field.
Customize the player color.
![]()
Pick a video style that suits your page.
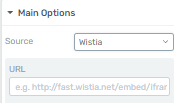
Wistia
Opt for Wistia if your video is hosted there.
Paste the Wistia video URL into the URL field.
Customize the player color.
![]()
Set the video start time if desired.
Choose a video style that complements your content.
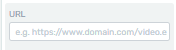
Externally Hosted Video
Use this for videos hosted on platforms other than YouTube, Vimeo, or Wistia.
Paste the video’s valid URL into the designated field.
Uploaded Video
Select “Uploaded Video” to use a custom video.
Click “Choose Video” to upload your video from your PC or media library.
![]()
Choose a video style to apply.
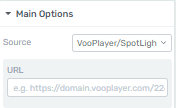
Spotlightr (formerly Vooplayer)
Choose “VooPlayer/Spotlightr” for videos from Spotlightr.
Paste the video URL into the URL field.
Additional Customization
Adjustable Player Size
Customize the player size to fit your design by disabling the “Adjustable player size” option.
![]()
Choose a preset size or enter custom dimensions.
Custom Aspect Ratio & Orientation
Adjust the aspect ratio and orientation of your player.
![]()
Enable this option and select your preferred size preset and orientation.
Custom Start/End Times
Set specific video start and end times to focus on specific content.
![]()
Activate this option and enter the desired minutes and seconds.
Anonymize Viewing Data
Protect user privacy by anonymizing viewing data.
![]()
Enable or disable this option as needed.
Default Aspect Ratio
Choose a default aspect ratio for your video.
![]()
Select from preset ratios or create a custom one.
Sticky Float on Scroll (Optional)
If you want to make your video stand out, you can enable the “Sticky Float on Scroll” option. This feature displays a floating video icon as users scroll down your page. Customize the float position, player width, padding, and more to achieve the desired effect.
![]()
Lazy Loading (Core Web Vitals Optimization)
Optimize your website’s Core Web Vitals by enabling lazy loading. This feature can significantly improve page loading times and user experience. Check out our dedicated article for more information on how to implement lazy loading effectively.
![]()
Video Cover/Thumbnail
Improve Core Web Vitals and decrease page loading time by using a video cover or thumbnail. This feature replaces the video with an image placeholder, enhancing your page’s performance.
![]()
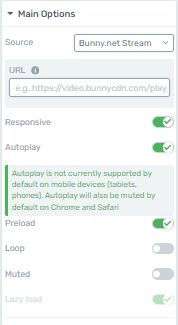
Bunny.net Stream (Advanced Option)
For videos hosted on Bunny.net Stream, you can customize various options, including autoplay, preload, loop, and more. Simply paste the Bunny.net URL and configure these settings as desired.
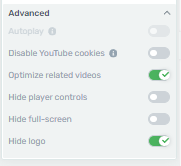
Advanced Options
Under the “Advanced Options” section, you can fine-tune your video’s behavior. Adjust autoplay, disable YouTube cookies, optimize related videos, hide player controls, and more to create a tailored video experience.
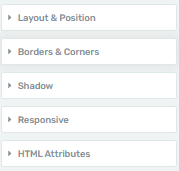
Further Customization
Thrive Architect offers additional options in the left sidebar to customize your video further. You can modify the layout, position, borders, shadows, and more to seamlessly integrate your video into your webpage design.
Save Your Work
Don’t forget to save your changes by clicking the green “Save Work” button at the bottom left of the editor.
![]()
By following these steps, you can effortlessly add and customize videos on your webpage using Thrive Architect, enhancing your website’s engagement and visual appeal.
Conclusion
Incorporating videos into your web pages can significantly boost user engagement and convey information effectively. Thrive Architect simplifies the process with its user-friendly interface and robust customization options. By following the steps outlined in this guide, you can seamlessly integrate videos into your web content and create a more engaging online experience for your audience.


