

Introduction
In the dynamic world of web design, captivating your audience’s attention is crucial. One effective way to achieve this is by incorporating comparison tables into your website. If you’re a user of Thrive Architect, the process becomes not only seamless but also highly customizable. Let’s dive into the step-by-step guide on creating a compelling comparison table that enhances user experience and boosts engagement.
Understanding Thrive Architect
Before we delve into the specifics of comparison tables, let’s familiarize ourselves with Thrive Architect. This intuitive visual editor empowers users to create stunning websites without the need for coding expertise. Its drag-and-drop functionality and rich set of elements make it a favorite among web designers and beginners alike.
In this step-by-step tutorial, we will walk you through the process of creating a comparison table using the “Table” element in Thrive Architect. Comparison tables are a great way to showcase product features, pricing, or any side-by-side comparisons on your website.
Finding and Adding the “Table” Element
- Locate the “Table” Element: To begin, open your Thrive Architect editor.
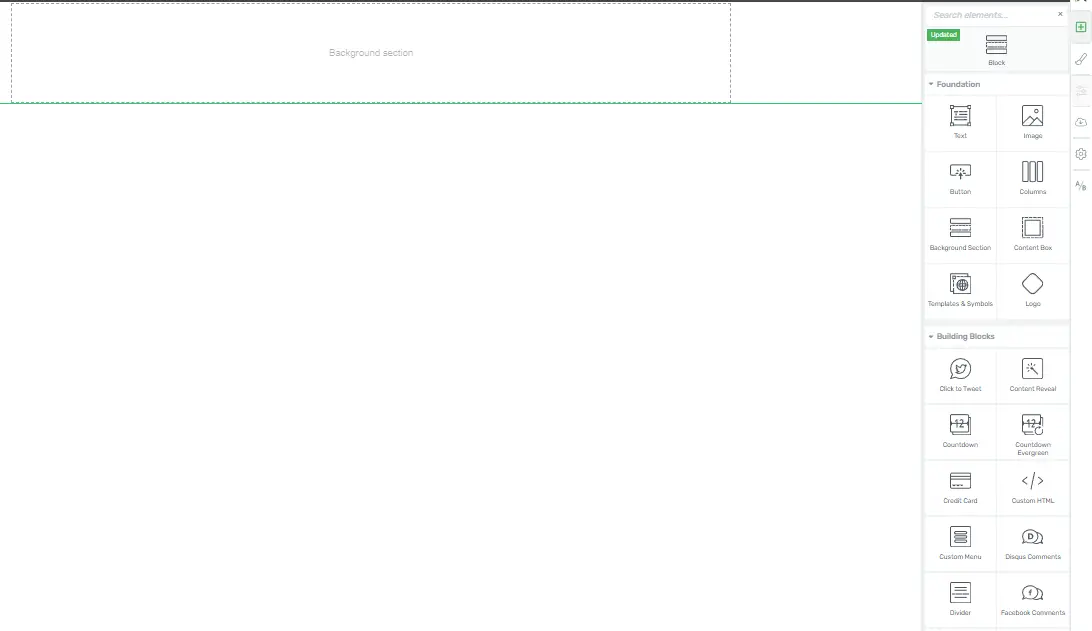
- Drag and Drop the “Table” Element: Find the “Table” element in the elements panel and drag it onto your page where you want to create the comparison table.
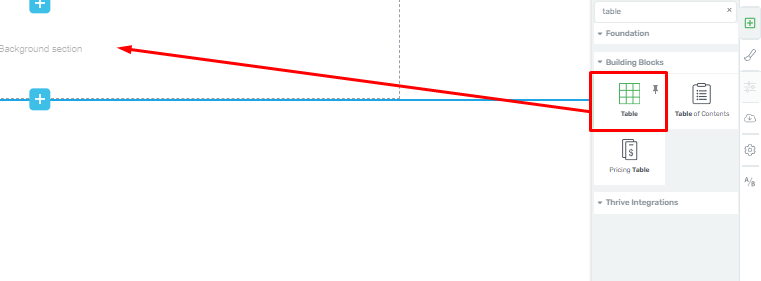
- Select a Template: Upon dropping the table element, you will be prompted to choose a template for your comparison table. Select the template that best suits your needs and click on it to proceed.

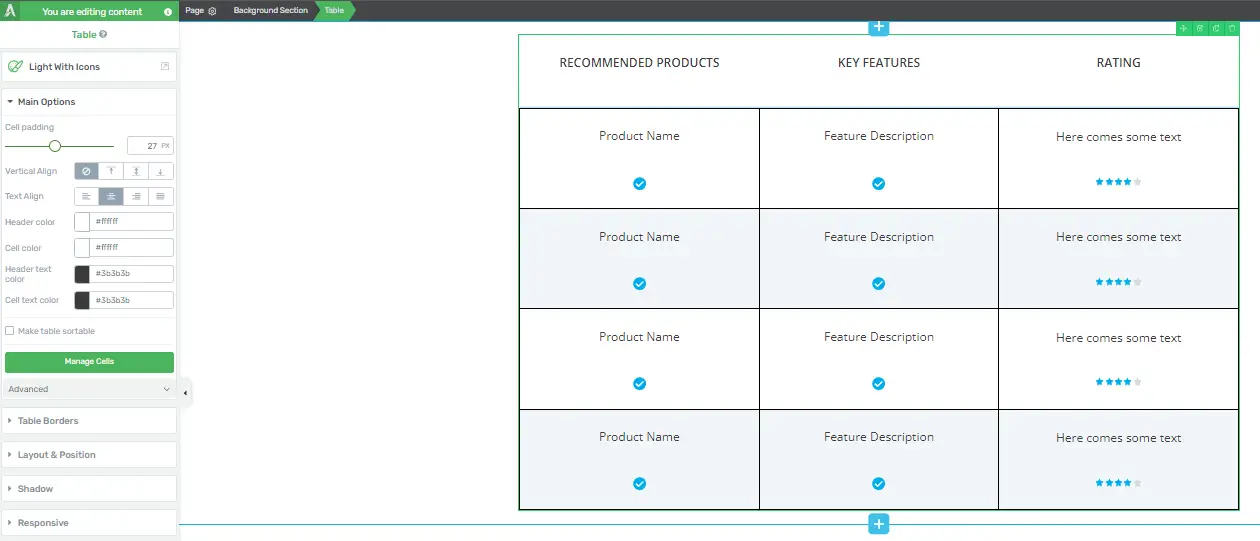
Creating a Comparison Table
- Customize the Table Content: Depending on the template you choose, you can add various elements such as images, icons, or ratings to your table cells. Customize the table content according to your requirements.
- Use Left Sidebar Options: Explore the options in the left sidebar to further modify your table. Keep in mind that changing the template after adding content may result in data loss, so it’s essential to choose the right template initially.
Customizing the Comparison Table
Template Library: In the left sidebar, under “Template Library,” you can change the table template if needed. Test different templates to find the one that best fits your needs.
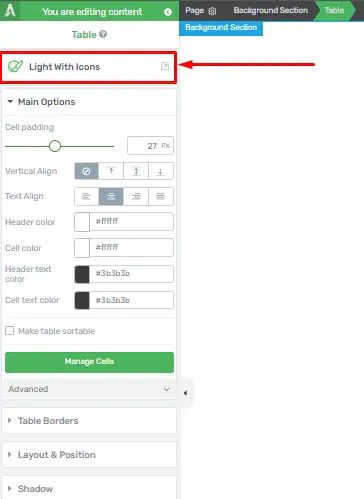
Main Options:
- Cell Padding: Adjust the padding within the table cells.

- Vertical Align: Align the content vertically within the cells.

- Text Align: Align the text horizontally within the table cells.

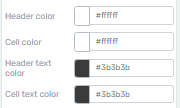
Customize Colors: You can change the header color, cell color, header text color, and cell text color by selecting the respective options and choosing your desired colors.
Sorting: Enable the sorting option if you want users to be able to sort the table columns.
![]()
Managing Table Cells
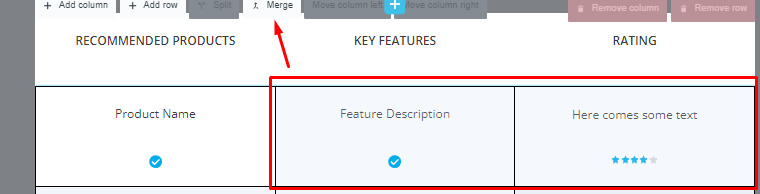
- Manage Cells: Click “Manage Cells” to customize individual cells within the table.

- Merging Cells: To merge cells, select multiple cells by holding the left mouse button and then click the “Merge” option that appears above the table.
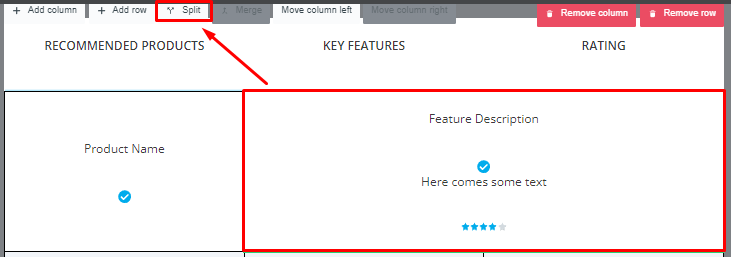
- Splitting Merged Cells: To separate previously merged cells, click on the merged cell and select the “Split” option.
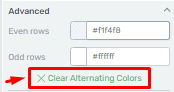
- Alternating Row Colors: Under the “Advanced” option of the “Table” element, you can select different colors for even and odd rows.
- Reset Widths and Heights: Use the “Reset Widths” and “Reset Heights” options when managing cells to remove custom width and height settings.

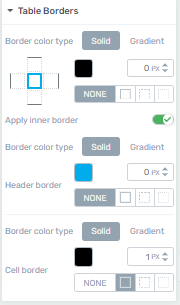
Adding Table Borders
Table Borders: If you want to add borders to the entire table, use the “Table Borders” option.
General Options
Additional Options: Explore more general options in the left sidebar to further customize your comparison table according to your specific design requirements.
Saving Your Work
Save Your Work: Once you’ve finished customizing your comparison table, don’t forget to click the “Save Work” button located in the bottom left corner of the Thrive Architect editor to ensure your changes are saved.
![]()
By following these step-by-step instructions, you can create a visually appealing and functional comparison table using Thrive Architect to enhance your website’s content.
Understanding the Importance of Comparison Tables in Thrive Architect
Comparison tables are an essential element when it comes to effectively presenting information and helping your audience make informed decisions. Thrive Architect, a popular WordPress page builder, offers a user-friendly way to create these tables. In this guide, we will explain the significance of comparison tables in Thrive Architect and how to use them effectively.
Step 1: Enhancing User Experience
Clarity and Readability
Comparison tables provide a structured layout that allows users to easily compare different options side by side. This improves the user experience by offering a clear, at-a-glance view of the information.
Efficient Decision-Making
Users can quickly assess the pros and cons of each option, making it easier for them to make informed decisions. This efficiency can lead to higher conversion rates and increased user satisfaction.
Step 2: Boosting Conversions and Sales
Highlighting Key Features
Comparison tables allow you to showcase the unique features and benefits of each option, helping potential customers understand why one option may be more suitable for their needs.
Encouraging Action
By presenting information in a structured format, comparison tables can encourage users to take action, such as clicking on a “Buy Now” button or signing up for a service.
Step 3: Improving SEO and Content Relevance
Targeted Keywords
Comparison tables can be optimized for specific keywords related to the products or services you’re comparing. This can improve your page’s visibility in search engine results.
Relevant Content
Providing detailed and relevant information in a comparison table can help your page rank higher in search results. This is because search engines value well-organized content that meets user intent.
Step 4: Establishing Credibility and Trust
Transparent Information
Clear and unbiased comparisons demonstrate transparency, which is crucial for gaining trust from your audience. It shows that you’re providing them with all the necessary information to make an informed decision.
Professionalism
A well-designed and structured comparison table reflects professionalism and attention to detail. This can instill confidence in potential customers and enhance your brand’s credibility.
Step 5: Creating a Visual Impact
Customization Options
Thrive Architect offers a range of customization options for comparison tables, allowing you to match the design and style to your website’s overall look and feel.
Visual Appeal
A visually appealing comparison table can capture users’ attention and keep them engaged with your content. This can lead to higher retention rates and increased conversions.
By understanding the importance of comparison tables in Thrive Architect, you can leverage this powerful tool to enhance user experience, boost conversions, improve SEO, establish credibility, and create a visually impactful presentation of information. Utilize the features provided by Thrive Architect to customize and optimize your comparison tables for maximum effectiveness.


