
Introduction
The Elementor Sticky Transparent Header is a design feature that keeps your website’s header visible as users scroll down the page. What sets it apart is its transparency, providing a modern and sleek look to your website.
In today’s tutorial, we’ll guide you through the process of creating a sleek and stylish sticky transparent header using Elementor, a popular page builder for WordPress websites. A transparent header not only adds a modern touch to your website’s design but also enhances the overall user experience.
Importance of a Sticky Transparent Header
A sticky transparent header in Elementor stays fixed at the top of the page, even as the user scrolls down. This ensures that important navigation options and branding elements are always visible, providing easy access to your website’s key sections. It’s a great way to maintain a clean and uncluttered layout while keeping essential information readily available. Follow these step-by-step instructions to achieve this effect:
How to Create or Edit Your Header Section in Elementor?
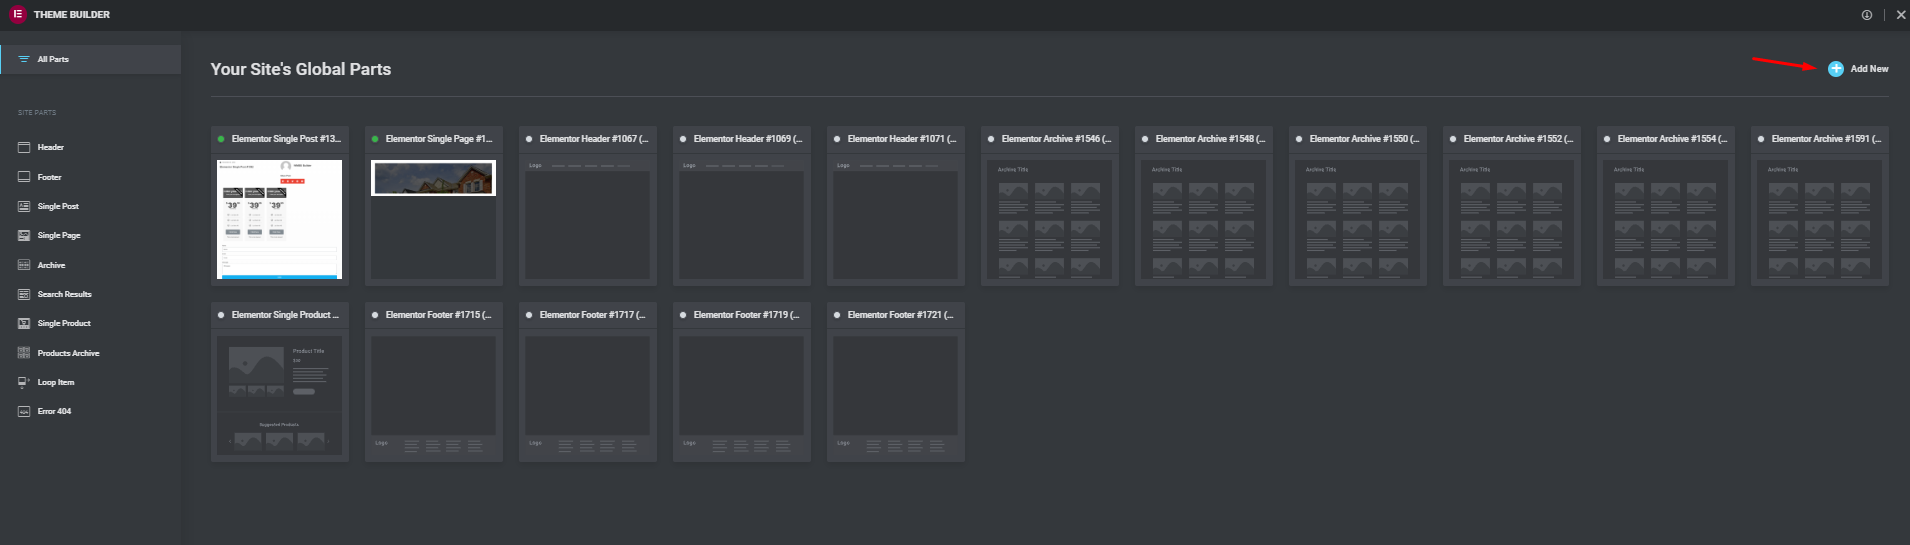
Firstly, go to templates then “Theme Builder”.
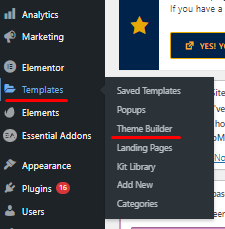
Next, locate the header section you want to edit or create a new one.
Customizing Elementor Header Section
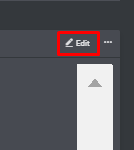
Once you click the “Edit” option. You’ll be taken to the Elementor editor with a blank header template. Here, you can start designing your sticky transparent header here.

Designing Elementor Header with Transparency
Afterward, use Elementor’s drag-and-drop interface to design your header. You can add your website logo, navigation menu, and any other elements you want in your header.
In the next step, to make your header transparent, you’ll typically set the background color to transparent or semi-transparent. You can do this by selecting the section or column containing your header elements and adjusting the background settings in the container’s settings.
Applying Custom CSS for Elementor Sticky Transparent Header
If your header still doesn’t appear transparent as desired, you may need to add custom CSS. Copy the CSS code you have from another source, like a video tutorial, and paste it into the custom CSS section provided in Elementor.

Updating Elementor Sticky Header
Now, after making all the necessary changes, click the “Update” button to save your sticky transparent header settings.
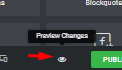
Previewing the Result of Your Elementor Sticky Transparent Header
To see the result, you can either visit your website’s front end or use the preview option within Elementor.
Designing a Seamless Navigation Experience with Elementor
Next, let’s focus specifically on designing a sticky menu using Elementor, emphasizing its importance for user experience.
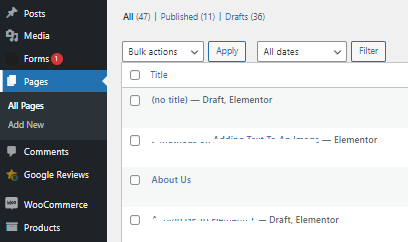
Navigating to Elementor for Page Editing
Following that, from the dashboard, hover over “Pages” on the left sidebar. Click on “All Pages” to open the list of your existing pages. Select the page where you want to create a sticky menu or create a new page.
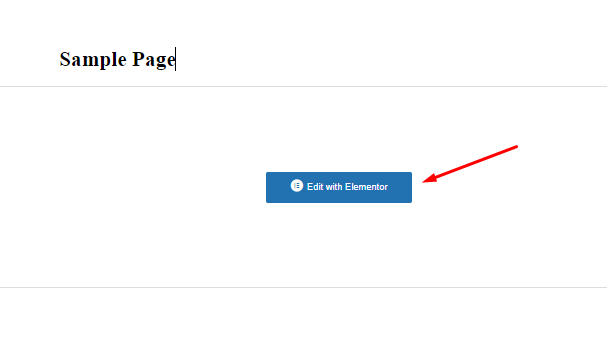
Editing Page with Elementor for a Custom Header
In the next step, once you’re on the page editor, click the “Edit with Elementor” button at the top of the screen.
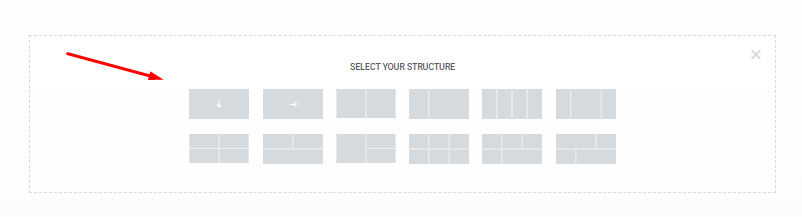
Adding a Section in Elementor for Navigation Menu
After that, your page is divided into sections. You can either use an existing section or add a new one by clicking the “+ Add Section” button. Choose the structure you prefer for your menu section. For a simple menu, a single-column structure is usually sufficient.

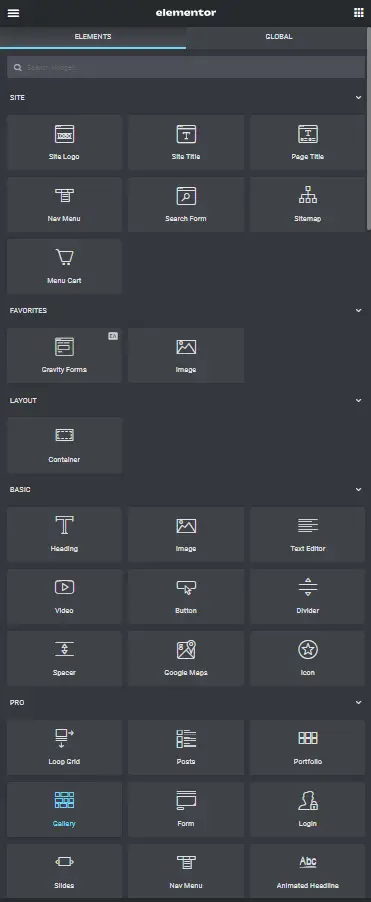
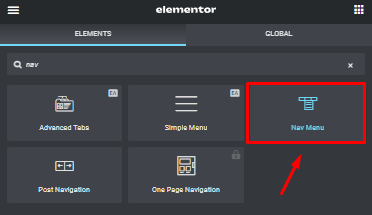
Incorporating a Navigation Menu Widget with Elementor
Now, inside the section you created, search for the “Nav Menu” widget in the Elementor widget panel on the left.
Drag and drop the “Nav Menu” widget into your section.
Configuring Navigation Menu in Elementor
As you work on the widget settings on the left, you can customize your menu. Select the menu you want to display from the dropdown menu. Configure the layout, style, and alignment settings to match your website’s design and branding.

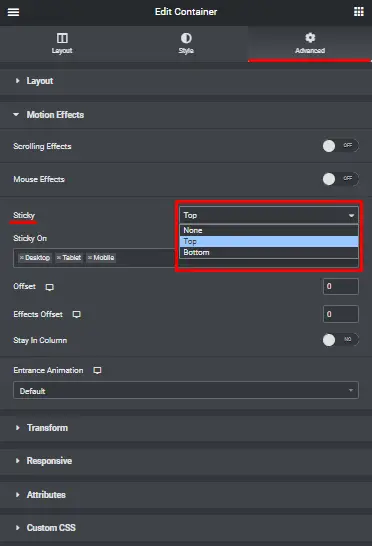
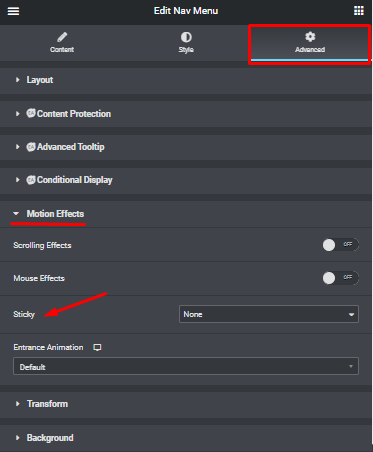
Making Your Menu Sticky with Elementor
When it comes to making your menu sticky, scroll down the widget advanced tab until you find the “Sticky” section.
Enable the “Sticky” option. You can customize the settings like the offset, animation, and transition effect according to your preference.
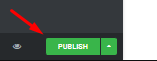
Saving Elementor Sticky Header Changes
Now, click the “Update” or “Publish” button to save your changes to the page.

Previewing and Testing Sticky Transparent Header
Finally, click the “Preview” button to see how your sticky menu looks and behaves on your webpage. Test scrolling to make sure the menu sticks to the top of the page as expected.