
Introduction to Single Post Templates
Bricks Builder revolutionizes the creation of single post templates in WordPress. With its intuitive interface and extensive customization options, Bricks empowers users to design visually captivating and functional single post layouts effortlessly. Explore how Bricks Builder simplifies the process of crafting engaging single post templates, enhancing user experience and elevating your website’s aesthetics.
Importance of a Well-Designed Single Post Template
A well-designed single post template plays a crucial role in enhancing user experience, reinforcing brand identity, and maximizing content impact. By ensuring clarity, consistency, and visual appeal, it not only captivates audiences but also improves SEO performance and fosters long-term engagement. In today’s competitive online landscape, investing in a well-crafted single post template is essential for establishing credibility, increasing visibility, and driving meaningful interactions with your content.
Benefits of Using Bricks Builder for Template Creation
Intuitive Interface: Its user-friendly drag-and-drop interface simplifies the design process.
Extensive Customization: Users can personalize templates with diverse layout options, fonts, colors, and more.
Efficiency: Bricks Builder streamlines development, enabling quick creation and modification of templates.
Dynamic Content Integration: Seamless integration with dynamic content sources enhances personalization.
Responsive Design: Templates adapt seamlessly to various devices and screen sizes, ensuring consistent user experiences.
Compatibility: Compatible with a wide array of WordPress themes and plugins, offering versatility in design.
Continuous Support: Regular updates and dedicated support ensure reliability and assistance for users.
Creating a New Single Post Template Step-by-step Guide
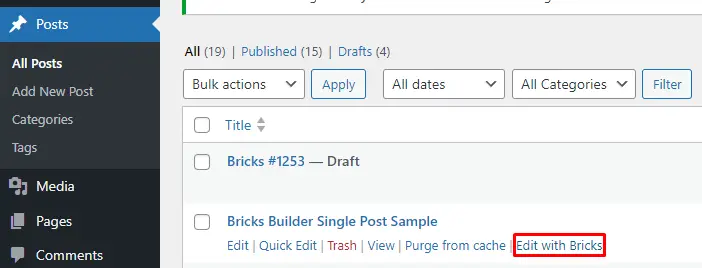
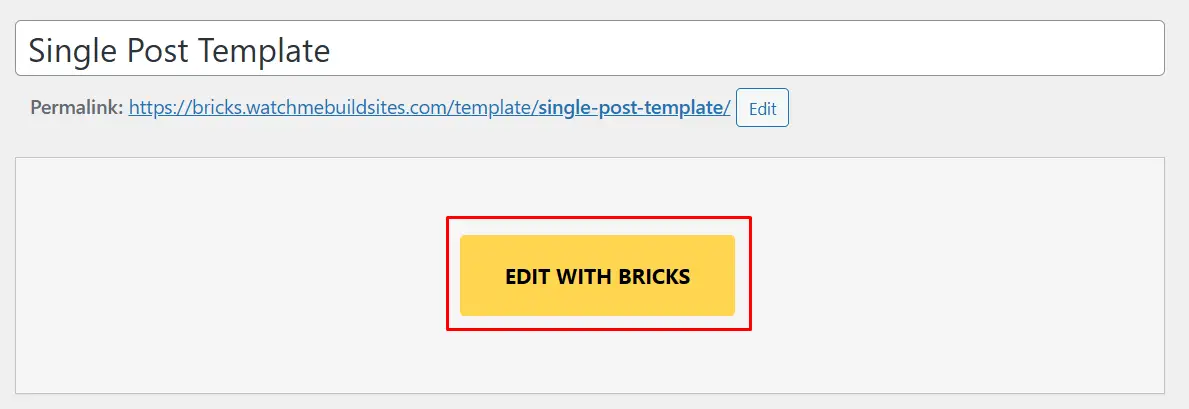
Access Bricks Builder: Log in to your WordPress dashboard and navigate to the page or post where you want to create the new single post template. Click on the “Edit with Bricks” option to access the Bricks Builder interface.
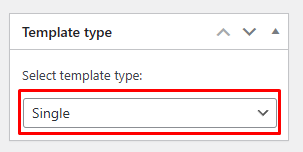
Title and Template Type:
Give your template a title that reflects its purpose or content. Then, from the template type options, select “Single”. This indicates that you’re creating a template for individual posts or pages.
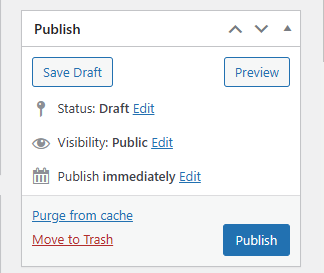
Saving Options:
Before diving into editing, you’ll have the choice to either save your template as a draft for further modifications or publish it immediately. Choose whichever option suits your workflow.
Entering Bricks Editor:
Once you’ve made your selection, click on “Edit with Bricks” to enter the Bricks Editor interface. This is where the actual design and customization process takes place.
Adding Sections and Elements:
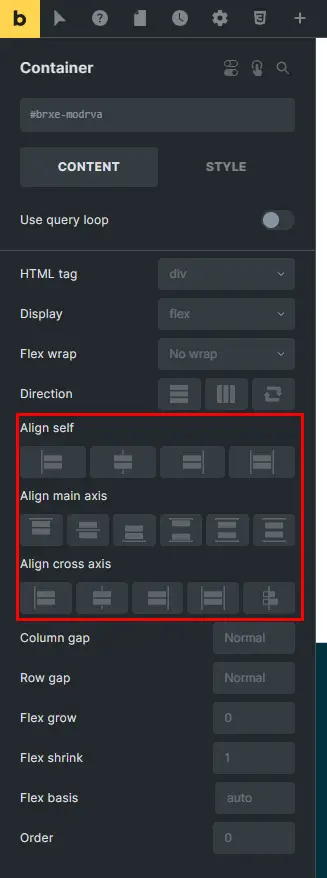
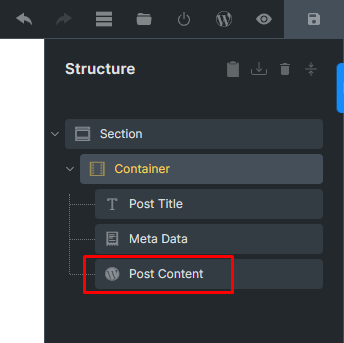
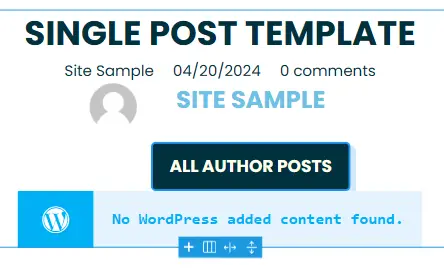
Begin by adding a section to your layout. Sections are containers inside your layout that hold various elements. Within the section, add the “Post Title” element. You can adjust its alignment to fit your design preferences.
Adding Post Content:
Now, go back to the elements panel and add the “Post Content” element within the section you previously created.
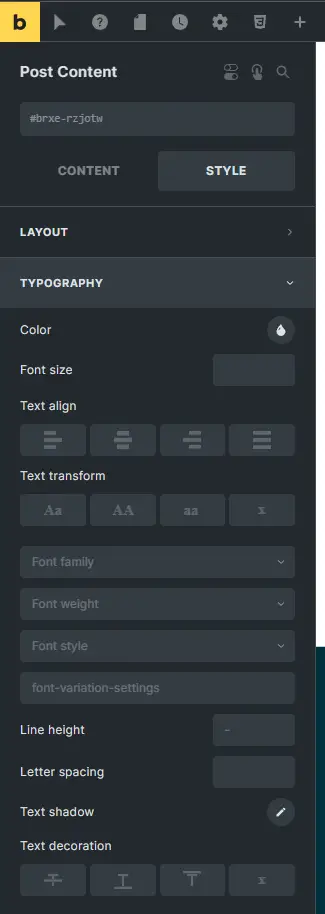
Typography and Styling:
Fine-tune the appearance of your post content by adjusting typography, spacing, and alignment. You can also experiment with different color schemes to match your branding or enhance readability.
Metadata and Author Details:
Below the post title, add elements for metadata (such as publication date) and author information. Ensure these elements are aligned and spaced appropriately to maintain visual consistency.
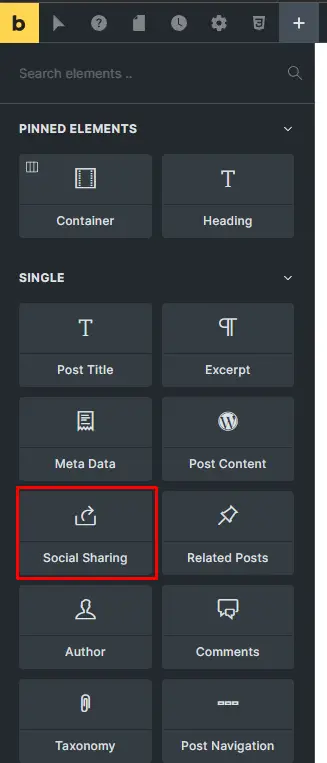
Social Sharing Integration:
Enhance user engagement by including social sharing buttons below the post content. These buttons allow readers to easily share your content across various social media platforms, extending its reach.
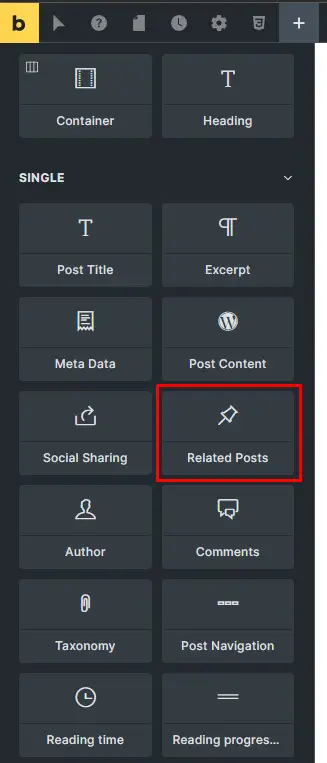
Adding Related Posts:
Finally, add another container to your template and insert the “Related Posts” element. Customize the query parameters to determine which related posts are displayed, and adjust styling options such as padding for optimal presentation.
Conclusion and Next Steps
In conclusion, this article provided a comprehensive guide to creating a basic single-post template using Bricks Builder for WordPress. We covered essential elements such as title and template type selection, customization options including background, typography, and styling, integration of metadata, social sharing buttons, related posts, comments, and content population. Additionally, we discussed previewing, refining, and saving the template for deployment. By following these steps, users can create a visually appealing and functional single blog post template tailored to their preferences and branding.


