How to Exclude Headings in Your Elementor Table of Contents

Facebook
Twitter
LinkedIn

Elementor has a “Table of Contents” element that works well. However, sometimes there are problems in that it lists content that is not in the blog post.

For instance, it will list your “related posts” or a social share button in your Table of Contents. This happens when those things are the same heading size as the heading sizes you choose to list in your table of content.

There is a pretty easy way to get rid of this. There is a little bit of legwork you need to do once. But as soon as you are done with that, you can save the “Table of Contents” as an Elementor template and just insert it into your other posts and your table of contents will display correctly. 

Note: In Elementor 3.8 onwards, there is a very easy way to do this. In our article, it is the third method. So if you are running Elementor 3.8 onwards, just go to method 3 below for removing unwanted headings in your Elementor table of contents.

Table of Contents

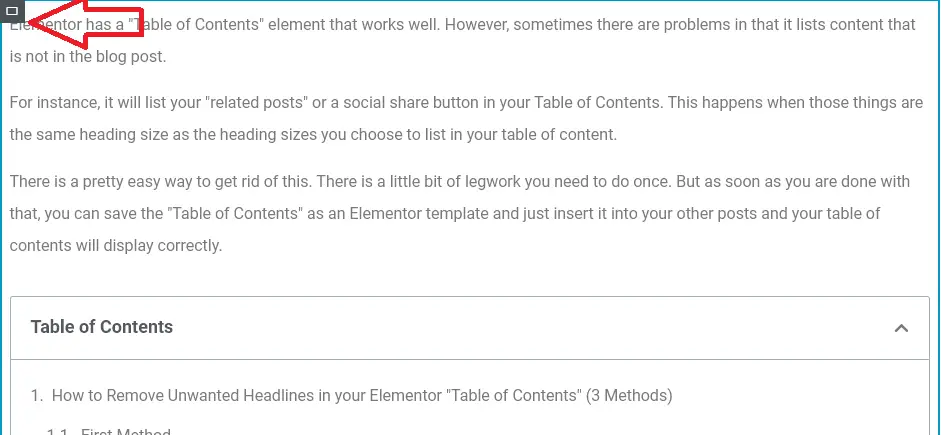
How to Remove Unwanted Headlines in your Elementor “Table of Contents” (3 Methods)

In the tutorial below, we are detailing the three methods to do it. But if you are running Elementor version 3.8 onwards, just use the third method. It is by far the easiest method.

First Method

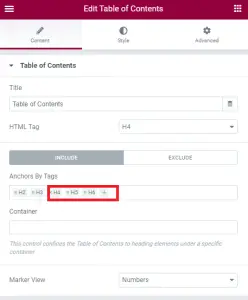
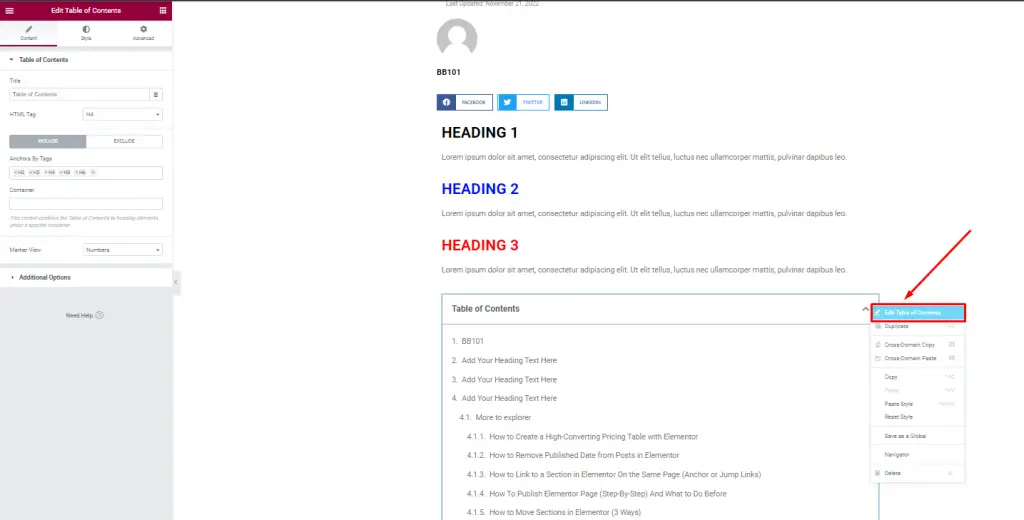
The first method is the easy “Duh” method. Essentially, you click on the “Table of Contents.” Then you head down to “Anchor By Tags” and remove any heading tags you don’t want to be included. So removing H4, H5, H6 will do the trick sometimes.

But if that doesn’t work, here’s the surefire way to do it.

Second Method

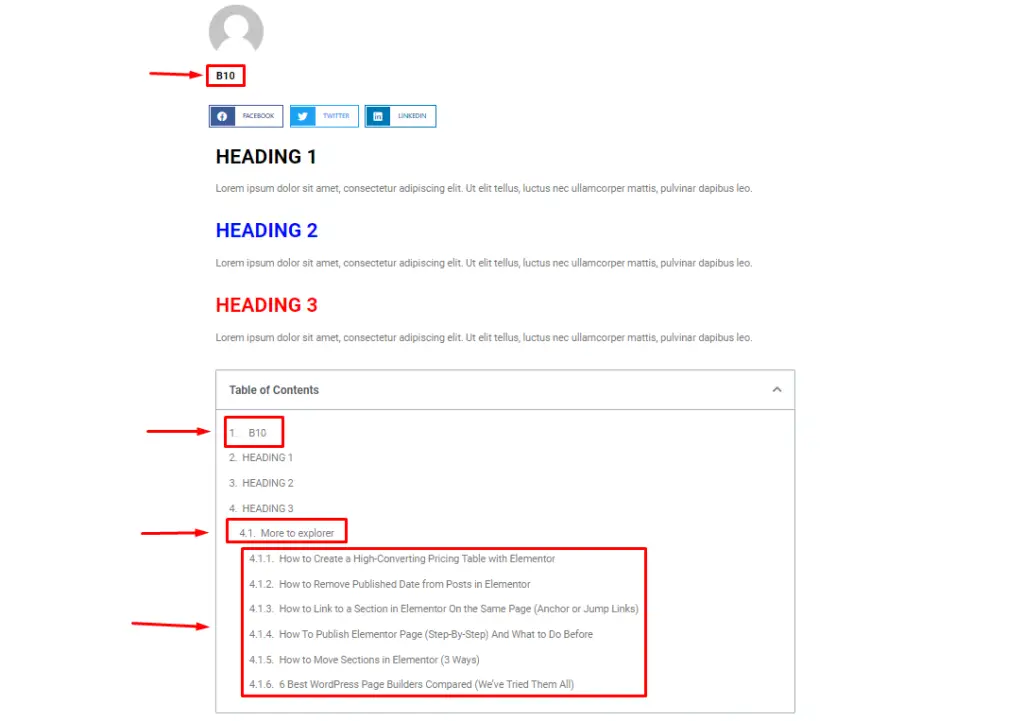
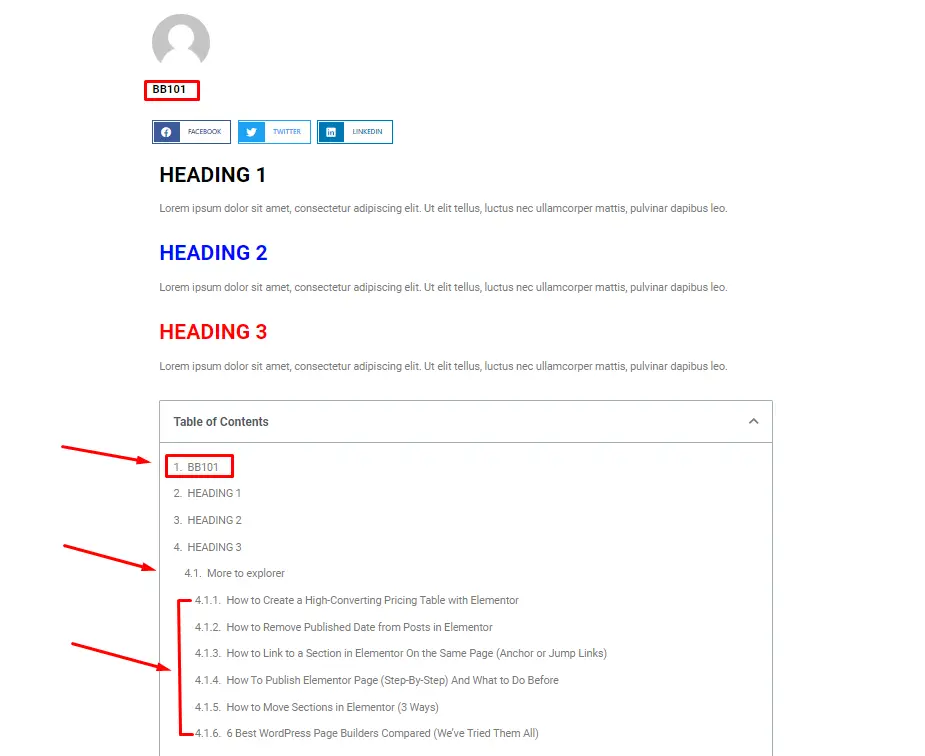
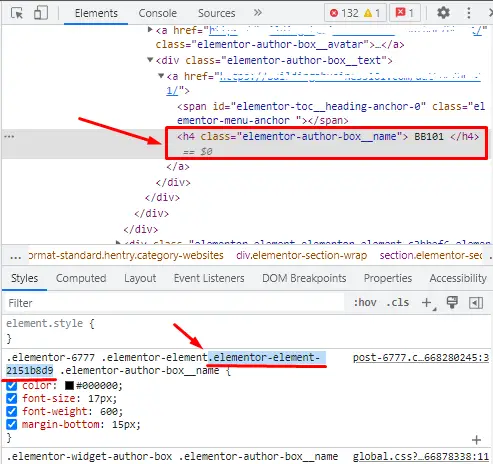
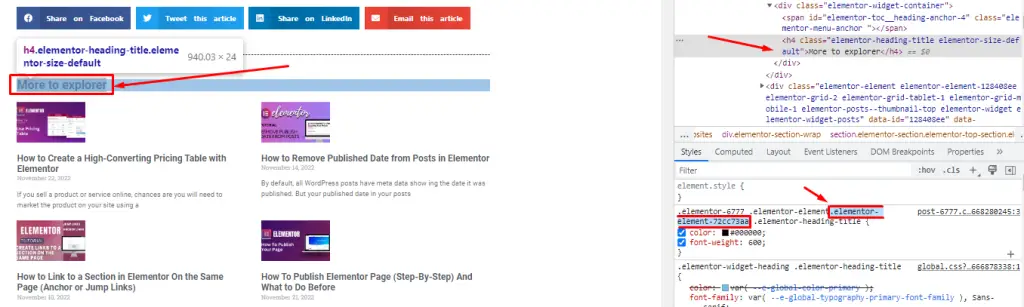
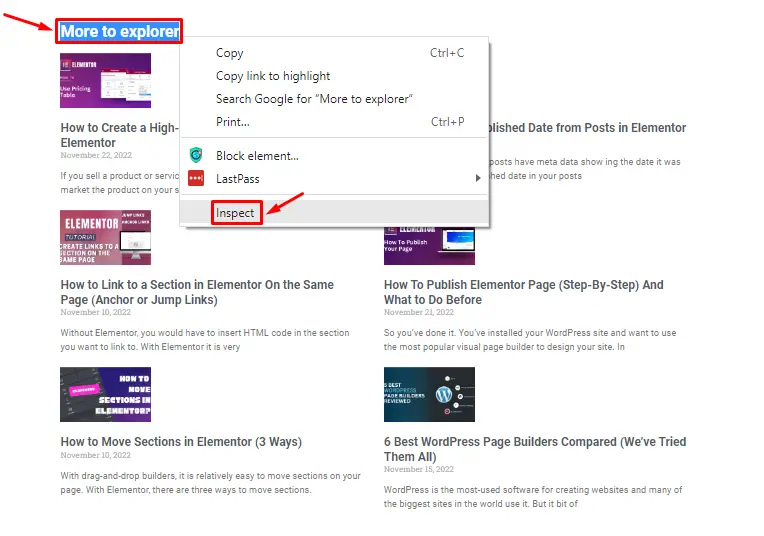
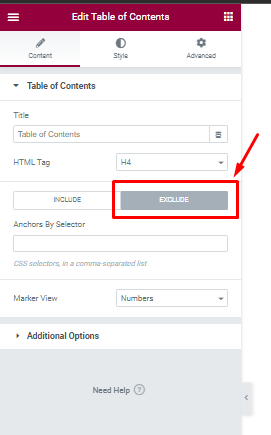
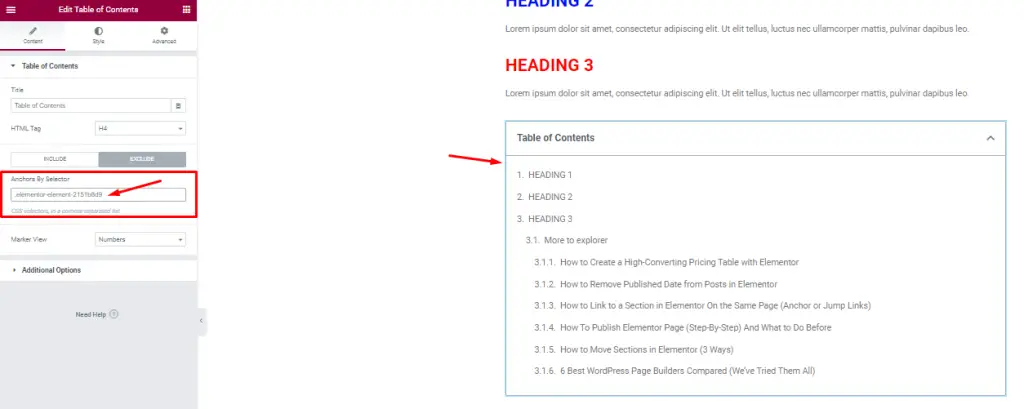
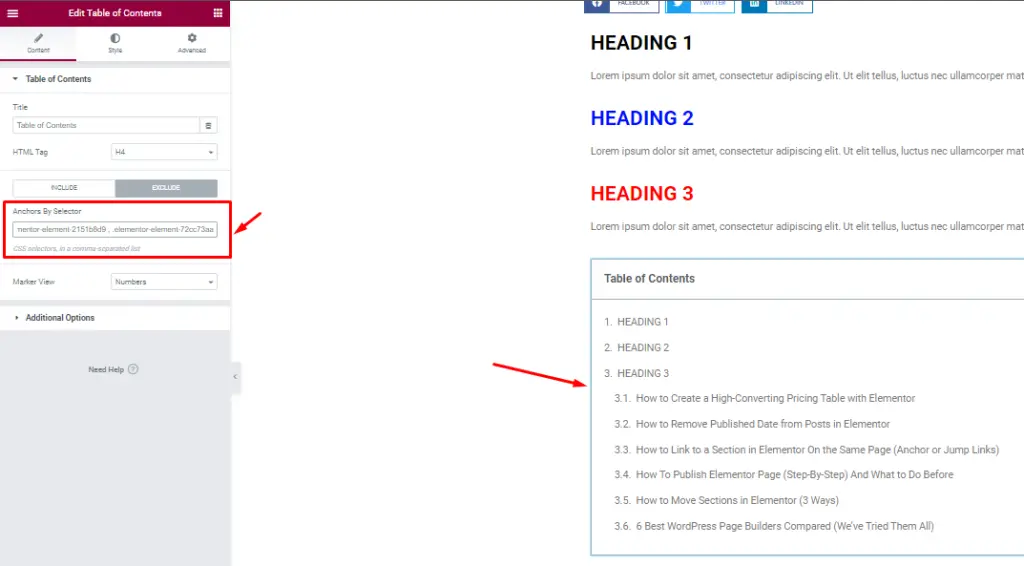
So if you want to include certain headings with the same tags but exclude others, here is the surefire method to do it.

Step 1: First, highlight the unwanted headings that you don’t want to include in the table of contents. 

In the example above, it is the author name (BB101) and everything under the “More to explore” section as those posts are “related posts” underneath the actual blog post.

Step 2: Then, right-click on the heading and click “Inspect”. In the example below, we first inspect the author box name to see the CSS selector (elements). The CSS selector for the author box name is underlined in red in the image below.

Now let’s get the selector for the related content headings. Do the same as above to get the CSS selector.

Step 3: After you have copied the CSS selectors you want to exclude, go ahead and click on the “Table of Contents” element.

Next, when the elements are open. Go to “Styles” tab and scroll down to the “Exclude” section.

Step 4: Go to “Exclude” and then paste the CSS elements you copied in the “Anchors By Selector”.

Third Method (THE EASIEST METHOD)

This method of removing unwanted headings in your table of content works in Elementor 3.8 onwards and it is very easy.
Step 1: Edit the outermost container of your page’s content by clicking the “Edit Container” rectangle on the left upper corner. Make sure all the content headings that you want to be included in your table of content is nested inside this container.
Step 2: Go to the Advanced tab.
Step 3: Go down to CSS Classes under the Layout section and name your CSS class without the period. For instance, you can put in main in the CSS Classes field.

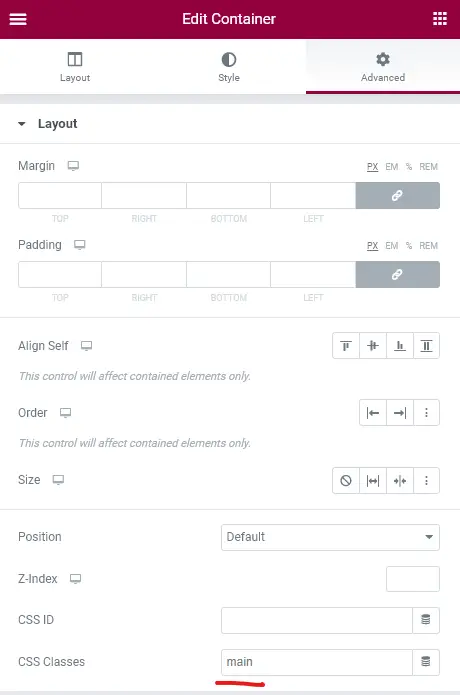
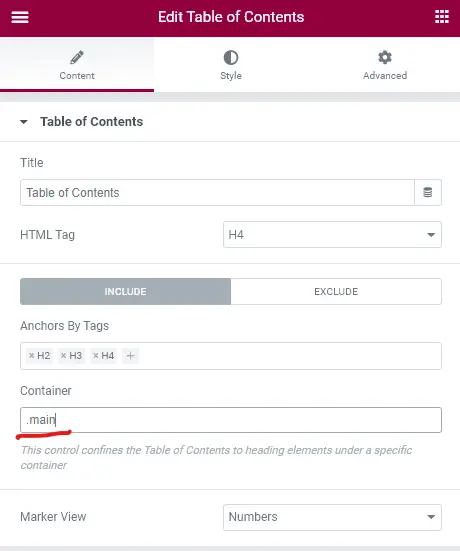
Step 4: Go to the Advanced tab of your Table of Content and put in .main. In here, you are putting the CSS class in with the period.

Making your Modified Table of Contents a Template (So You Don’t Have to Exclude Headings Every time)

Boom, you’re done excluding headings in your Elementor table of contents. You’ve just excluded unwanted headings in your table of contents. Now let’s make it a template so we don’t have to do this for every post.

Step 1: Right-click on the “Edit Section Element” where you table of contents is.

Then, select “Save As A Template” to access your saved template in the library folder whenever you want to add TOC to a post or page.

Step 2: You’re done. Now all you have to do is insert the table of content template you just saved into any post you want and it will automatically exclude those headings. All you have to do is to select “My Templates” and click on the insert button.

For more Elementor tips and tricks, check out our Elementor tutorial section.

And if you want to watch a video walkthrough of this article, here is our Youtube video showing you how to do it below.

Share on Facebook
Tweet this article
Share on LinkedIn
Email this article

More to explorer

Crafting Hero Section in Brizy

Understanding the Importance of a Hero Section Introduction to Hero Sections A hero section is the prominent and visually striking part of