
Introducing the Text Path Widget
In the ever-evolving landscape of web design, Elementor stands out as a powerful and user-friendly page builder. One of its standout features, the Text Path Widget, introduces a new dimension to creative expression. This tutorial is your key to unlocking the full potential of the Text Path Widget in Elementor, allowing you to craft visually stunning and dynamic text paths seamlessly.

A Closer Look at Widget Features
Text Input
Your Message, Your Way

Crafting your message becomes effortless with the Text Path Widget. Whether you prefer manual entry or dynamic text options, this feature puts the power in your hands.
Path Type
Choose Your Path Wisely
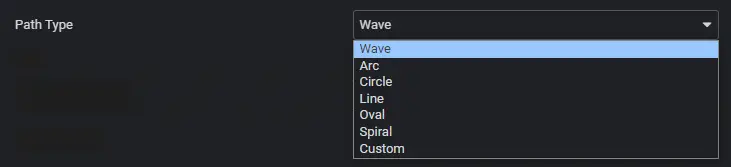
Navigate through a dropdown list offering diverse path types like Wave, Arc, Circle, Line, Oval, Spiral, or upload your unique SVG path file for a personalized touch.
Linking Magic
Connect with Your Audience

Enhance engagement by seamlessly integrating links into your captivating text. Whether it’s a specific URL or dynamic options, the Text Path Widget makes connecting with your audience a breeze.
Alignment and Direction
Precision in Presentation

Fine-tune the alignment of your text and choose its orientation, be it Default, RTL (Right-to-Left), or LTR (Left-to-Right). Ensure precision in presentation for an impactful visual experience.
Navigating Text Path and Shape Options
Text Path Container
Where Style Meets Substance
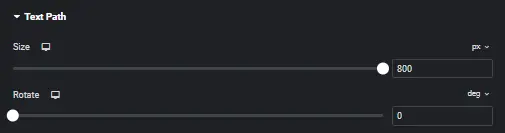
Shape the container of your text path with precision. Define the container size using either percentage (%) or pixels (PX), and infuse dynamism by setting the rotation in degrees.
Text Options – Typography Brilliance
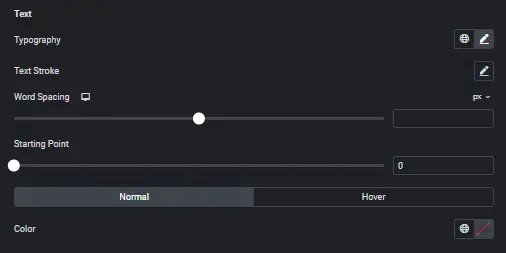
Elevate your text with advanced options. Choose font family, sizes, and style or opt for global control. Enhance readability by adjusting word spacing percentage and control the starting point of your text on the path.
Path – Crafting the Background
Customize the appearance of your path by selecting background colors using the color picker or global options. Define stroke width using the slider in pixels for a polished and professional look.
Enhancing Website Typography: Using the Text Path Widget in Elementor
Step 1: Open Elementor Editor
Navigate to the page or post where you want to enhance the typography.
Click the “Edit with Elementor” button to open the Elementor editing interface.
Step 2: Choose the Text Path Widget
In the Elementor editor, search for the “Text Path” widget in the left sidebar search bar.
Drag and drop the Text Path widget onto your desired section or column of the page.
Step 3: Enter your Text
Click on the Text Path widget to open its settings in the left sidebar.
Enter the text you want to display on the website in the “Text” field.
Step 4: Customize the Typography
Under the “Style” tab in the Text Path widget settings, you can customize the typography of the text.
Adjust the font size, font family, font weight, letter spacing, and other typography settings to your preference.
Step 5: Configure the Text Path
Scroll down in the Text Path widget settings to find the “Path” section.
Click on the “Edit Path” button to configure the path along which you want the text to follow.
You can select from various predefined paths or create a custom path using the built-in drawing tool.
Step 6: Adjust Path Animation (continued)
Choose the animation type (e.g., fade in, slide in) and set the animation duration and delay.
Experiment with different animation options to find the one that suits your website’s style.
Step 7: Fine-tune the Design
To further enhance the typography, you can customize other design settings available in the Text Path widget.
Adjust the color, background, padding, and margin to make the text visually appealing and aligned with your website’s overall design.
Step 8: Preview and Publish
Once you’re satisfied with the typography enhancements, click the “Preview” button to see how it looks on your website.
If everything looks great, click the “Publish” button to make your changes live.
Remember to save your progress regularly to ensure that you don’t lose any modifications made using the Text Path widget. Feel free to explore other Elementor features and widgets to enhance your website even further.
Conclusion
The Text Path Widget transcends traditional design boundaries, offering an intuitive and powerful way to shape your text. Whether you’re a seasoned designer or a novice, this tool empowers you to create visually stunning and engaging content with ease. Embrace the creative freedom the Text Path Widget provides and elevate your design game.


