
Introduction
In this step-by-step guide, we’ll walk you through the process of using the Video Widget in Elementor, a popular page builder for WordPress. Elementor makes it easy to integrate videos into your website, whether they’re from YouTube, Vimeo, Dailymotion, or your own self-hosted source. Let’s get started!
Step 1: Search for the Video Widget
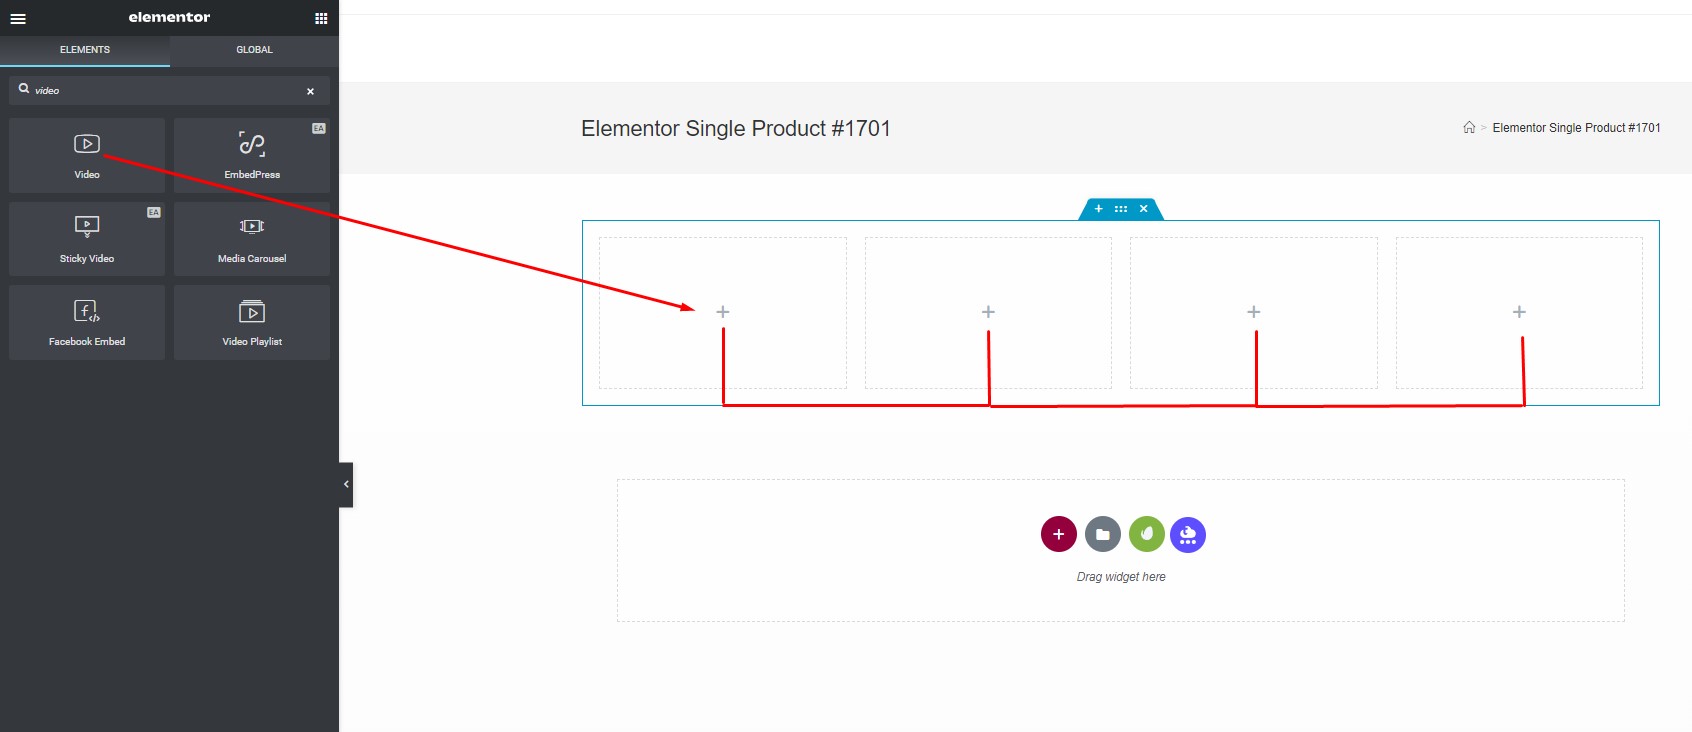
The first step in adding a video to your Elementor-designed webpage is to locate the Video Widget. To do this, open your Elementor editor, and in the left sidebar, search for the “Video” widget. Once found, simply drag and drop it into an empty section of your webpage.
Step 2: Select Your Video Source
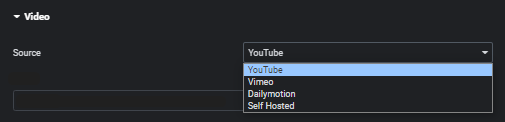
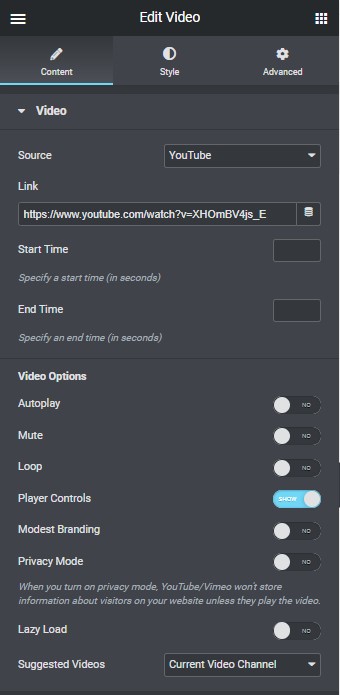
After adding the Video Widget, it’s time to choose the source of your video. You have several options: YouTube, Vimeo, Dailymotion, or your own self-hosted video. Select the source that suits your needs.
Step 3: Enter Video Details
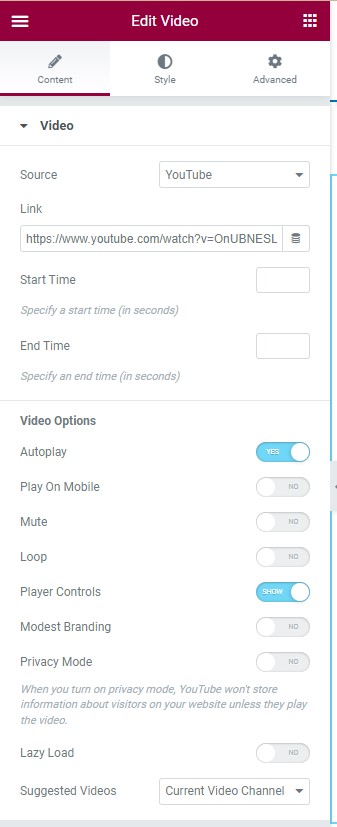
With your video source selected, you’ll need to enter the URL of the video you want to embed. Additionally, you can set the video’s start and end time, allowing you to showcase specific segments of the video. If you want the video to play automatically when the page loads, you can enable the auto-play option.
Step 4: Customize Player Controls
You can further customize your video’s playback experience by configuring player controls. If auto-play is enabled, you’ll see the “Play on Mobile” option, which allows iOS devices to auto-play the video. You can also choose to mute the video and enable looping.
When it comes to player controls, you have the option to show or hide elements such as Play/Pause, Volume, and more.
Step 5: Hide the YouTube Logo and Enable Lazy Load
If you want to enhance the user experience and ensure visitor privacy, Elementor provides additional features. You can hide the YouTube logo by sliding the “Modest Branding” slider to “YES.” Enabling this option ensures that YouTube won’t track visitor information until they actually watch the video.
For improved website performance, Elementor offers Lazy Load functionality. With this feature, video resources will only load when a user interacts with the Play button. You can choose to apply Lazy Load to the current video channel or any video on your webpage.
Step 6: Image Overlay
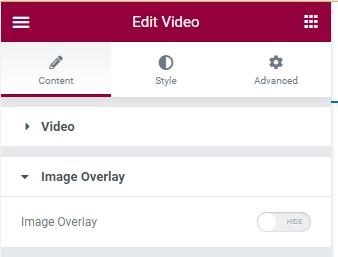
Elementor allows you to add an image overlay to your video. This feature is especially handy if you want to display a custom image or add branding to your video. You can show or hide the image overlay, set the image, and adjust its size. You can also enable a play icon overlay if desired.
Step 7: Style Your Video
Under the “Style” tab, you have the option to change the video’s aspect ratio, ensuring it fits seamlessly with your webpage’s design. If you still require more customization options, explore the left sidebar for a range of additional settings under the “Advanced” tab.

With Elementor’s Video Widget, you can seamlessly integrate video content into your website, enhancing your visitor’s experience and engagement. Whether you’re sharing instructional videos, product demos, or captivating content, Elementor’s Video Widget makes it easy to bring your vision to life.
How To Use Video Widget Embed: A Step-by-Step Guide
Step 1: Select the Source
The first step in embedding a video is to choose the source. For most users, this source is YouTube. Here, you have the option of hosting your video on external servers. By selecting the appropriate source, you are setting the foundation for your embedded video.
Step 2: External URL
If you decide to use a self-hosted video, you will need to enable the External URL toggle. This toggle becomes active when the video is not present in your Media Library. Once activated, a text box will appear, allowing you to enter the file’s URL. This step is crucial to ensure your self-hosted video is linked correctly.
![]()
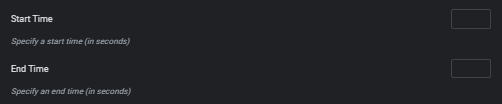
Step 3: Set Start and End Time
In this step, you can specify the start and end time for your video. If you want the video to play from the beginning to the end, you can leave these fields blank. However, if you only want a specific portion of the video to be played, enter the desired start and end times accordingly.
YouTube Settings
If you’re embedding a YouTube video, you’ll find additional settings to customize your video’s behavior:
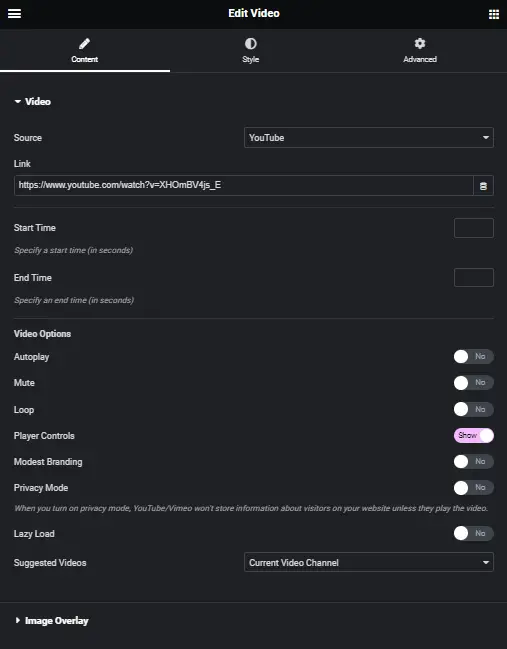
- Autoplay: Slide this toggle to ‘YES’ if you want the video to start playing automatically as soon as the page loads. It’s a great way to capture your audience’s attention instantly.
- Play on Mobile: This option only appears if Autoplay is set to ‘YES’. Enabling it allows iOS users to experience autoplay as well.
- Mute: Slide this toggle to ‘YES’ if you want the video to play without sound. This can be useful in situations where you want to provide visual content without audio.
- Loop: Enable this setting by sliding to ‘YES’ if you want the video to replay continuously, creating a seamless viewing experience.
- Player Controls: This setting allows you to show or hide the video player controls, giving you more control over the user experience.
- Modest Branding: When Player Controls is set to ‘YES’, you can further enhance the viewing experience by hiding the YouTube logo. Slide the Modest Branding slider to ‘YES’ for this feature.
- Privacy Mode: Decide whether you want to enable or disable Privacy Mode. When turned on, YouTube won’t store information about visitors on your website unless they actively play the video.
- Image Overlay: Choose to show or hide an image overlay to make your video presentation more visually appealing.
If Image Overlay is set to ‘Yes’, you can adjust the following options:

- Image: Select the image you want to overlay on the video.
- Lazy Load: Defer the loading of video resources until the user clicks the Play button, improving page load times and user experience.
- Image Size: Set the size of the overlay image to fit your design.
- Play Icon: Slide this toggle to ‘YES’ to display a play icon on the overlay image.
- Lightbox: Enable the Lightbox feature by sliding it to ‘ON’. This allows users to view the video in a pop-up window for a more immersive experience.
How To Use Woocommerce In Elementor?
The Products menu is where you populate your shop with things others can purchase.
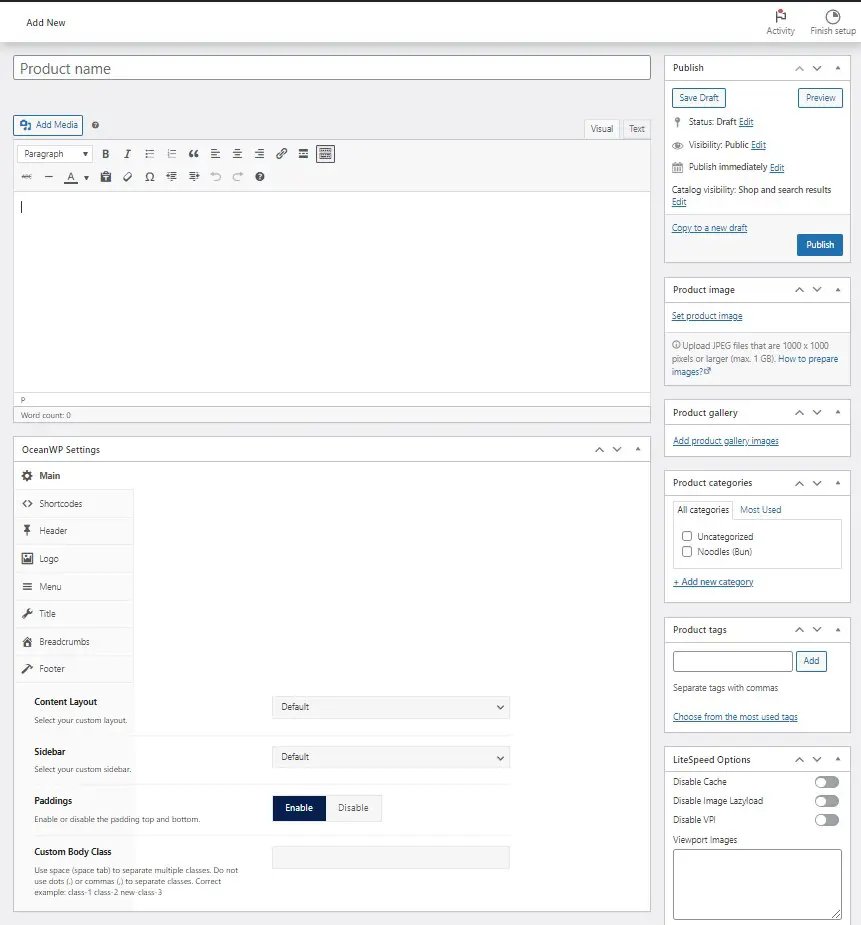
1. Add a Product
Create items to sell via Products > Add New. Clicking on it takes you to this familiar screen. Creating products in WooCommerce basically happens through the classic WordPress editor plus some additional options.
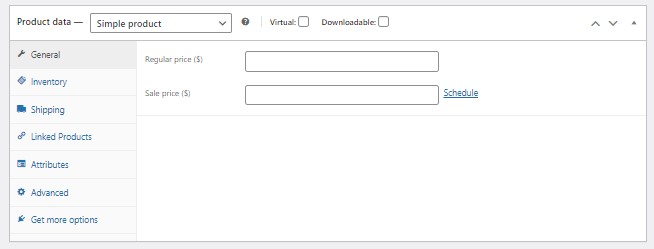
2. Configure Product Data
You find the product data below the main editor window. Filling in this information is mandatory for your shop to work.
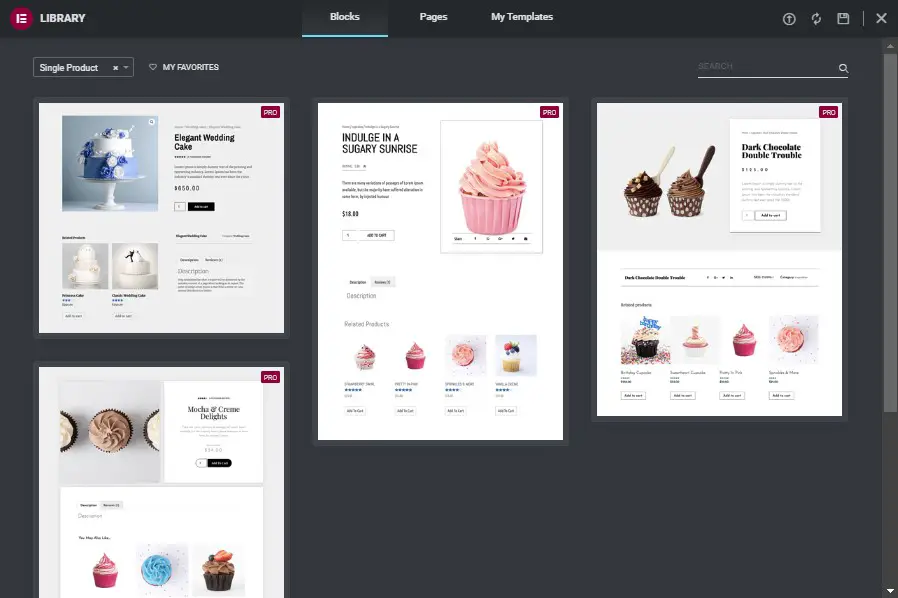
3. Build a Product Page using Elementor
You can also customize the look and feel of your product pages with Elementor. Yes, your favorite page builder integrates with WooCommerce. To create a new product template, simply go to Templates > Add New. Then pick Single Product as the type you want to create.
4. Configure the Add-to-Cart Button
Since the Buy button is one of the most central elements of every online shop, it deserves special mention here. Elementor offers two options for Add-to-Cart buttons: regular and custom.
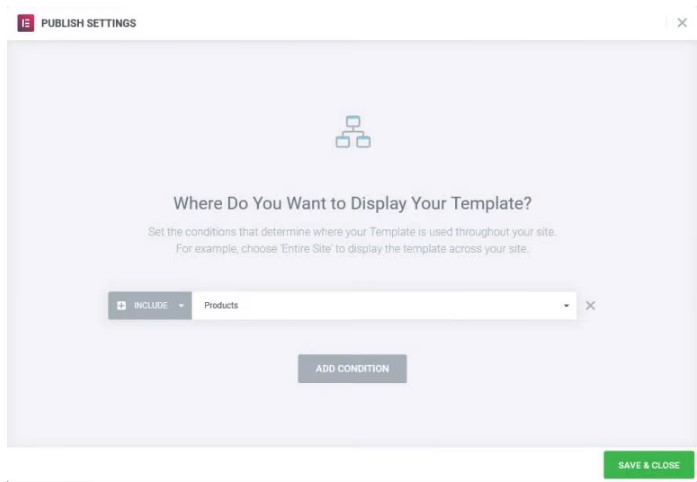
5. Finalize the Design
Finally, when you are done and ready to hit the Publish button, remember to set the conditions under which the new design should show up. This can be set for all products, for a certain category and/or child category, a tag, or only for products by a certain author. More complex conditions are also possible.
How To Add Video Gallery In Elementor?
WooCommerce stands as a robust e-commerce solution, offering a user-friendly way to establish and oversee your online store. Especially for WordPress users, WooCommerce seamlessly integrates, rendering it a favored option among online business owners. In this comprehensive guide, we will lead you through the process of leveraging WooCommerce in conjunction with Elementor, an excellent page builder, to craft an attractive and customer-friendly online shop.
Method 1: Creating a Dedicated Video Gallery Page
In this method, we’ll guide you through setting up a dedicated video gallery page on your WordPress website.
Step 1: Access Your WordPress Dashboard
First and foremost, log in to your WordPress dashboard. If you’re not already logged in, enter your credentials and gain access.
Step 2: Navigate to Pages and Add New
Once you’re inside your dashboard, go to the ‘Pages’ tab on the left sidebar. From the dropdown menu, select ‘Add New.’ This action will take you to a new page setup.
Step 3: Name Your Gallery Page
In the new page setup, give your gallery page a unique and descriptive name. This name will appear on your website’s menu or wherever you choose to link your video gallery.
Step 4: Create Your Video Gallery
Now that you’ve named your gallery page, it’s time to create the actual gallery. Follow the instructions for Method 2 to proceed with building your gallery.
Method 2: Creating a Video Gallery on Any Page
If you prefer not to create a dedicated page for your video gallery, you can integrate the gallery into any part of your website. This method offers flexibility in terms of placement.
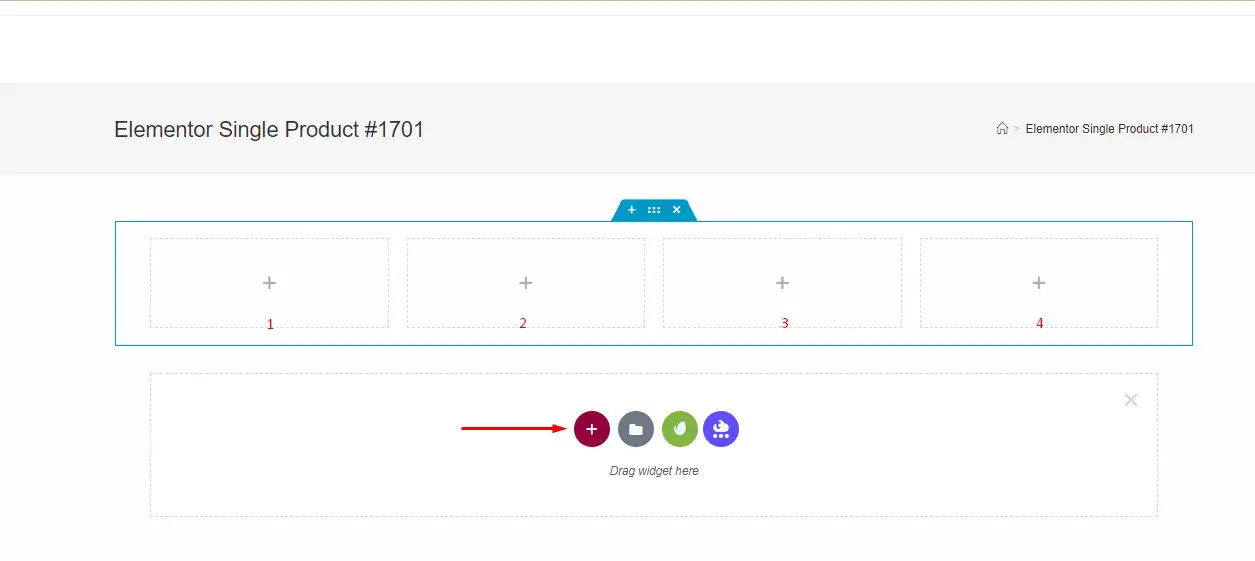
Step 1: Choose Your Gallery Structure
To start, select the page or area where you want to embed your video gallery. Click on the plus button to add a new element to that page or section.
Step 2: Add Videos to the Gallery
Now, it’s time to populate your gallery with videos. Follow these steps:
Step 3: Add Own Videos
You just add your own videos into the gallery. Customize the option that you want for the video using the options at the left sidebar.
Step 4: Duplicate Your Gallery
If you want the same gallery format in multiple parts of your website, you can easily duplicate it. This can save you time and ensure consistency throughout your site.
Right-click on the section you’ve created.
Find the option to duplicate the entire section.
You can also copy and paste the gallery format into other sections or pages on your website.

Conclusion
Creating a video gallery in WordPress is a straightforward process that allows you to showcase your multimedia content effectively. Whether you choose to create a dedicated gallery page or integrate it into your existing pages, your website’s visual appeal and user engagement will significantly benefit from this addition.
To ensure a seamless user experience, make sure your videos are engaging and relevant to your target audience. Experiment with different gallery layouts and options to find the best fit for your website’s design.


