

Introduction
A Price List Widget is a dynamic element that displays a catalog of products or services along with their corresponding prices. It acts as an organized showcase, presenting information in a visually appealing manner.
Setting Up Elementor for Online Ordering
Getting started with Elementor and online ordering is easier than you think. After installing and activating the plugin, navigate the Elementor dashboard and add a new page dedicated to your products or services.
Step 1: Go to the Elements Panel and search for the Price List.
Drag it to the new section
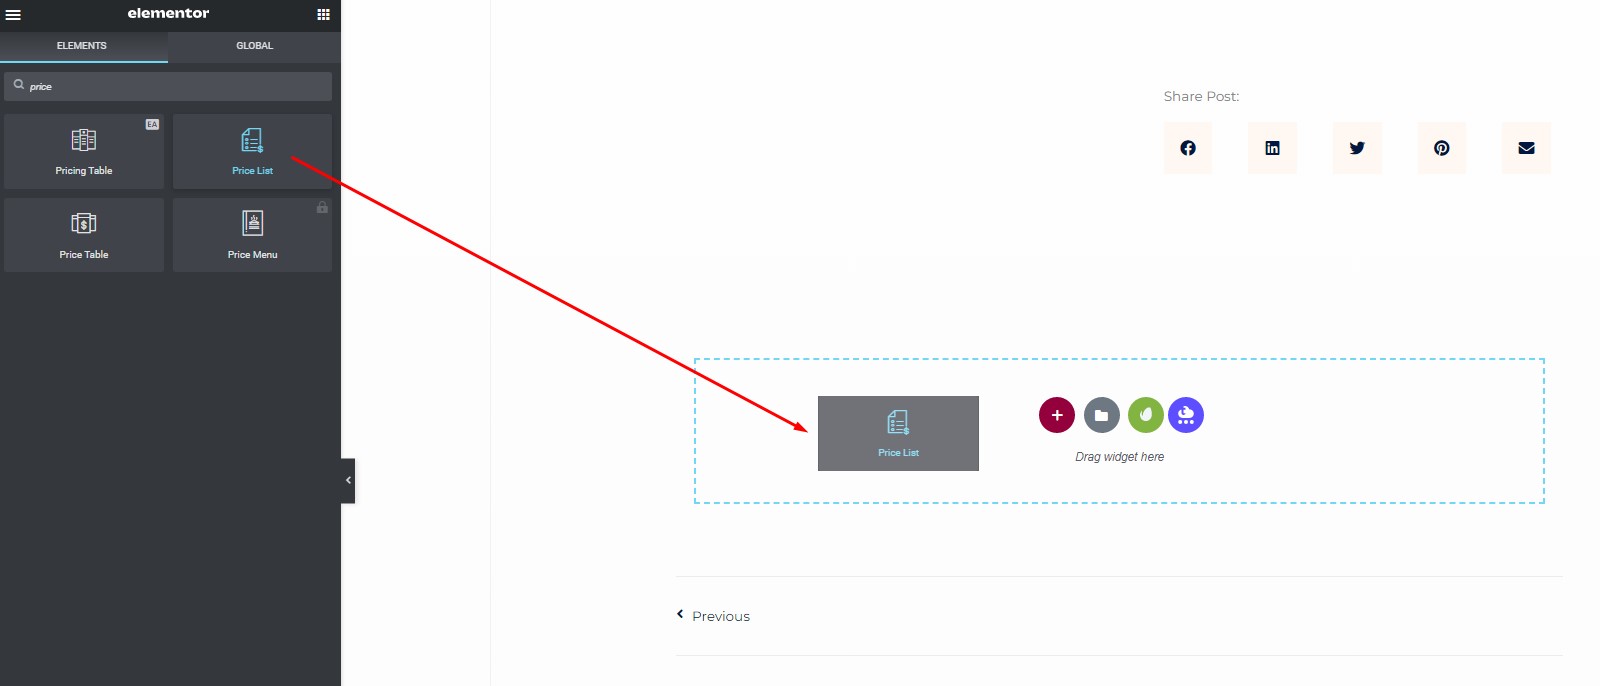
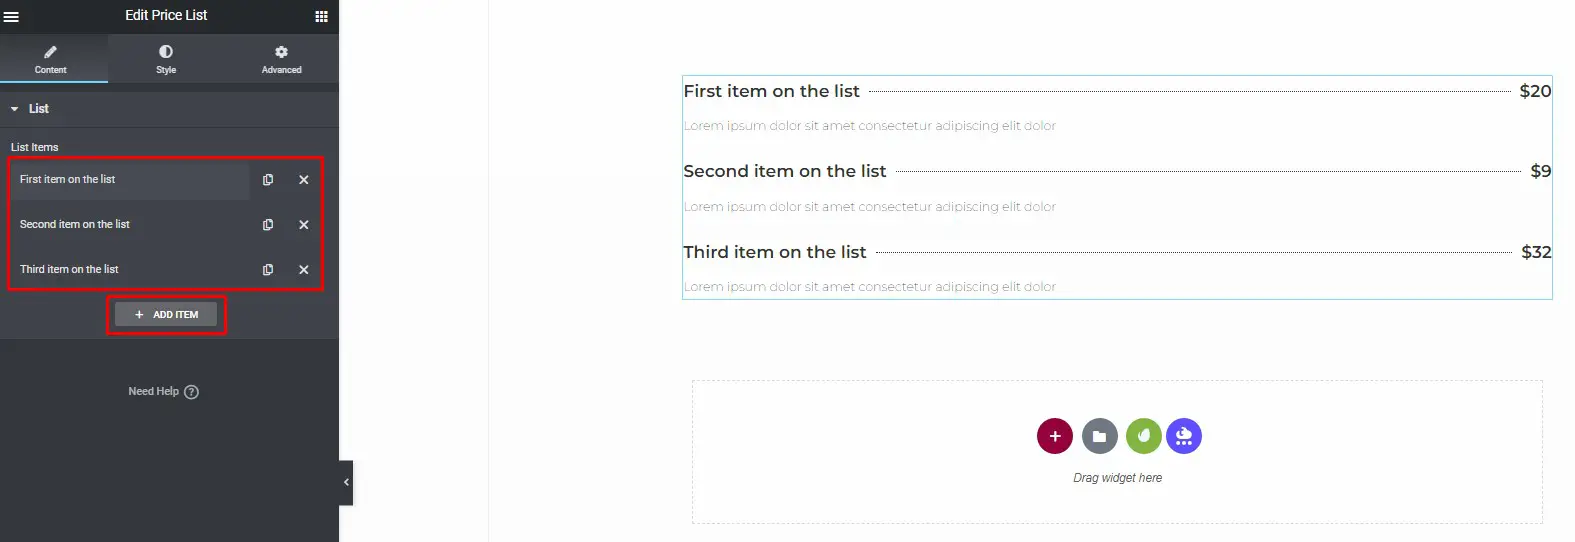
1. Displays a list of all the widget’s items. You can reorder them by dragging and dropping them.
2. Add another item to the list, and click the Add Item button.
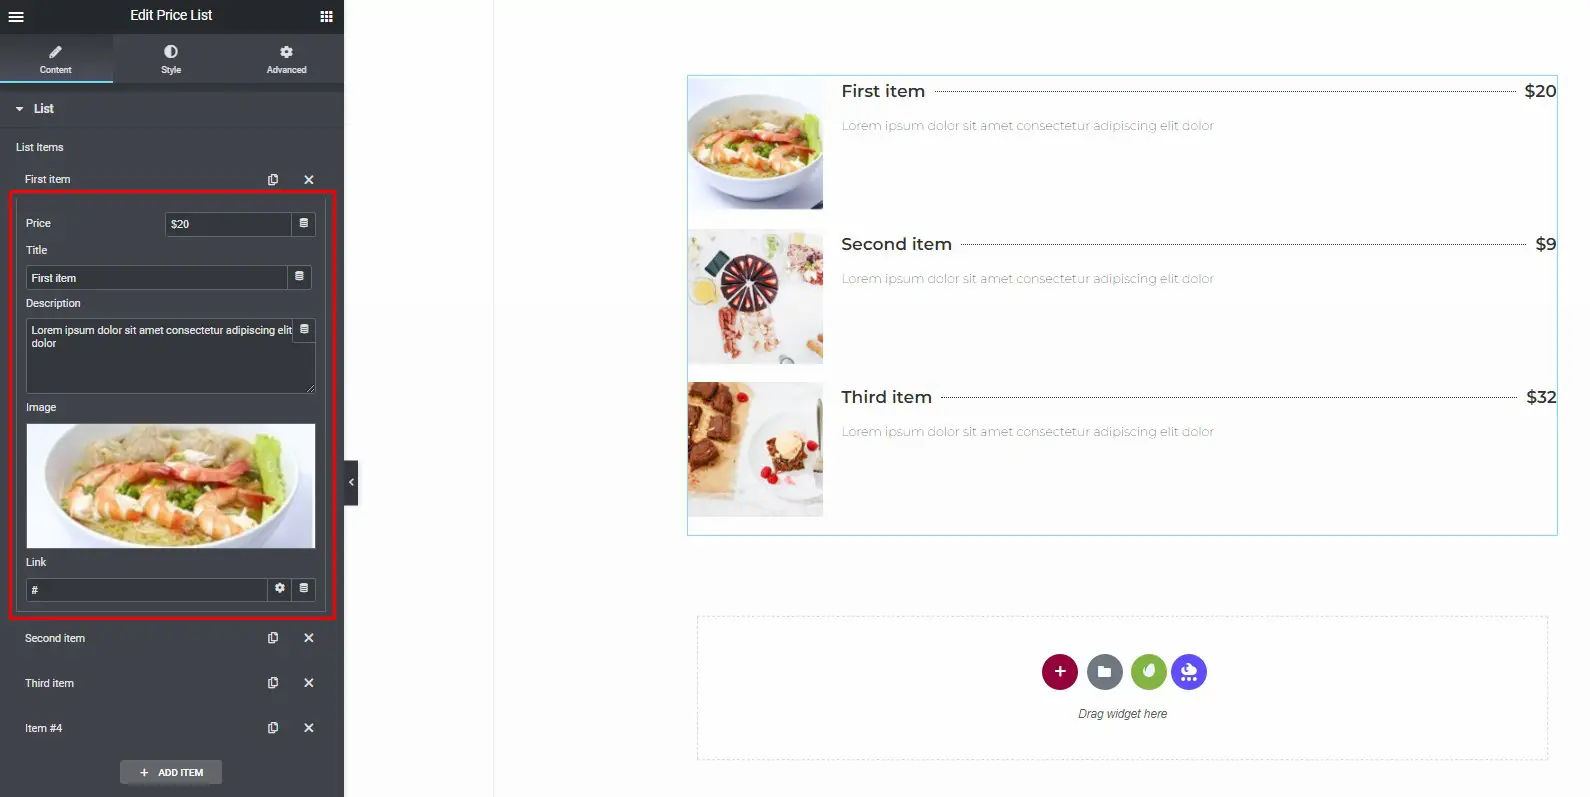
Step 2: Set the Elementor Price List
1. Add the item’s price.
2. Give the item a title and a description.
3. Select a picture from the media library.
4. Put in the link’s URL for the item.
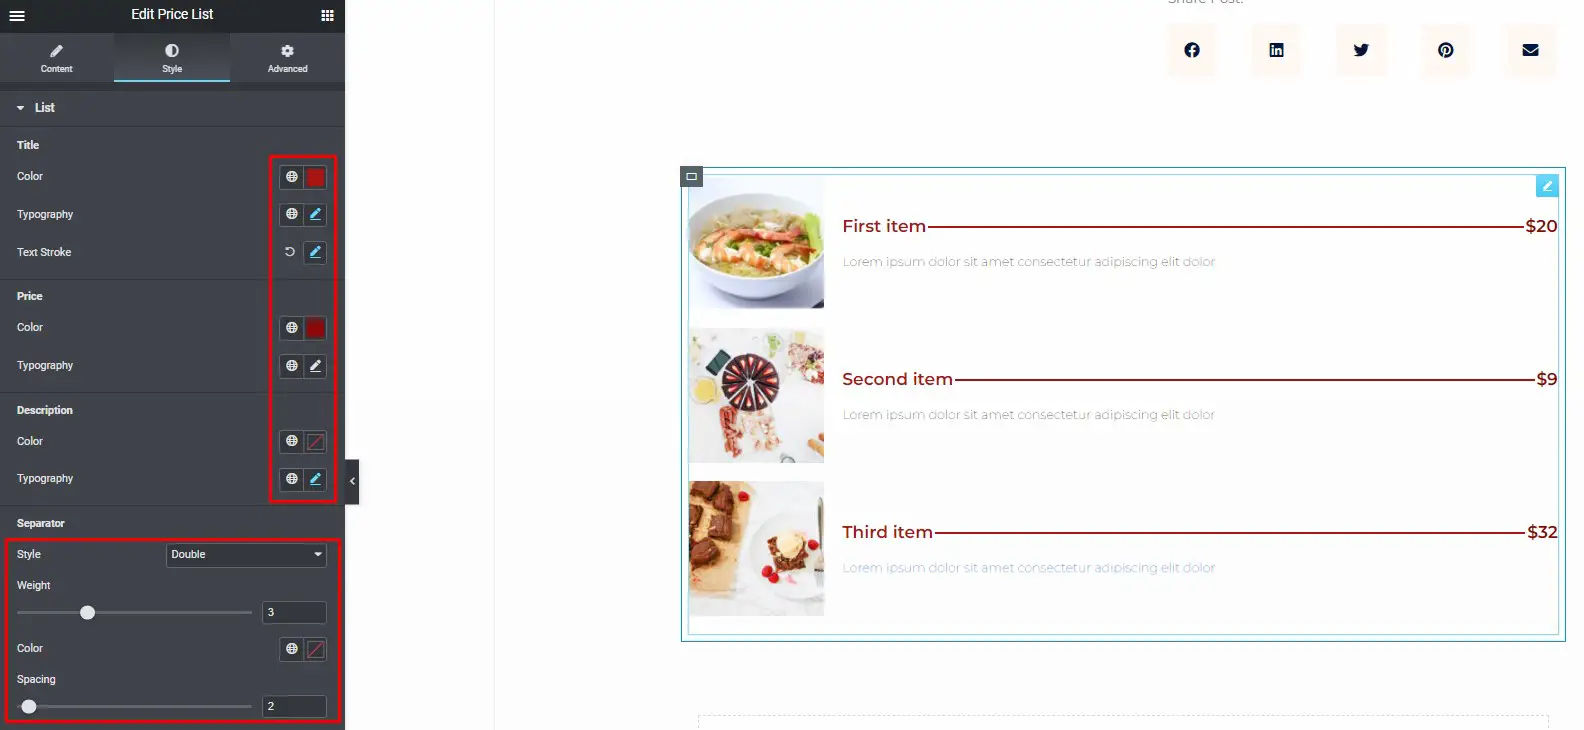
Step 3: Customize the Price List Styles
You can change the styles of the list, image, and item under the Style tab.
List
Customize the title, price, and description.
1. Set the color, typography, and text stroke.
2. Set the Style, Weight, Color, and Spacing for the Separator.
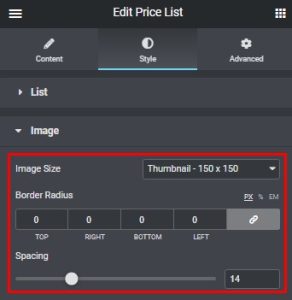
Image
Set the image size, border radius, and spacing for the image.
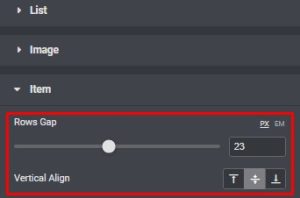
List
Set the row gap and the vertical alignment for the image.
If you go to the Advanced tab and set the styles there, you may use the standard Elementor toolkit for the advanced styling.
You can now save your pricing list once you’ve finished designing it.
If you want to link each item to another page dedicated solely to that item, you can use the Link feature of the widget to link to separate pages.
How to Enable Online Ordering With The Price List Widget
You don’t need a fancy plugin to do online ordering of your restaurant menu items. All you need is Elementor’s Price List widget and WooCommerce.
In this tutorial, we are going to go over how to use this Price List widget to take orders through your website. This is a very quick and easy method of adding online ordering to your site and can be done in 1-2 hours.
And you don’t need to take payments over the Internet if you don’t want to—you can take the order online and take payments physically at the store.
Steps to Add Online Ordering to Your Menu
Here are the steps to add online ordering to your menu items using the Price List widget.
Install WooCommerce
WooCommerce is the most popular e-commerce plugin for WordPress. Even if you don’t want to take payments online, you can use WooCommerce to take orders online and pay at the store.
Configure WooCommerce and Payment Options
Once you install WooCommerce, go through their setup process to get your online store up and running. It should only take a few minutes.
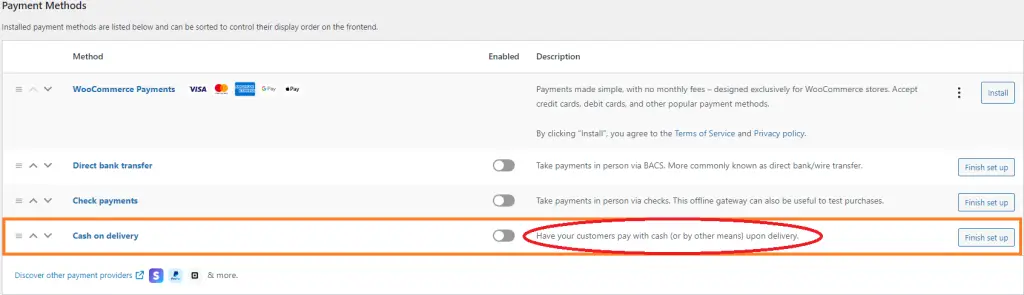
Note: If you want to save yourself the hassle of setting up online payments and want your customers to pay when they pick up their order, you can go to WooCommerce–>Settings—>Payments
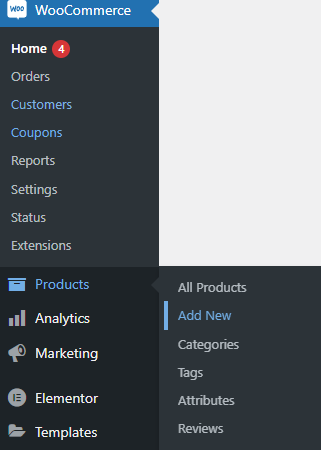
Input products
Once you’re done with setup, go ahead and input your products. You can do this by going to Products–>Add New.
Create a New Page
Go ahead and create a new page in Elementor and once the page is created, click on Edit With Elementor. You can name this page “Menu” or “Order” or something of that sort. This will be the page where you display your menu for people to order online.
Two-Column Container Setup
Click on the + button and choose a two-column container

Size it so that the left container is wider than the right container. The left side is where your menu will go and the right side is where the order buttons will be.
Add the Price List Widget
Add the Price List widget on the left side.
Search in the Elementor pane on the left-hand side for Price List. Add that to the left side of the container.
Add your menu items, price, pictures, and descriptions to this widget.
Add the Add to Cart Widget
Add the Add to Cart widget on the right side.
Search for Add to Cart in the Elementor pane and add that to the right side.
Each Add to Cart button will be linked to a product that you added in Step 3. Make sure the prices are the same on the menu item as what you put in during Step 3.
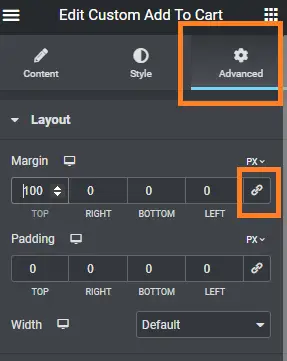
Adjust Margins and Padding
Adjust margins and padding of buttons
Go to the Advanced tab to adjust the margin and padding of the buttons.
Adjust the margins and padding so that each Add to Cart button matches with the item on the price list.
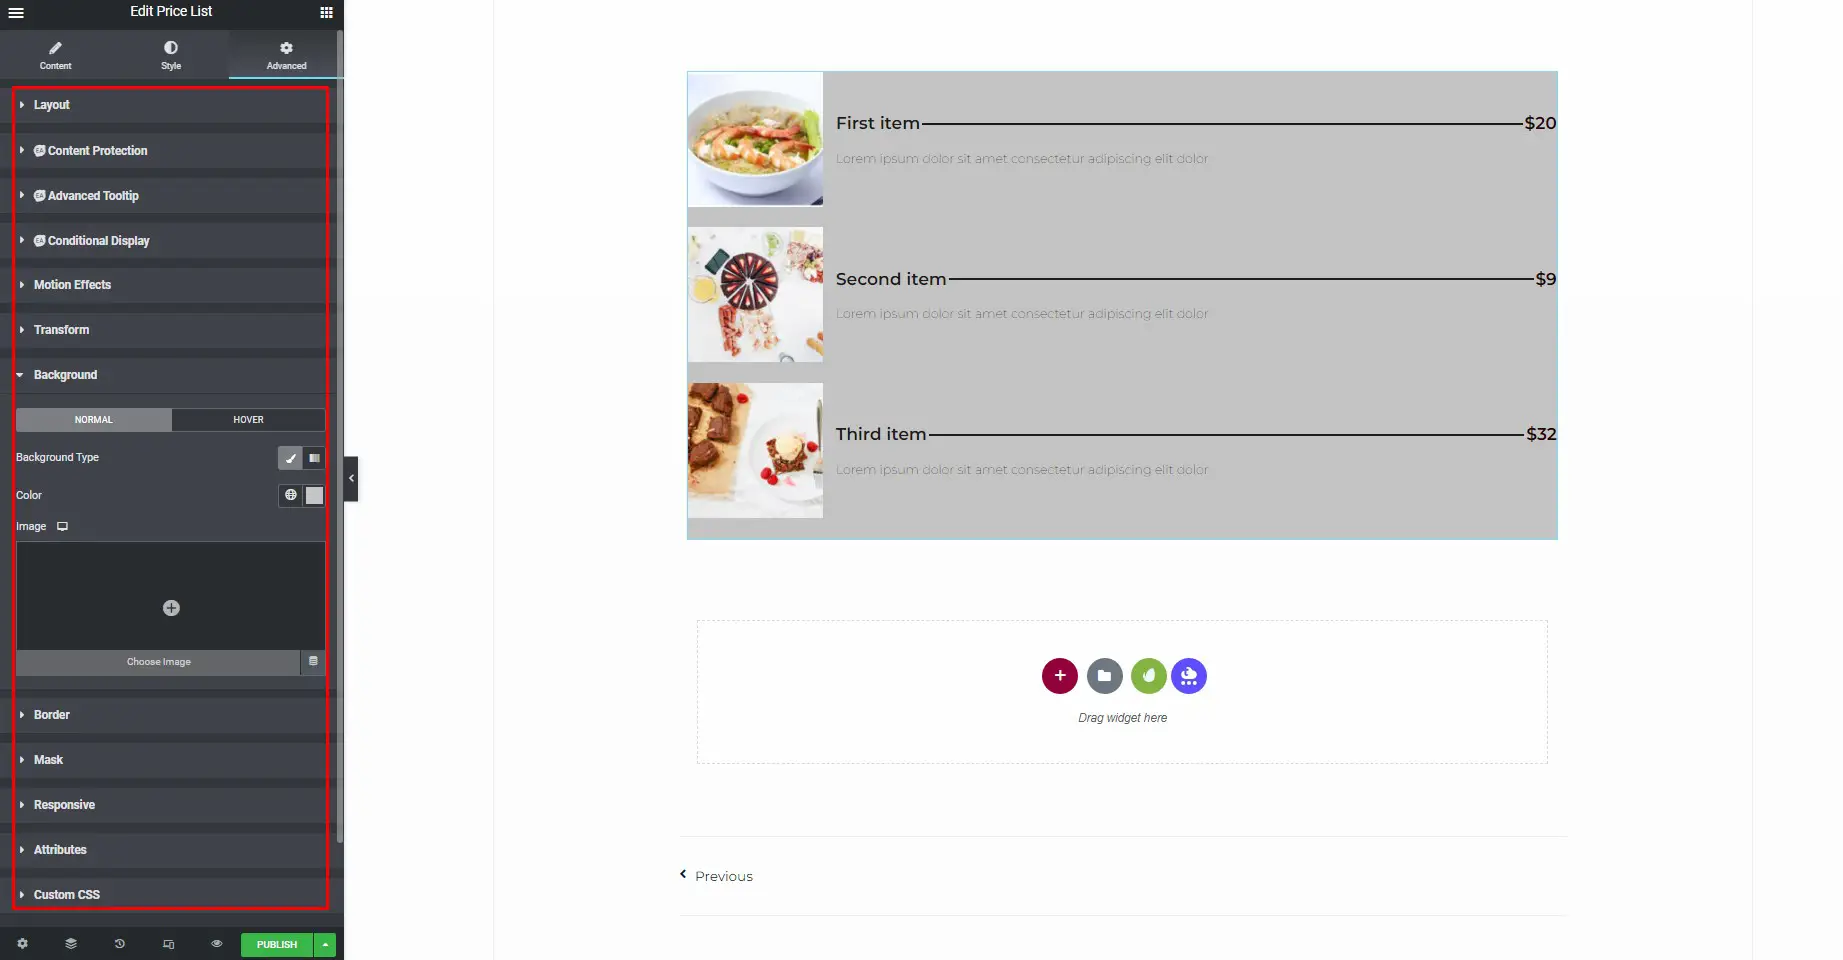
When adjusting the margins and padding, make sure the little link/anchor icon does not have a gray background. If it does, click on it to disable it. When there is a gray background, all four values change together. See the picture below for reference.
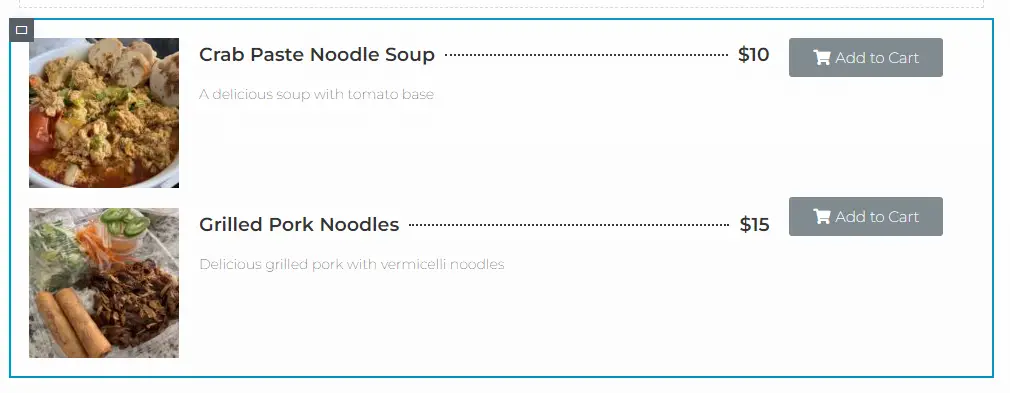
Final product
In the end, it should look something like this on a computer or laptop.
But wait…there’s more. One more really important step.
IMPORTANT: Modify Your Menu To Work On Phones and Tablets
Recognizing the Importance
You’re almost done but you’re not done quite yet. This is probably the most important step that most people will miss. You need to adjust the menu so that it works (well) on people’s phones. Most people will order through their phones.
To do this…follow these steps.
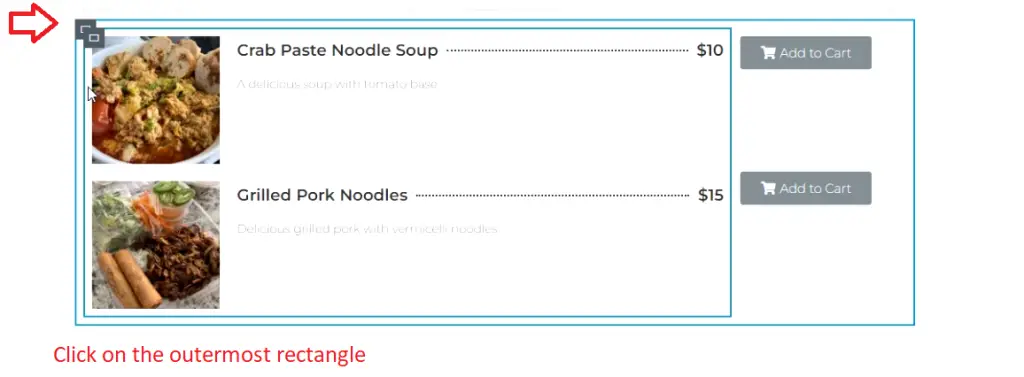
Step 1: Click on the outermost rectangle. That will enable you to edit both sides.
Step-by-Step Modification
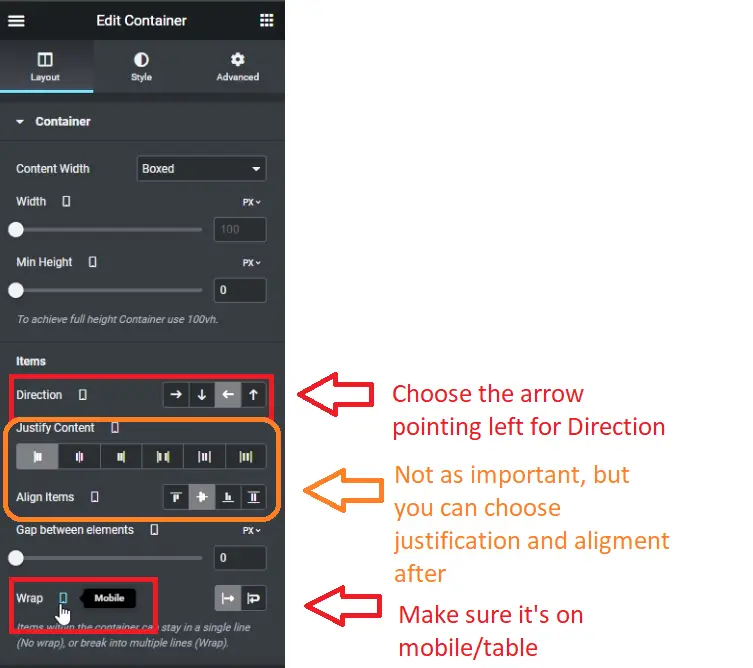
Step 2: Edit the layout of the container.
Once you are done editing in responsive mode, you should preview what it looks like on a phone/tablet.
To do so, you can view what it looks like in Elementor’s responsive mode. Or you can just publish the page and view it on your phone.
Alternatively, you right-click on the page in the browser and click “Inspect Element.” Then select at the top-left which device you want to emulate. Below, the view is emulated in a Samsung Galaxy S20.
![]()
Make sure that all your buttons are clickable and are supposed to do everything you want it to do. Always test your finished product on mobile/tablet.
There. Easy peasy. That’s how you do an online menu with online ordering capabilities without any fancy or expensive plugins.
But if you are looking for a more dedicated online ordering solution for restaurants, check out MotoPress.


