

Introduction
Elementor is a versatile and user-friendly page builder for WordPress that empowers website creators to design stunning web pages with ease. One of its standout features is the Portfolio Widget, which allows you to showcase your projects or work in a visually appealing manner. In this article, we will guide you through the steps on how to use the Portfolio Widget effectively.
Adding the Portfolio Widget
The Portfolio Widget in Elementor is a powerful tool for showcasing your projects or work in an organized and visually appealing manner. Here’s how to add it to your Elementor canvas:
Step 1: Search for the Portfolio Widget
- Open Elementor and create a new page or edit an existing one.
- In the Elementor editor, click on the widget icon.
- In the search bar, type “Portfolio.”
- Locate the Portfolio Widget and drag it to an empty section on your page.
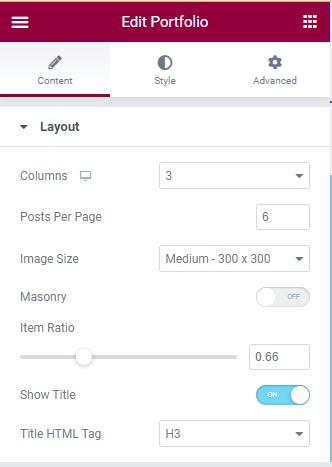
Step 2: Customize the Content
Once you’ve added the Portfolio Widget to your page, it’s time to customize the content tab.
- In the left sidebar, you can set the number of columns you want to display in the widget.
- Configure the number of posts to be displayed in the widget.
- Adjust the size of the images to fit your design.
- Turn on or off the masonry layout.
- Set the aspect ratio of the items.
- Enable or disable the display of project titles.
- Customize the HTML tag for the project titles.
Configuring the Portfolio Widget
Once you’ve added the Portfolio Widget and customized the content, it’s time to configure it to meet your specific requirements. Here’s how to do it:
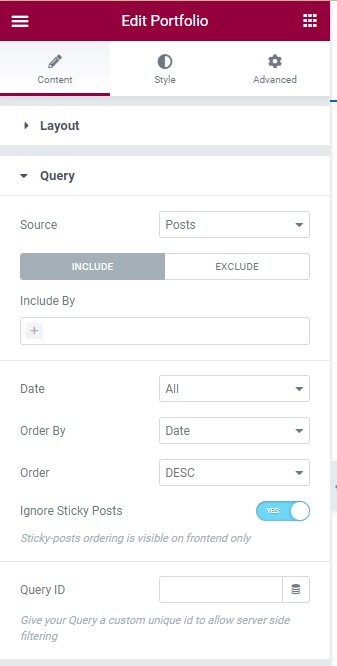
Step 3: Configure the Query
- In the Query section, choose the content source from which the widget will display projects. You can choose between “Term” and “Author.”
- Select your preferred date range for the displayed projects.
- Set the order in which the posts will be displayed, choosing between “Ascending (ASC)” and “Descending (DESC).”
- Decide whether to ignore sticky posts and choose “Yes” or “No.”
- Optionally, give your query a custom unique ID to allow server-side filtering.
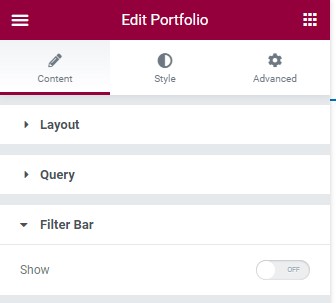
Step 4: Customize the Filter Bar
- Decide whether to show or hide the filter bar above the portfolio.
- Choose a taxonomy from which to display the posts.
Customizing Style Tab for Portfolio
Now, let’s enhance the style of your portfolio to make it visually appealing:
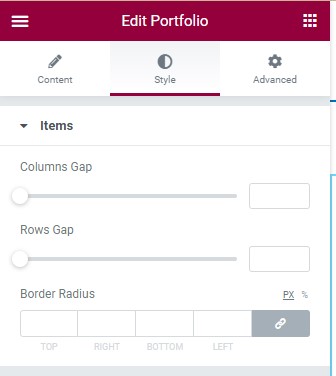
Step 5: Style Tab Customization
- Under the “Style” tab, adjust the column gap and row gap using the sliders.
- Set the border radius to control the corners’ roundness.
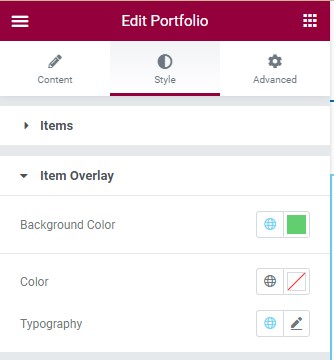
Step 6: Item Overlay
- In the “Item Overlay” section, choose a background color for the item overlay.
- Customize the typography to make the text on the overlay more attractive.
You can explore additional style and design options in the left sidebar and make use of general settings in the “Advanced Tab.”
By following these step-by-step instructions, you can effectively use Elementor’s Portfolio Widget to showcase your projects in a visually appealing and organized manner.
Portfolio Widget Design Best Practices In Elementor
Introduction
In this guide, we will explore the best practices for designing a portfolio widget using Elementor, a popular WordPress page builder. Follow these step-by-step instructions to create an engaging and visually appealing portfolio section on your website.
Step 1: Accessing Elementor Editor
- Navigate to the page where you want to add the portfolio widget.
- Click on the “Edit with Elementor” button.
Step 2: Adding a New Section
- Once in the Elementor editor, click the “+” icon to add a new section.
- Choose the appropriate structure for your portfolio layout (e.g., single column, grid, masonry).
Step 3: Adding the Portfolio Widget
- In the new section, click on the gray folder icon to open the Elementor widget panel.
- Search for the “Portfolio” widget and drag it into the section you just created.
Step 4: Configuring Portfolio Settings
1. Click on the portfolio widget to open the settings panel on the left-hand side.
2. Configure the following settings:
- Source: Choose where your portfolio items will be sourced from (e.g., posts, custom post types).
- Layout: Select the desired layout style (e.g., grid, masonry, slider).
- Columns: Adjust the number of columns to display in the grid layout.
- Number of Items: Set the maximum number of items to display.
Step 5: Designing Portfolio Items
- Click on the “Edit” button next to the portfolio widget to add individual items.
- For each item, upload an image, add a title, description, and any additional information.
- Customize the style, typography, and spacing to match your website’s design.
Step 6: Adding Filters (Optional)
- If desired, you can add filter options to allow users to sort and view specific categories of portfolio items.
- Go to the portfolio widget settings and enable the “Filter” option.
- Configure filter settings and assign categories to each portfolio item.
Step 7: Styling and Customization
- Use Elementor’s styling options to customize the overall appearance of the portfolio section.
- Adjust colors, typography, spacing, and other design elements to create a cohesive look.
Step 8: Preview and Save
- Click the “Preview” button to see how your portfolio widget looks on the live site.
- If you’re satisfied with the design, click the “Save” button to publish the changes.
Conclusion
By following these best practices, you can create an impressive portfolio widget using Elementor that showcases your work effectively and engages your website visitors. Experiment with different layouts, styles, and configurations to find the perfect design for your website.


