
Introduction
In the ever-evolving world of website design and content creation, it’s crucial to have the right tools at your disposal. Thrive Architect is one such tool, and within its arsenal, the “Text” element stands out as one of the most versatile and essential features. In this comprehensive tutorial, we will walk you through the ins and outs of using the ‘Text’ element effectively to enhance your website’s aesthetics and user experience.
Understanding the Text Element
The Text Element, at its core, is a flexible component that empowers users to present textual content in a visually appealing manner. From headings to paragraphs, it caters to various forms of communication, making it an indispensable part of any web designer’s toolkit.
Adding the ‘Text’ Element to Your Page
To begin harnessing the power of the ‘Text’ element, follow these steps:
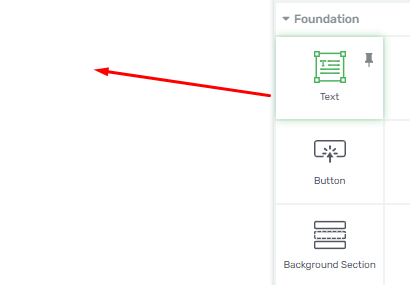
- Open Thrive Architect and access your desired page.
- Locate the plus sign on the right sidebar and search for the “Text” element.
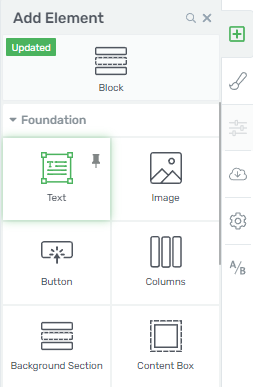
- Drag and drop the ‘Text’ element to your page.
There are two primary ways to add text to your page using the ‘Text’ element:
- If you intend to intersperse other elements, such as buttons, between paragraphs, add a separate ‘Text’ element for each paragraph.
- If your goal is to include text content exclusively, simply insert one ‘Text’ element and write your content as you would in a standard text editor, using “Enter” or “Shift+Enter” to navigate between rows.
Once you’ve added the ‘Text’ element to your page, you’ll notice two sets of options: those on the left sidebar and those at the top of your screen.
Making Use of the Sidebar Options
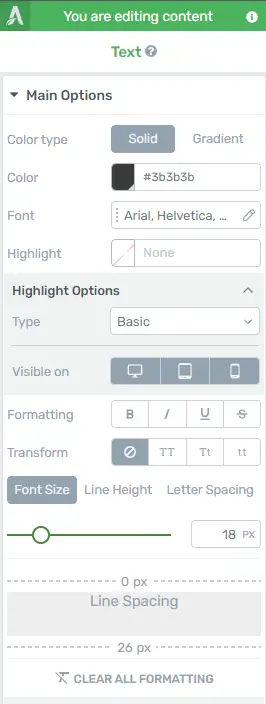
1. Color
Customizing the text color is a breeze with Thrive Architect. Follow these steps:
- Click on the color box in the “Color” section.

- You can unlink the text color from your current theme or template by selecting the appropriate option.
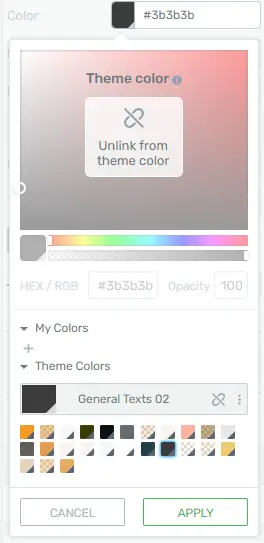
- Choose your desired color using the color picker or input a HEX/RGB code.

- You can also select colors from the pre-existing “My Colors” and “Theme Colors” sections.
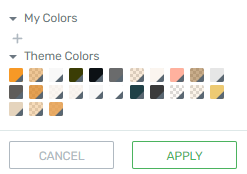
- Additionally, you can adjust the opacity of the text color and even save it as a global or favorite color for future use.

2. Font
Font selection is crucial for text legibility and aesthetics. Here’s how you can modify it:
- Click the edit icon (pencil) in the “Font” section.
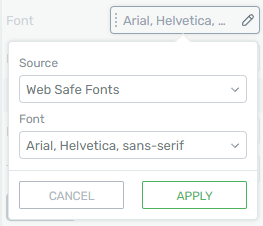
- Choose from three font sources: “Google Fonts” (with additional options), “Web Safe Fonts,” and “Inherit Landing Page Font.”
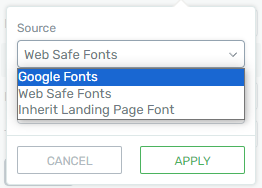
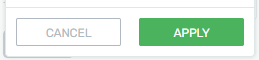
- Select the font style that best suits your needs from the dropdown menu. You can also choose between “Regular” and “Bold” variations, as well as italic versions if available.
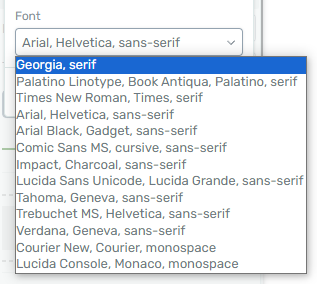
- Click “Apply” to implement your font changes.
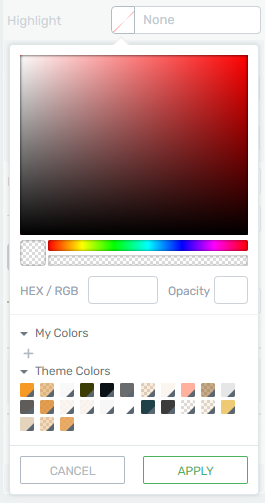
3. Highlight/Background Color
Enhance the readability and visual appeal of your text by setting the background color using the “Highlight” section. Here’s how:
- Click on the box next to “Highlight.”

- A color picker will appear, allowing you to choose the background color for your text. The process is similar to selecting text color.
4. Format
Basic text formatting options are essential. Thrive Architect offers the ability to make text bold, italic, underlined, or strikethrough easily. You can access these options from both the right sidebar and the Panel Options.![]()
5. Transform
Customize text appearance with the “Transform” option. You can make text all uppercase, normal text, or all lowercase directly from here by clicking on the respective icons.
![]()
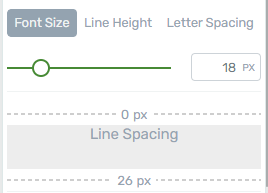
6. Font Size, Line Height, and Letter Spacing
Fine-tune your text’s size, line spacing, and letter spacing:
![]()
- Click on the option you want to adjust.
- Drag the slider or enter your desired value manually.
- If you wish to reset all formatting options to default, use the “Clear All Formatting” option.

7. Advanced Option
With the “Advanced” option, you can add a TypeFocus animation to your text:
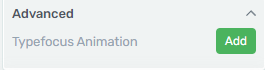
Select your text.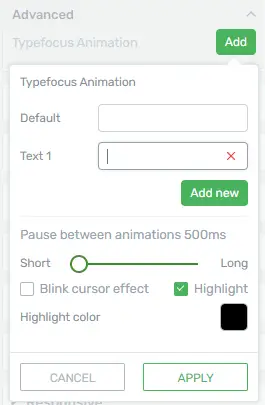
- Click on the “Add” button in the “Advanced” dropdown.
- Configure various settings for the TypeFocus Animation, including different text, animation pause, effect, and highlight color.
- These are the specific options available for the ‘Text’ element in the left sidebar. Below, you will find more general options that are available for most other elements as well.
Exploring Panel Options
Styling Options
These are the fundamental text styling options that you’ll find in any text editor:
- Bold, Italics, Underline, or Strike-through can be easily applied to your text by selecting the desired text and clicking the corresponding option.

Transform the Text
Under the paragraph icon, you can transform your text in various ways:
- Headings: Transform your text into a heading by selecting from six different heading types in the dropdown.
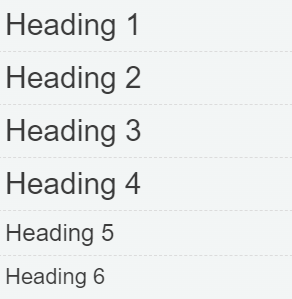
- Paragraph: To revert text to a paragraph, simply click the paragraph icon below the heading types.
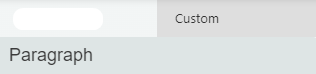
- Blockquote: Easily convert your text into a blockquote by selecting “Blockquote” from the dropdown.

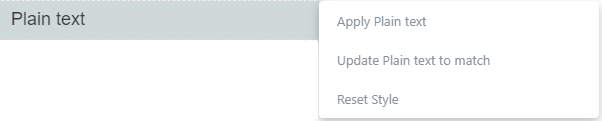
- Plain Text: Use the “Plain Text” option to transform your text into a simple element without inheriting styling from themes or plugins. This is useful for label text in boxes and other layout elements.
Alignment Options
Align your text to the left, right, center, or justify it to suit your layout preferences.
![]()
Lists
Create unordered (bullet points) or ordered (numbered) lists within your text. Select the desired text and click the corresponding panel option to structure your text accordingly.
![]()
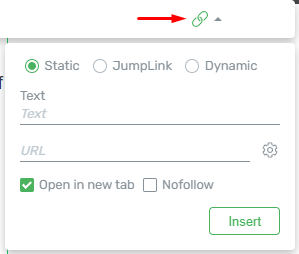
Adding a Hyperlink
Insert hyperlinks with ease using the “Hyperlink” option (chain icon) from the panel. After selecting the text you want to hyperlink, click on the “Hyperlink” panel option (or press ‘Ctrl+K’). This opens a dropdown where you can configure the link, including URL, text, and open in a new tab or nofollow options.
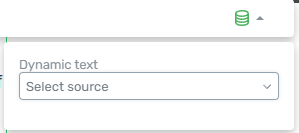
Inserting Dynamic Text
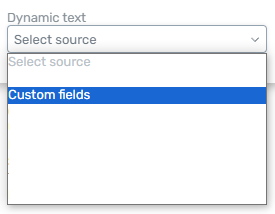
The “Dynamic Text” option is useful for inserting dynamic information into your text. You can choose the source of dynamic text and customize it to your liking.
- Global Fields: Utilize global information by selecting the “Global Fields” option if you’ve set up global fields in your Thrive Dashboard.
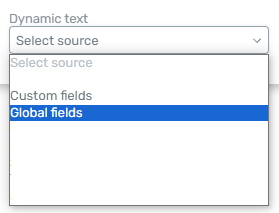
- Custom Fields: If you’ve created a “Text” custom field using the “AdvancedCustom Fields” plugin, you can use it with the “Dynamic Text” option.
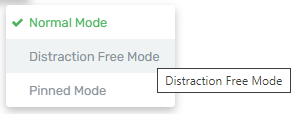
Distraction-Free Mode
Activate the “Distraction Free Mode” for a simplified editing experience resembling Microsoft Word or Google Docs. This mode eliminates the green border typically surrounding the ‘Text’ element.
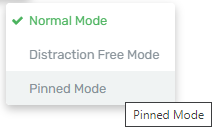
Pinned Mode
In “Pinned Mode,” the “Panel Options” will be pinned to the top of your editor, offering a full-width view. This ensures that the options remain visible as you scroll through your content.
Using General Options
The ‘Text’ element also offers general options available for all Thrive Architect elements. These can be found under “Main Options” in the left sidebar when the ‘Text’ element is selected.
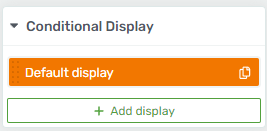
Conditional Display
The ‘Conditional Display’ feature allows you to create alternate versions of a block of content based on visitor permissions and display rules. This advanced feature enhances user experience and personalization.
Related Topics
1. Web Design Best Practices
Learn more about effective web design principles and how to create visually appealing and user-friendly websites.
2. Content Creation Strategies
Explore strategies for creating engaging and valuable content that resonates with your target audience.
3. Thrive Architect Tips
Discover additional tips and tricks for maximizing the potential of Thrive Architect and optimizing your web design projects.
Conclusion
Mastering the ‘Text’ element in Thrive Architect opens up a world of possibilities for creating engaging, visually appealing content on your website. Whether you’re a seasoned web designer or just starting your journey, these comprehensive options and features will help you elevate your content and make a lasting impression on your audience.
For more in-depth guidance on Thrive Architect’s features and functionality, be sure to explore our comprehensive tutorials and resources. As you continue to refine your web design and content creation skills, Thrive Architect will be your trusted companion in achieving remarkable results.


