
Introduction
Elementor is a versatile and user-friendly WordPress page builder that allows you to create stunning websites with ease. Adding buttons to your website is an essential part of enhancing user engagement and directing them towards desired actions. In this step-by-step guide, we’ll walk you through the process of adding a button in Elementor.
In this Elementor tutorial, we are going to walk you through adding a button. But before setting your button, be sure to read about the best practices for making a button widget below.
Step 1: Adding the Button Widget
To begin, you’ll need to add the button widget to your page. Follow these simple steps:
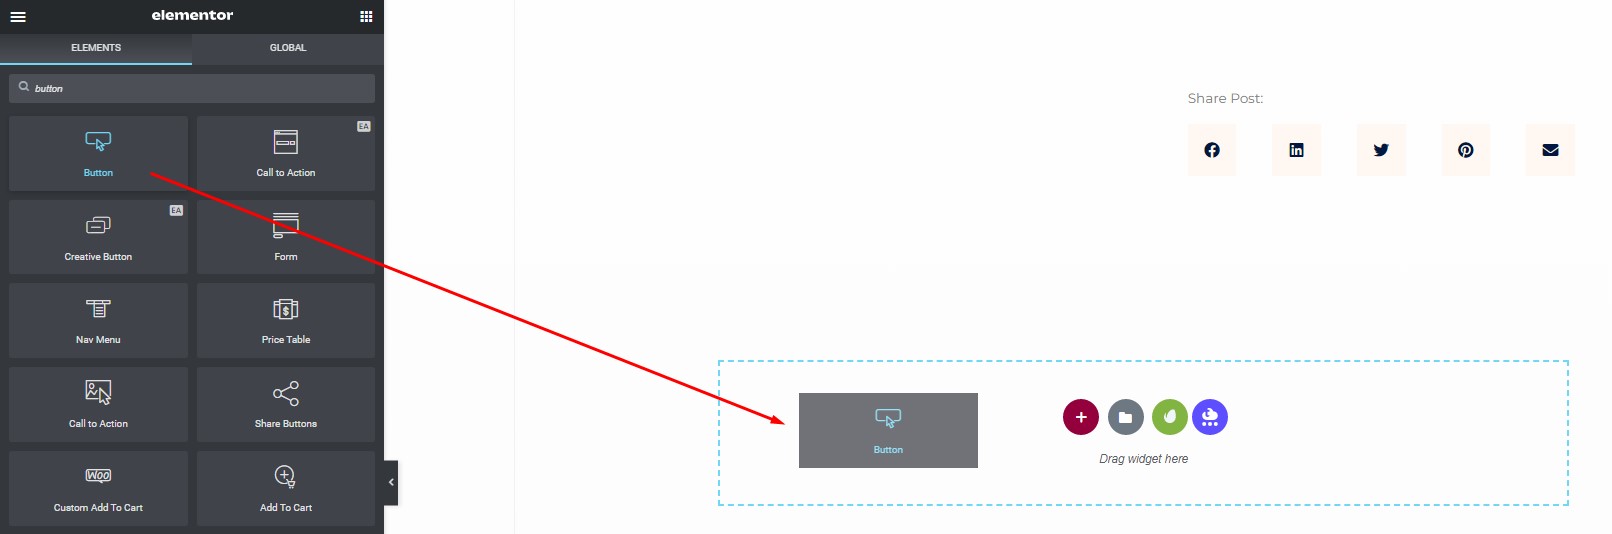
Drag and Drop
Open your Elementor editor and navigate to the section where you want to add the button. Simply drag and drop the button widget into the desired section.
Step 2: Setting the Elementor Button
Once you’ve added the button widget, it’s time to configure its settings. Here’s how:
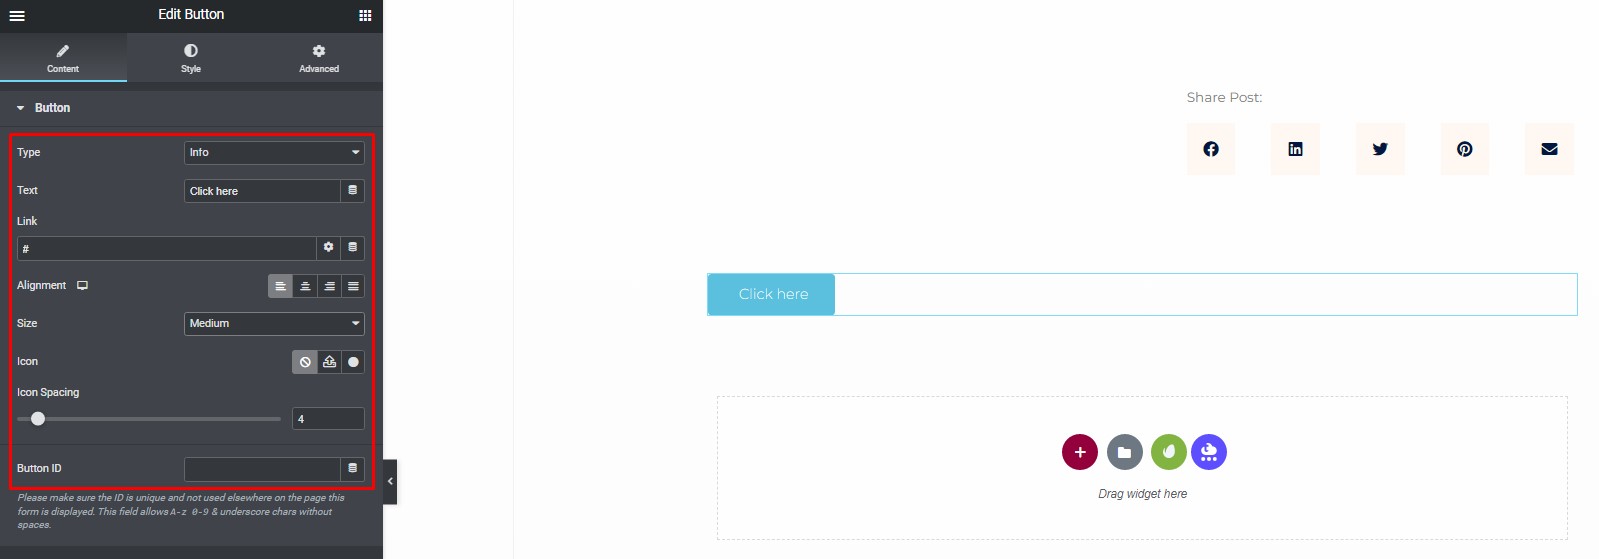
Button Type
Choose a button type that suits your design from the five options available: Default, Info, Success, Warning, or Danger.
Text
Enter the text that you want to display on the button.
Button Link
Specify the URL to which the button will redirect when clicked.
Alignment
Align the button within its column by selecting either left, center, right, or justified.
Button Size
Pick between Extra Small and Extra Large button sizes to fit your design.
FontAwesome Icon
Optionally, select an icon to display on the button.
Icon Position
Set whether the icon appears before or after the button text.
Icon Spacing
Adjust the distance between the icon and the button text.
Step 3: Customizing Button Styles
The next step involves customizing the button’s appearance to match your website’s style. Here’s how to do it:
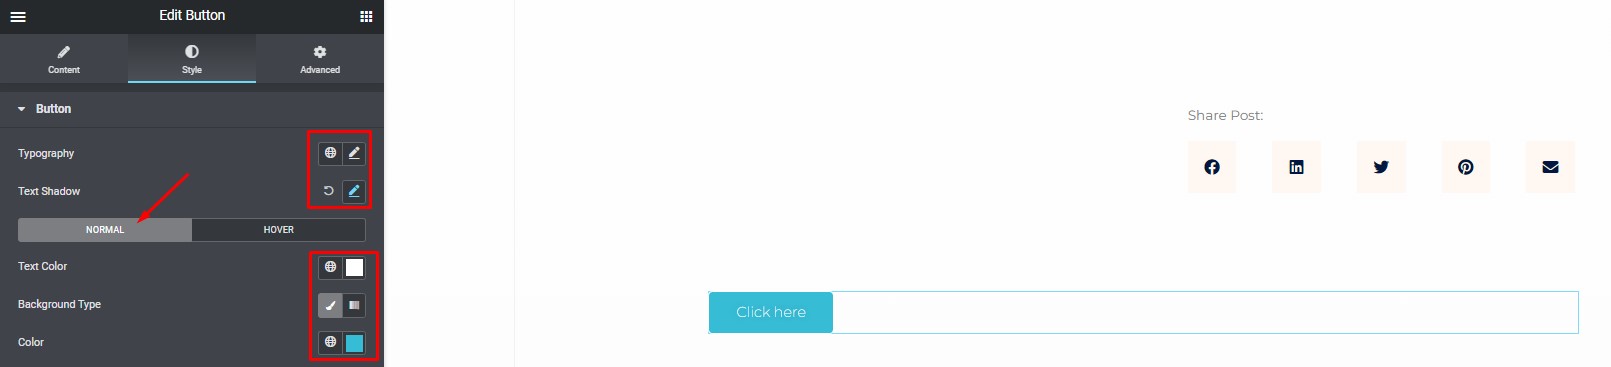
Typography
Change the default typography options for the button’s text to match your website’s font style.
Shadow and Blur
Give the button’s text a shadow and blur effect if desired.
Text Color
Select the color for the button’s text.
Background Color
Choose a background color for the button in both Normal and Hover states. You can opt for a solid color or a gradient.
Hover Animation
Add a hover animation effect by clicking on the hover tab.
Border Style
Pick the border style you want to use around the button.
Border Radius
Control the roundness of the button’s corners by adjusting the border-radius settings.
Box Shadow
Set the options for applying a box shadow to the button.
Padding Settings
Define the padding settings for the button to control its size and spacing.
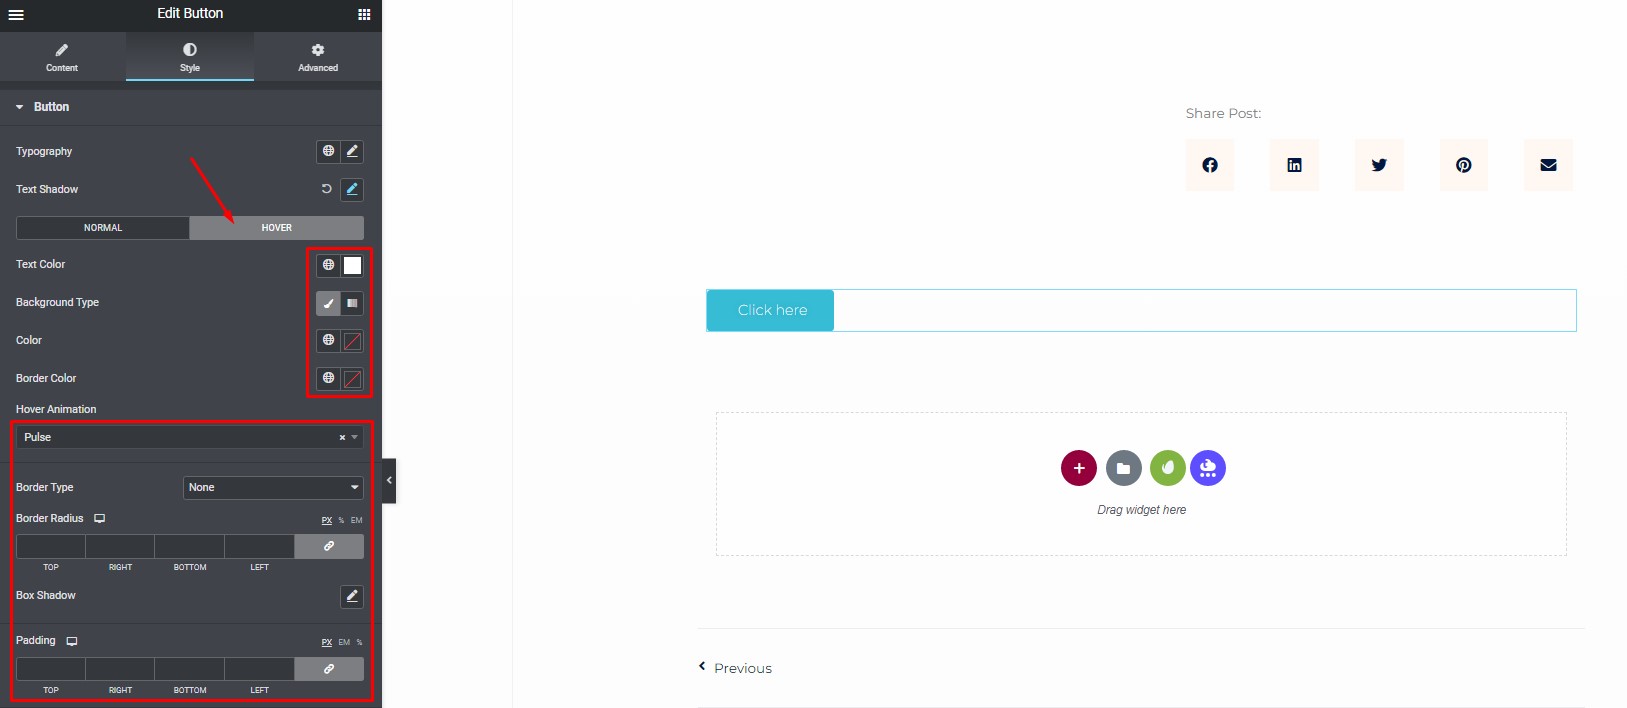
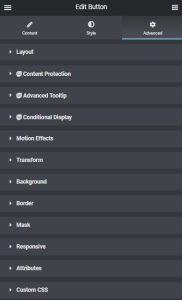
If you require additional customization options, you can explore further settings in the Advanced Tab located in the left sidebar.
Conclusion
By following these steps, you can easily add a button in Elementor and customize it to align with your website’s design and objectives. Buttons are a vital element for guiding your visitors and encouraging them to take specific actions on your website.
With Elementor’s intuitive interface, you can create visually appealing buttons that enhance the user experience.
How To Add A Back To Top Button Using Elementor?
Step 1: Accessing Section Settings
To get started, you’ll need to access the settings for the first section on your page. Here’s how you do it:
Click the section handle. It’s usually a small icon that appears when you hover over the section.
This action will open up a range of options to customize the section, which is essential for placing the Back To Top button in the right spot.
Step 2: Naming the CSS ID
Next, you’ll want to create a unique identifier for the section. This is crucial for the button to work correctly. Here’s what you should do:
Enter a name into the CSS ID field on the section’s Advanced tab. You can choose any name you prefer, but for simplicity, ‘top’ is a good choice.
The CSS ID serves as an anchor point for the button, ensuring that it takes users back to the right location.
Step 3: Adding the Button
Now that you’ve set up the section correctly, it’s time to add the Back To Top button. Here’s how you can do it:
Drag the Button widget from the Elementor sidebar to your desired location on your page. You can choose to place it anywhere you think is convenient for your users.
The Button widget will be the element that users click on to return to the top of your page.
Step 4: Labeling the Button
A crucial part of this process is labeling the button so that users know its purpose. To do this:
In the text field of the button, type ‘Top.’ This label will be visible to your users.
Having a clear and concise label ensures that users understand the function of the button.
Step 5: Linking to the CSS ID
To make the button functional, you need to link it to the CSS ID you chose earlier. Follow these steps:
In the Link field, enter the #top or the CSS ID you defined in step 2. Make sure to place a # sign before the CSS ID with no spaces between, as this is essential for the link to work correctly.
This link connects the button to the designated section, allowing users to return to the top of your page seamlessly.
Now, when users visit your website, clicking the ‘Top’ button will take them back to the top section, providing a smooth and convenient navigation experience.
In conclusion, adding a Back To Top button using Elementor is a simple yet effective way to improve user experience on your website. By following these easy steps, you can enhance your site’s accessibility and keep your visitors engaged. Try it out and watch your website’s user-friendliness soar!


