

Introduction
Beaver Builder is a user-friendly WordPress page builder that simplifies the process of building stunning pages and posts. Its drag-and-drop interface makes it accessible to users with varying levels of technical expertise. Countdown timers have become a powerful tool in online marketing, creating a sense of urgency and boosting conversions.
In this tutorial, we will explore how to seamlessly integrate a countdown timer into your WordPress website using the popular Beaver Builder plugin.
Understanding Countdown Timers
Countdown timers are powerful tools that create a sense of urgency, prompting visitors to act quickly. Whether you’re running a limited-time promotion or building anticipation for an upcoming event, incorporating a countdown timer can significantly impact user behavior and increase conversion rates.
Let’s dive into the practical steps of adding a countdown timer with Beaver Builder.
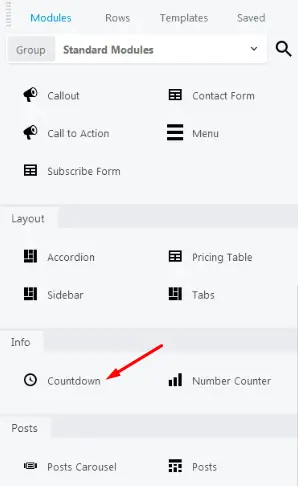
Accessing the Countdown Timer
The first step to adding a countdown timer with Beaver Builder is to locate the timer module in your builder. Here’s how:
Drag and Drop
Once you’ve found the countdown timer module, the next step is to drag and drop it onto your webpage. This action will place the timer on your desired location.
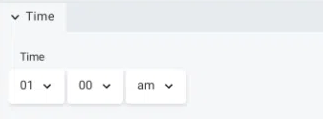
Setting the Date and Time
In the “General” tab, you can define the date and time for your countdown. This is when your timer will reach zero, creating anticipation among your visitors.
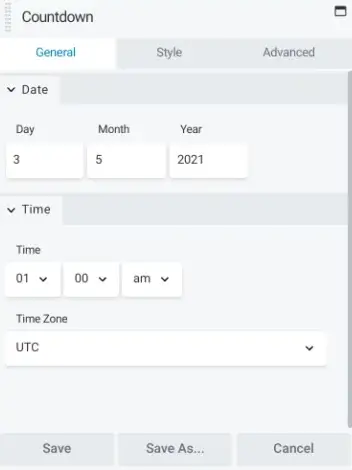
Visual Countdown
The “Countdown Module” offers a visual timer that counts down to zero, providing a visually engaging element for your webpage.
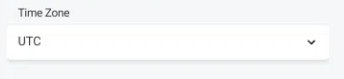
Time Zone Customization
You have the flexibility to specify the time zone to be used, ensuring that your countdown timer aligns with your target audience’s location.
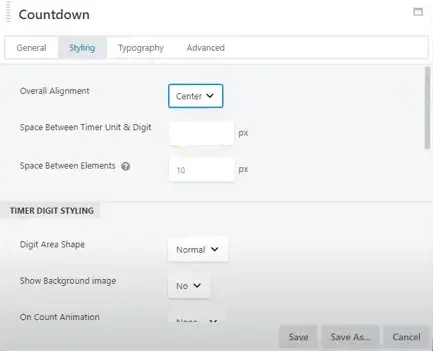
Styling Your Countdown Timer
Now that you’ve added the timer let’s move on to customize its style to match your webpage’s aesthetics.
Layout Choices
In the layout section, you have two choices: “Numbers” and “Numbers + Circles.”
Numbers Layout
Under the “Numbers” layout, each unit of measurement includes numbers as well as accompanying text (days, hours, minutes, seconds), giving your timer a detailed look.
Numbers + Circles Layout
The “Numbers + Circles” layout adds a circle around the numbers, offering a visual representation of the time remaining. It includes seconds in a minute, minutes in an hour, hours in a day, and days in a year.
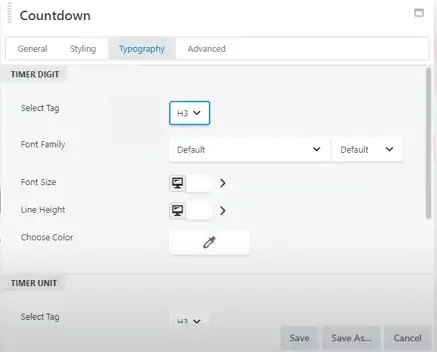
Alignment and Typography
Set the alignment of your countdown timer and choose the color and typography for both the numbers and text to match your webpage’s design.
Padding and Spacing
Fine-tune your timer’s appearance by setting horizontal and vertical padding as well as adjusting the number spacing.
Background Customization
If you’ve chosen the “Numbers” layout, you can further enhance its appearance by selecting the number background color and setting the number border radius.
Time Separators
In the separator section, decide whether you want to show time separators between each time unit. This can make your countdown timer even more visually appealing.
Advanced Customization
If you want to take your countdown timer to the next level, explore the options available in the “Advanced” tab. Here, you’ll find additional settings to fine-tune your timer’s appearance and functionality.
By following these step-by-step instructions, you can easily add a countdown timer with Beaver Builder, enhancing your website’s engagement and user experience.
Tips for Responsive Design In Beaver Builder
Creating mobile-friendly countdown timers in Beaver Builder requires attention to responsive design principles. Follow these step-by-step instructions to ensure your countdown timers look and function flawlessly on mobile devices.
Step 1: Open Beaver Builder
Navigate to the page where you want to add the countdown timer.
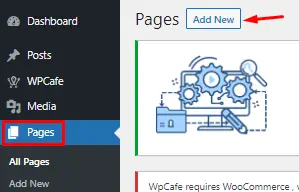
Click on the “Launch Beaver Builder” button for the desired page.
Step 2: Add a Countdown Timer Module
Within Beaver Builder, locate the row or section where you want to place the countdown timer.
Click the “+” icon to add a new module.
Search for “Countdown Timer” and select it from the list of available modules.
Step 3: Configure Countdown Timer Settings
In the Countdown Timer module settings panel, adjust the following:
a. End Date and Time: Set the date and time for the countdown to end.
b. Timezone: Ensure the correct timezone is selected.
c. Design: Choose a style that complements your website’s aesthetic.
For mobile optimization, consider the following:
a. Font Size: Use a readable font size for smaller screens.
b. Button Size: Ensure buttons are large enough for easy tapping.
c. Padding and Margins: Adjust spacing to maintain a balanced appearance.
Step 4: Enable Responsive Editing
Click on the row or section containing the countdown timer to select it.
In the top toolbar, click the responsive editing icon (usually represented by a mobile device icon).
Step 5: Optimize for Mobile Devices
Adjust the countdown timer module settings for mobile responsiveness:
a. Font Size: Reduce font size slightly for better visibility on smaller screens.
b. Button Size: Increase the size of buttons for easy touch interaction.
c. Spacing: Fine-tune padding and margins to ensure elements are well-spaced.
Step 6: Preview and Test
Click the preview button to see how your countdown timer looks on different devices.
Test the timer’s functionality on both desktop and mobile devices to ensure it works as expected.
Step 7: Save and Publish
Once you’re satisfied with the mobile-friendly design of your countdown timer, click the “Save” button in Beaver Builder.
Publish the page to make the changes live on your website.
By following these steps, you’ll create a mobile-friendly countdown timer using Beaver Builder, ensuring a seamless user experience across all devices.


