
Introduction
In the world of web design and content creation, efficiency is key. Beaver Builder, a popular page builder plugin for WordPress, offers a fantastic feature that can save you time and effort. You have the ability to replicate any Beaver Builder layout onto a fresh page while maintaining its original design and metadata intact. This capability extends to all types of Beaver Builder layouts, including pages, posts, Beaver Theme layouts, and saved layout templates, encompassing rows, columns, and modules.
Understanding Beaver Builder
Beaver Builder is a popular drag-and-drop page builder plugin for WordPress, known for its intuitive interface and robust set of features. Whether you are a seasoned developer or a novice in the world of web design, Beaver Builder caters to all skill levels. Its seamless integration with WordPress makes it a go-to choice for creating visually appealing and responsive websites. Let’s dive into the practical aspects of duplicating a page in Beaver Builder.
In this step-by-step tutorial, we will explore two methods for duplicating a page using Beaver Builder and unleash the full potential of this time-saving feature.
Method 1: Replicating a Page Through the WordPress Admin Panel
If you’re comfortable navigating the WordPress admin panel, this method is straightforward and efficient. Here’s how to do it:
Step 1: Access the WordPress Admin Panel
In your WordPress admin panel, navigate to either “Pages > All Pages” or “Posts > All Posts,” depending on whether you want to duplicate a page or post, or choose the corresponding option for your custom post type.
Step 2: Duplicate the Page
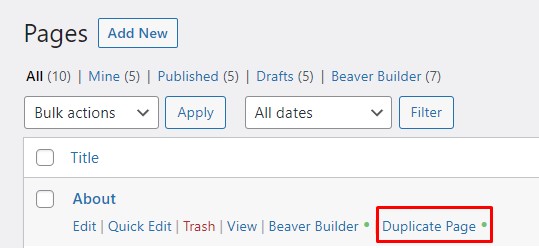
Hover your cursor over the page or post you wish to duplicate. You’ll notice the Beaver Builder’s involvement indicated by a green dot next to the “Duplicate Page” option. Select “Add Duplicate.”
The duplicated page or post will load in the Beaver Builder editor, where you can start editing immediately.
Method 2: Replicating a Page from Within the Beaver Builder Editor
If you’re already working in the Beaver Builder editor and want to duplicate a page, this method is more convenient. Follow these steps:
Step 1: Open the Page
First, open the page you wish to duplicate using Beaver Builder.
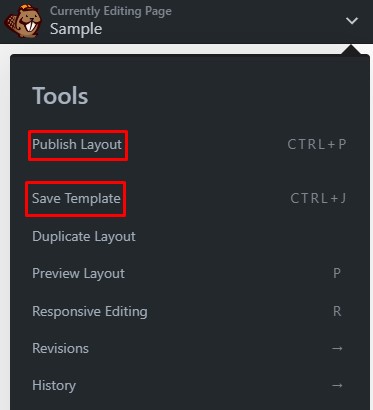
Step 2: Access the Tools Menu
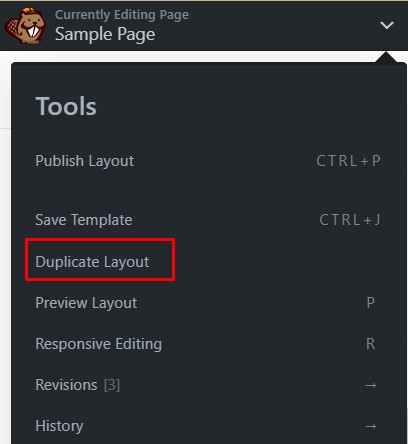
Look for the arrow in the upper left corner of the page title bar. Click on it to access the Tools menu, then choose “Duplicate layout.”
Step 3: Customize the New Page
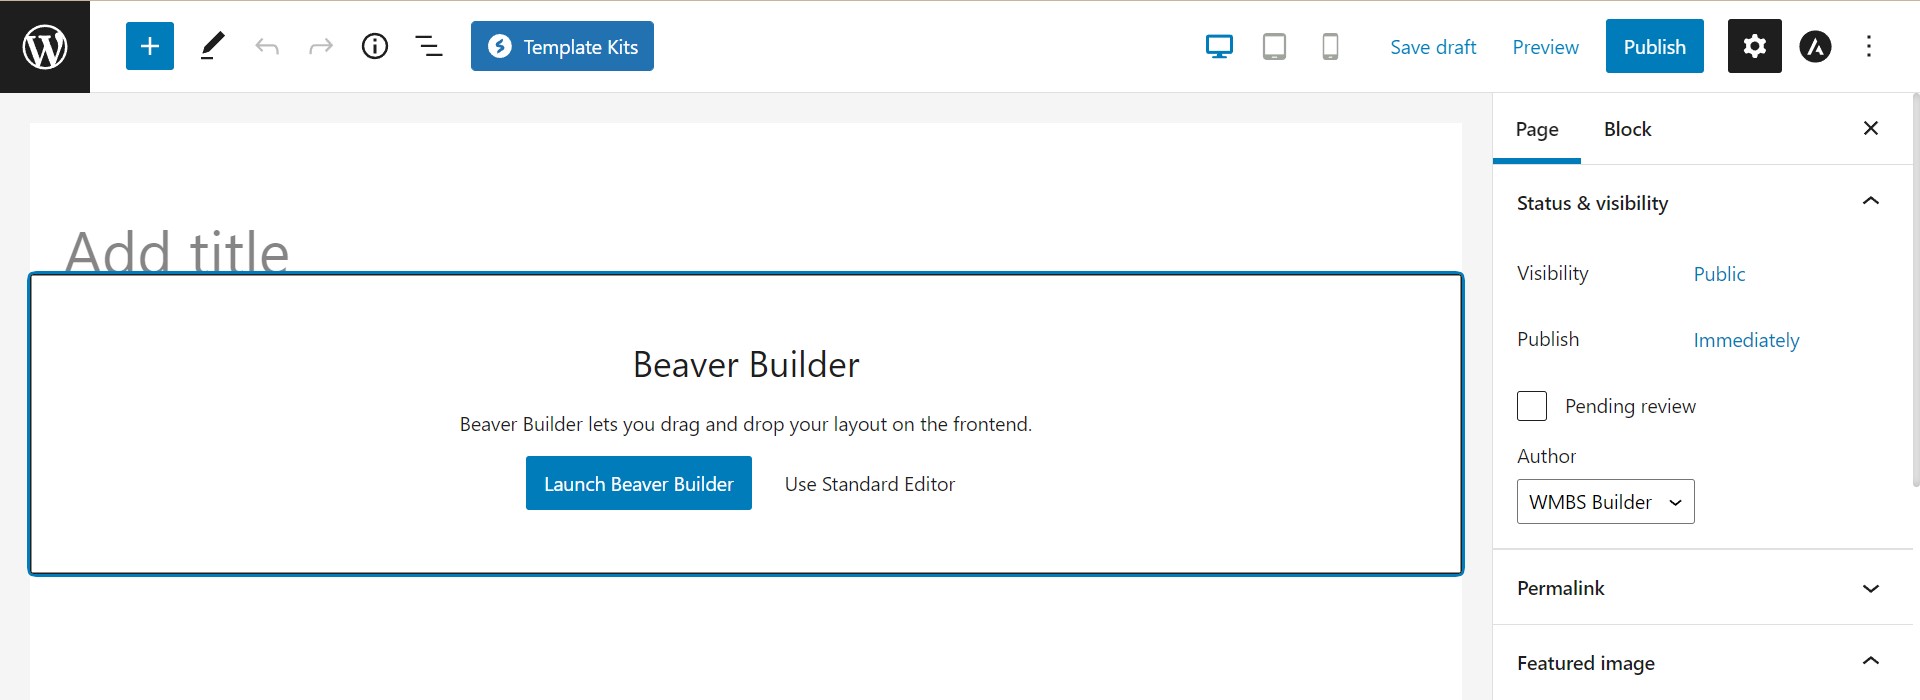
The newly duplicated page will be accessible in the WordPress editor. Here, you can modify the page title and slug. You can also launch the Beaver Builder editor to make further changes if needed.
By following these simple steps, you can effortlessly replicate any Beaver Builder layout, saving you time and preserving the original design and metadata. Whether you prefer the WordPress admin panel or the Beaver Builder editor, you have the tools to streamline your web design process.
In conclusion, Beaver Builder’s layout duplication feature is a valuable asset for web designers and content creators. It allows you to work efficiently and maintain the integrity of your designs. So, go ahead and make the most of this incredible tool to enhance your productivity and creativity.
How to Create Pages Using Beaver Builder?
Creating pages using Beaver Builder is a straightforward process that allows you to design beautiful, customized pages for your WordPress website. This step-by-step guide will walk you through the entire process, from crafting a basic WordPress page to selecting templates and utilizing Beaver Builder’s powerful features.
Step 1: Craft a Basic WordPress Page
To begin creating pages using Beaver Builder, follow these simple steps:
- Navigate to “Pages”: Start by logging into your WordPress admin dashboard. On the sidebar menu, click “Pages” to access the list of existing pages and create a new one.
- Select “Add New”: Click on the “Add New” button to start crafting a new page from scratch. This will open a blank canvas for your content.
Step 2: Select a Template
Templates serve as the foundation for your creative process when using Beaver Builder. They offer guidance and pre-designed layouts that can save you time and effort. Follow these substeps to select a template:
- Click the “+” Icon: In the upper right corner of your WordPress editor, you’ll find a “+” icon.
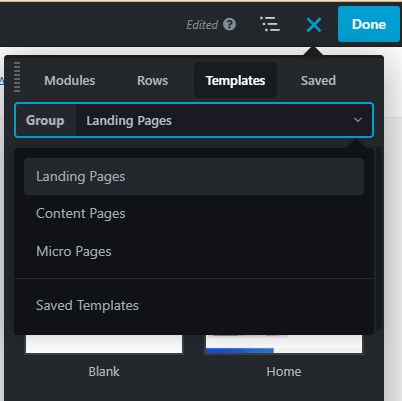
- Go to “Templates”: From the dropdown menu, select “Templates.” This will take you to the Templates library.
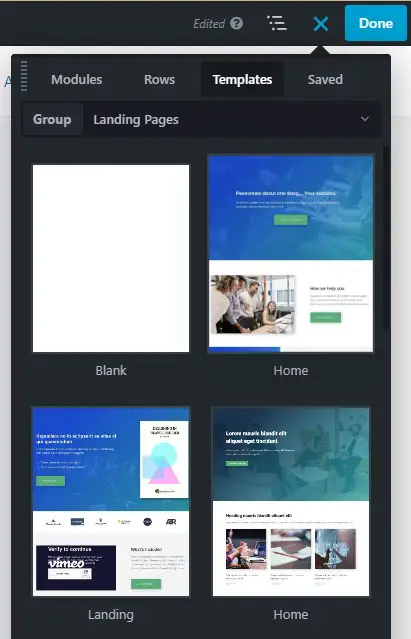
- Choose Content Type: In the Templates library, you can choose the type of content you wish to work with. Here are the options:
- Landing Pages: If you’re looking to create autonomous sections for lead generation, choose “Landing Pages.” These templates are ideal for capturing visitor information.
- Other Types: For templates related to blog posts, about pages, or any other content, explore the “Content” group. These templates provide diverse options for your website.
- Saved Templates: If you’ve used Beaver Builder before, you might have saved templates for future use. Check the “Saved Templates” section to see if there’s a template that suits your needs.
- Empty Templates: If you’re using Beaver Builder for the first time, the “Saved Templates” section will be empty. In this case, you can explore the available templates in the library and select the one that best aligns with your page’s purpose.
By following these simple steps, you can create and customize pages using Beaver Builder. Whether you need a stunning landing page for lead generation or a beautifully designed homepage, Beaver Builder’s templates and features have got you covered.
How To Create A Landing Page Builder
Creating a landing page builder can seem like a complex task, but with the right guidance, it can be a straightforward process. In this step-by-step guide, we will break down the procedure into easy-to-follow subheadings. By the end of this article, you’ll be well on your way to crafting a custom landing page builder.
Step 1: Accessing the Content Panel
To initiate the process of creating your own landing page builder, the first step is to access the Content Panel. Here’s how you can do it:
Click on the plus (+) sign located in the upper right-hand corner of your screen. This action will reveal the Content Panel with module options.
Once the Content Panel is open, you’ll notice that the plus sign changes to an X, which you can click to close the panel. In this panel, you’ll find options to customize your landing page.
Step 2: Exploring Templates
The next step is to explore available templates, which can serve as a foundation for your landing page builder. Here’s how you can do it:
In the Content Panel, you’ll find various tabs, including Modules, Rows, Templates, and Saved. Click on ‘Templates’ to access a wide range of pre-designed templates.
You have two options at this point:
Option 1: Choose a Template
You can choose a template that suits your project by clicking on it. This will load the template into your workspace, allowing you to start customizing it according to your needs.
Option 2: Start from Scratch
If you prefer to build your landing page builder from the ground up, simply select the option to start from scratch. This provides you with a blank canvas to work with.
Step 3: Customizing Template Modules
Once you’ve selected a template or started from scratch, you can proceed to customize the template modules. Here’s how you can do it:
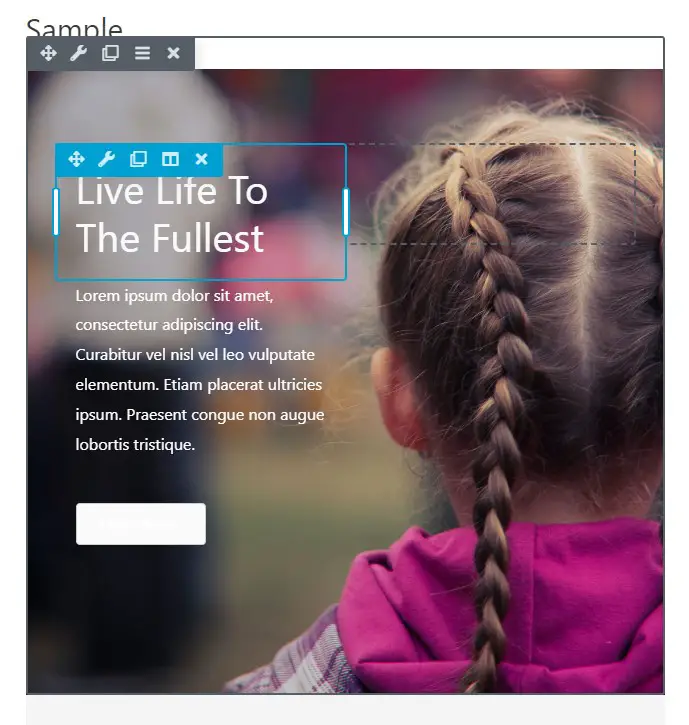
Hover your mouse over any area of the template that you want to edit. As you do this, a blue toolbar will appear around the selected row, column, or module.
This toolbar offers a range of options, allowing you to edit text, images, and layout, ensuring that the template aligns with your unique requirements.
Step 4: Adding Modules
To enhance your landing page and make it more functional, you can add new rows and modules to the layout. Here’s how to do it:
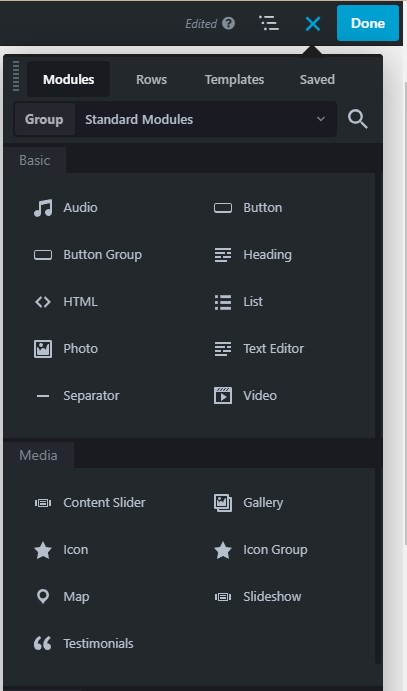
In the Content Panel, click on the ‘Modules’ tab, located at the top of the panel.
You’ll find a variety of modules at your disposal. While many modules can be useful, the following are particularly relevant for creating effective landing pages:
Testimonials
As mentioned in Chapter 1, testimonials and reviews can be powerful tools for convincing leads to convert. You can use this module to showcase positive feedback from satisfied customers.
Call to Action (CTA)
CTAs play a crucial role in encouraging users to take a specific action. This module provides a straightforward way to include compelling calls to action on your landing page.
Callout
Similar to a CTA, the Callout module offers different styling options, including the ability to use both content and images. It’s a versatile element for drawing attention to important information.
Contact Form
Including a contact form on your landing page is essential for gathering information and connecting with potential leads. This module simplifies the process of receiving inquiries and feedback.
Subscribe Form
Making it easy for leads to join your email list is a valuable strategy. With this module, you can capture email addresses and build a database of interested users.
Step 5: Saving or Publishing
As you make changes to your landing page builder, it’s essential to save your progress. Fortunately, Beaver Builder automatically saves your work during the editing process. Even if you accidentally leave the page, your modifications will be preserved for your next visit.
In addition to the automatic saving feature, the Tools menu offers further options. You can access this menu by clicking the downward arrow next to the page title area in the upper left-hand corner. This menu provides additional choices to save or publish your landing page.
By following these step-by-step instructions and utilizing the Beaver Builder platform, you can create a powerful and customized landing page builder for your specific needs. This tool will enable you to design and optimize landing pages that are tailored to your marketing goals.


