
I’ve been running sites for awhile now. And that means I have to move (or migrate) sites pretty often as I find new web hosts that I like better.
And moving sites used to be a pretty technically arduous task. Some web hosts offer free migration but those would often take days and sometimes had errors.
Now there is a really easy way to move your WordPress site using a free migration plugin that will get you up and running on your new server in less than an hour. Throughout testing, I’ve found that the easiest and fastest way to move a WordPress site is through the plugin called Duplicator. It takes less than 30 minutes and is very straightforward.
Duplicator is a freemium plugin similar to many other backup and migration plugins. But the free version should suffice for most sites.
In this article below, I will break down the step-by-step process on migrating your WordPress site over to a new server using the Duplicator plugin.
Essentially, this is a five step process that involves the following:
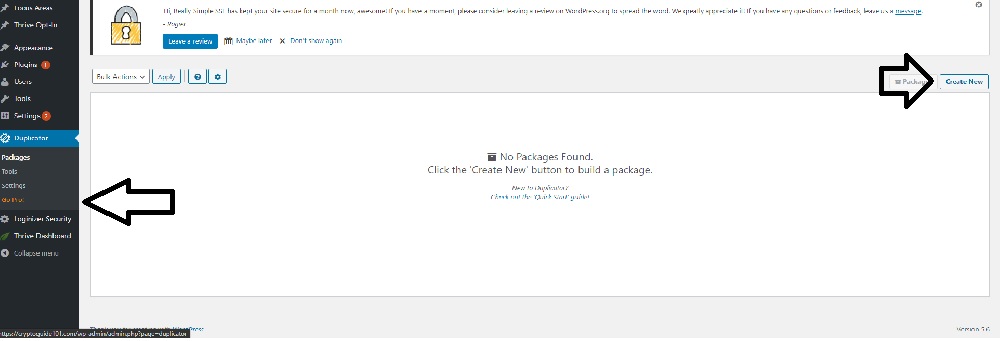
Step 1 – Create Package
After installing the plugin in your WordPress dashboard, go to Packages and click Create New
All you need to do is click Next unless there are things you specifically want to change or modify with the options.
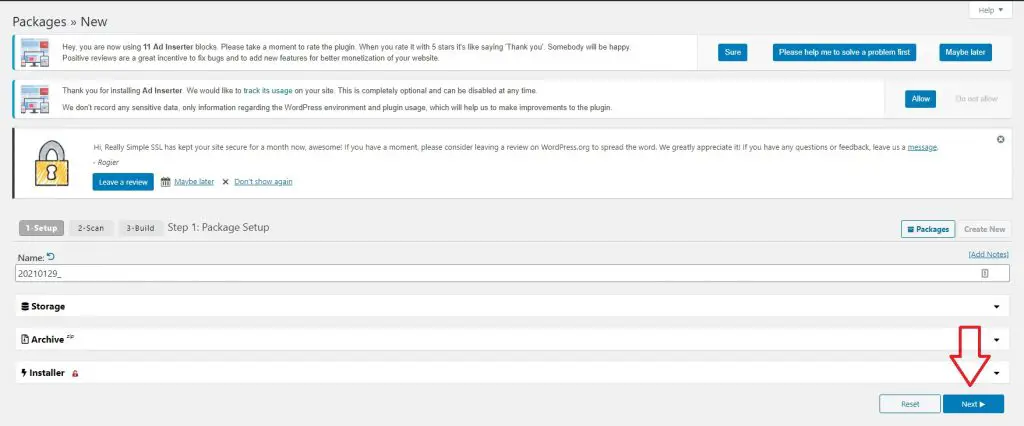
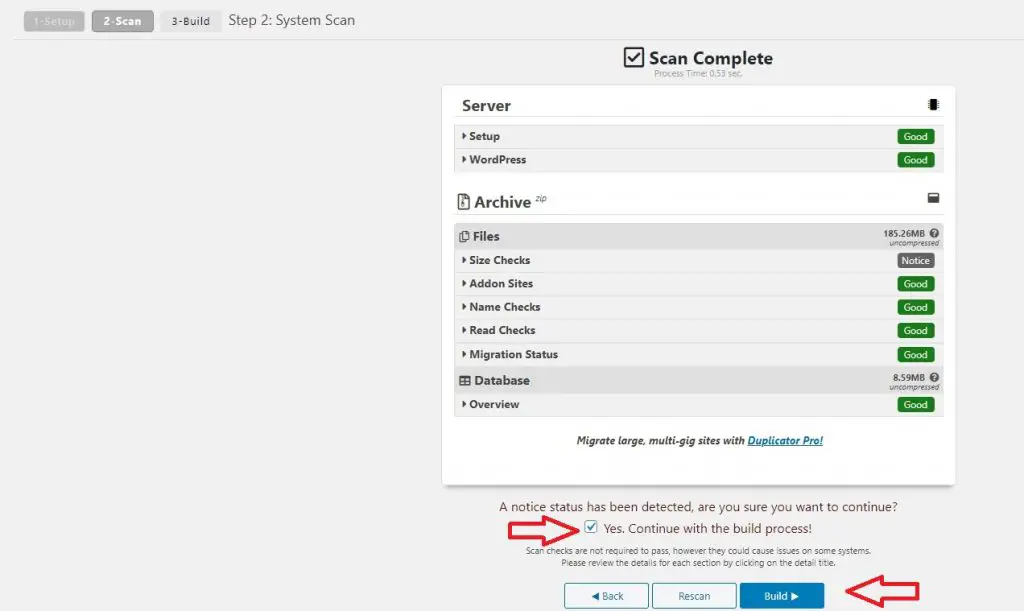
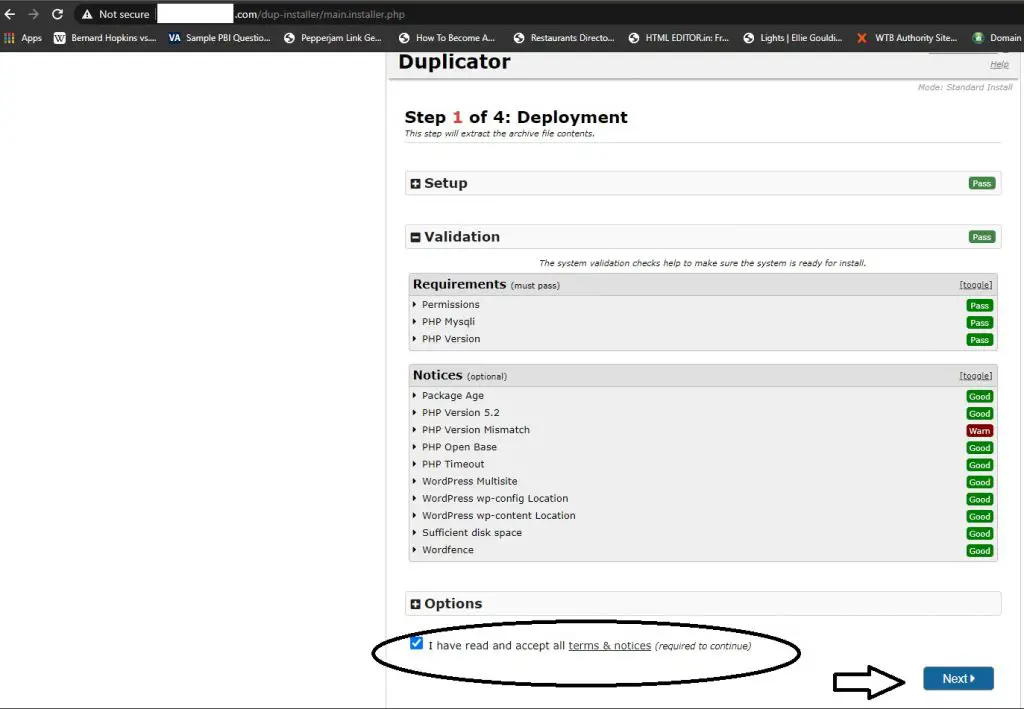
After the plugin scans your site, it will give you the results of your scan. It will be all green most of the time. But sometimes, you will get notices. Notices doesn’t mean that you can’t proceed with the migration. It just means that there are things they want you to be aware of.
In this case, the notice is for file size because some cheap hosts timeout when compressing large files. But from my experience migrating more than 10 sites, this has never been an issue with any file under 1 gig. As such, I am going to proceed with the migration.
To proceed, check the box and click Build.
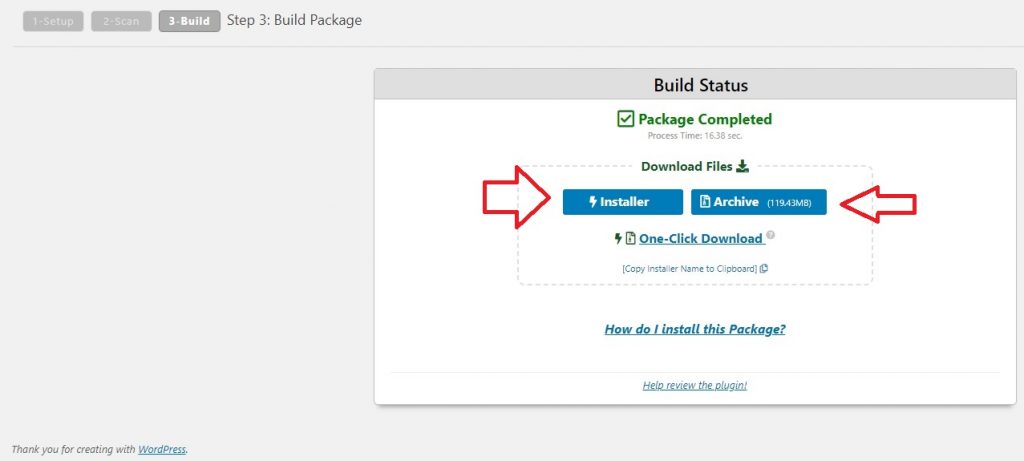
Download both the installer and the package onto your computer. The build should be relatively quick. My compressed file was a little over 100 megs and took less than 20 seconds to build. Once it is built, you should see this.
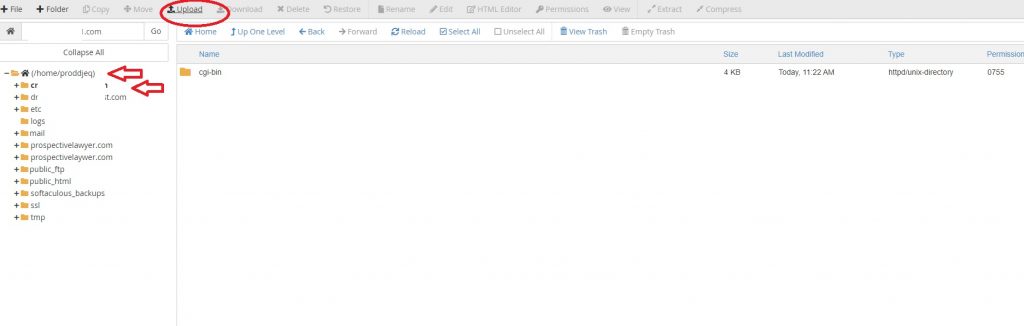
Step 2 – Upload Installer and Package To New Server
Next step is to upload the installer file and the package to the new server’s root domain. If you are using shared hosting and have multiple sites on one server, you will need to add your new site as an add-on domain first.
Upload to the home directory of your site using either FTP or File Manager. The directory on your new server should not have an existing WordPress installation on it.
Step 3 – Change Hosts File On Your Computer
Since you did not change the nameservers at your host registrar, your domain is still pointing to the old server.
As such, you will need to change the hosts file on your computer to run the installer. There are other ways to do this but I find that changing the hosts file is the easiest way.
To change your hosts file so that the domain points to the new server, use method 3 in the link. You can also watch the video below to see how it is done. It is super simple. Just make sure to delete the entries after.
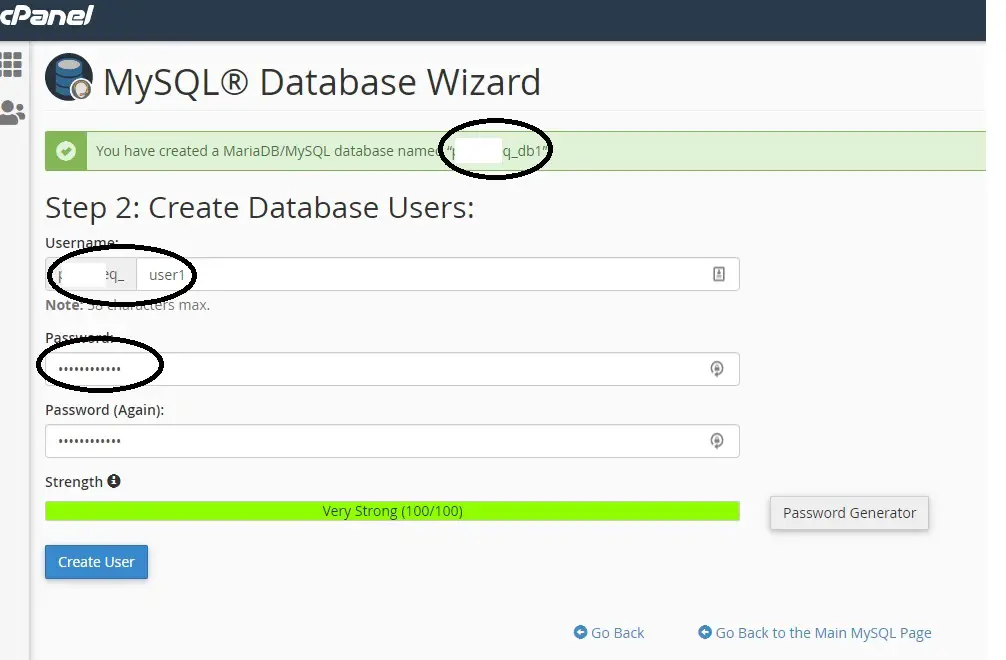
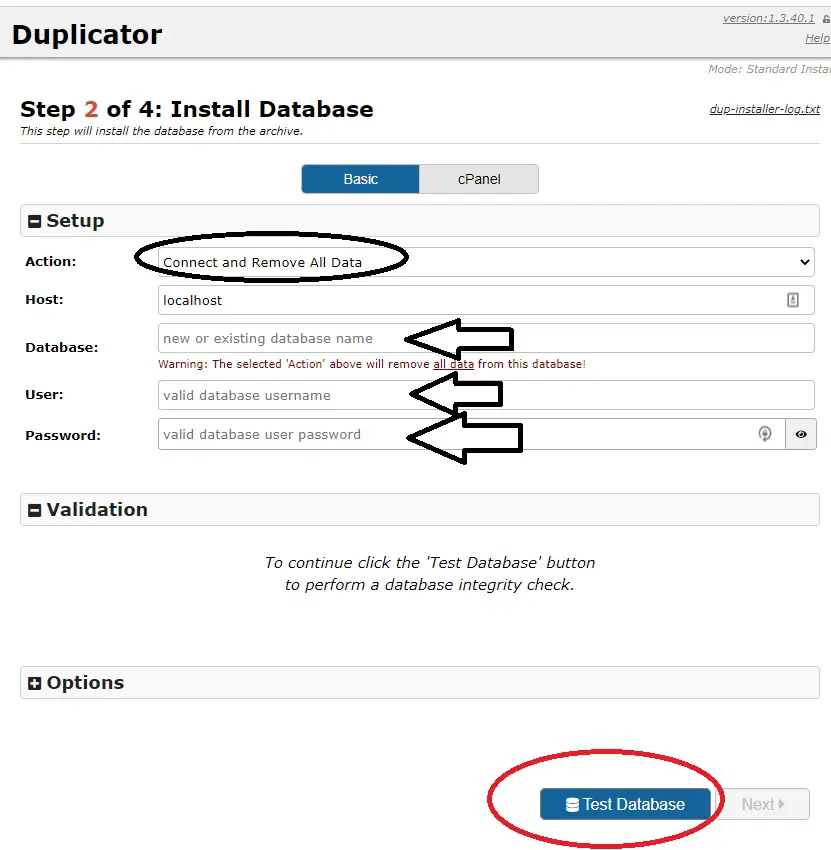
Step 4 – Create New Database On Server
Before running the installer, you should create new database using the MySql Database Wizard found in Cpanel (or other server management software).
Important: write down your database name, database username, and database password. You will need it later.
Step 5 – Run Installer on Your New Server
To run the installer, simply type in yourdomain.com/installer.php
Once you run the installer, work through the steps.
Once you run it, it will take you to the screen below. Choose Connect and Remove All Data and then enter in the information of the new database you just created. After that, click Test Database.
Once you are done. It is important that you delete your installation files. Duplicator will do it for you automatically if you log into the admin panel if you leave the box checked. But do verify that they are deleted even if you leave it checked.
That’s it. You’re all done. You’ve just migrated your site. It should take you less than 30 minutes to migrate your site if it isn’t a very large site.
Remember to delete the entries in your hosts file after you done.
Also, remember to install an SSL cert on your new server if you don’t have it.