
Gravity Forms is a really power forms software that you can do virtually anything with. One of my main uses is to take payments. One of the businesses I run is a service business. And when a customer books with me, I only charge them after the service has been completed. However, I take their credit card information first to (pre)authorize the payment to make sure they are able to pay.
Gravity Forms allows you to authorize a payment first without charging, then capture it at a later date. This can be done easily without a plugin or complicated coding. Gravity Forms laid it out in their documentation on how to do it, but doesn’t really show you the step-by-step process.
I’ll show you step-by-step how to do this.
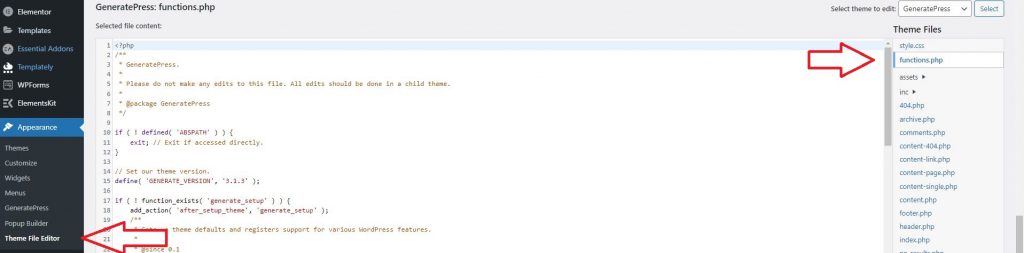
Step 1: Locate your theme’s functions.php file. You can do this by going to Appearance—>Theme File Editor in the WordPress admin dashboard.
Step 2: Backup your site or copy the whole file into Notepad and save.
The functions.php file is extremely important to your site. If you mess it up, your site won’t work. So make sure to make a backup of it. What I do is copy the whole functions.php code into Notepad and save it. That way, if I mess up, all I have to do is paste that old code back into my functions.php file and my site will work again.
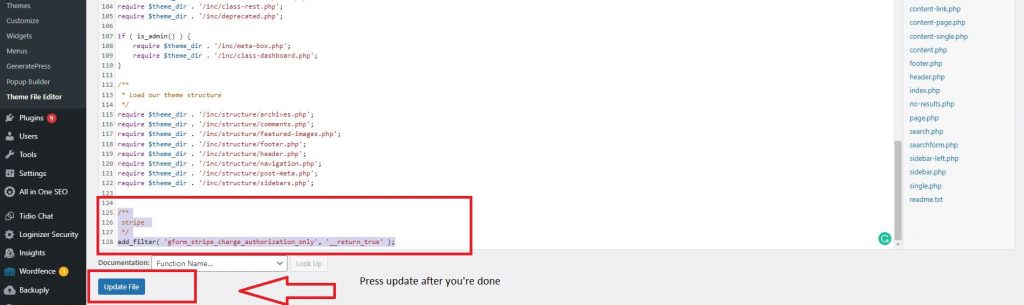
Step 3: Insert the following code at the end of the functions.php file and press “Update”
/**
stripe
*/
add_filter( ‘gform_stripe_charge_authorization_only’, ‘__return_true’ );
I’ve bolded the necessary code. The code above it is just to let anyone looking at the code in the future what the code is for.
That’s pretty much it. That’s all you need to do. The code above is for all feeds. If you only want to apply that code to some of your Stripe feeds, then you would need to put in a little more code, and Gravity Forms can guide you here.
How to Capture Payment After Authorizing with Gravity + Stripe
So after you’ve done the above steps, you should probably test it first with a small transaction with someone’s card.
Here is how it works if you’ve done everything correctly.
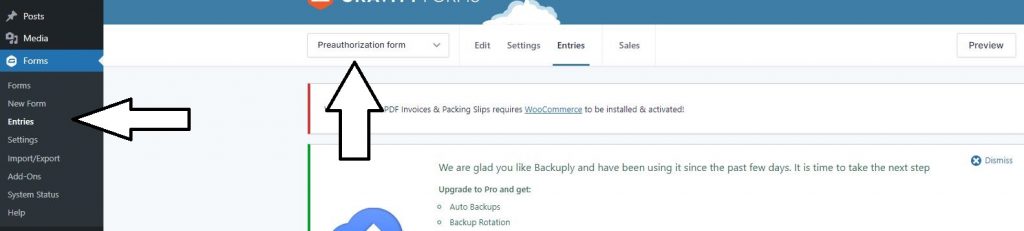
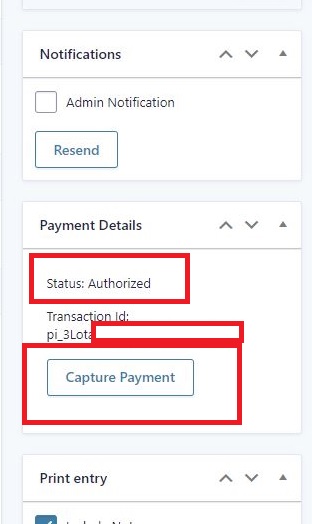
When the person enters their credit card information into the form, the payment will show as Authorized in the entry. To get to the entry, go to Entries and select the form that it was captured under. For this example, I created a form called Preauthorization form.
When you select the entry to see the transaction, it should look something like the image below. It should say “authorized” and then have a Capture Payment button. To process the authorized payment, press the button.
That’s pretty much it. That’s all you have to do. If you did it right, it should only take 2-3 minutes to do and you should be up and running.
Also, keep in mind that Stripe’s hold for credit card payments taken online is 7 days. So you would need to capture the payment within 7 days of authorizing it. However, Stripe’s extended authorization allows up to 31 days for holding the payment.