
Introduction
In the world of website development and design, Elementor is a popular and user-friendly page builder plugin for WordPress. It empowers users to create stunning web pages without any coding knowledge. One of the features that enhance Elementor’s functionality is the Author Box Widget. In this article, we’ll explore how to use the Author Box Widget in Elementor, step by step.
In this Elementor tutorial, we are going to walk you through creating an Author box. But before setting your author box, be sure to read about the best practices for making an author box widget below.
Main Features
- Displays the author’s name, website, author bio, and author gravatar.
- Fully customized to fit your theme design (style, color, size, and text options)
- On a computer, laptop, tablet, or phone, it looks nice.
- Automatically add the author box at the end of your post.
- Excellent for guest posts and authors.
Author Box Best Practices
There are several DOs and DONTs to keep in mind when building an author box. Examples are provided below.
Advantages:
- More Traffic
- Collaboration
- Good relations
- Better for New visitors
- More Opportunities
- Explains what you do
Disadvantages:
- Security issues
- 100% Real Information: The author typically offers 100% original information, which occasionally causes significant issues.
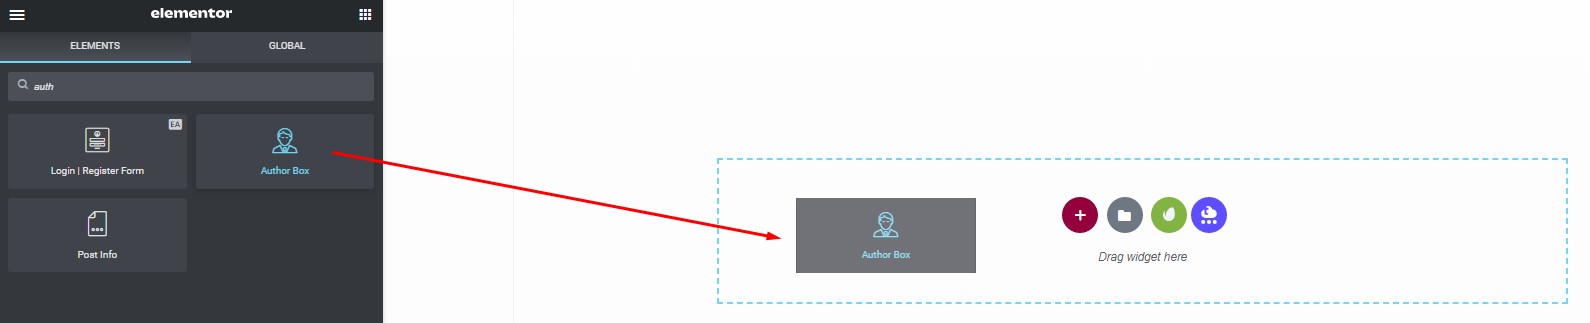
Step 1: Find the Author Box Widget
- Open your Elementor panel and search for the “Author Box” widget.
- Drag and drop it onto the desired page or post.
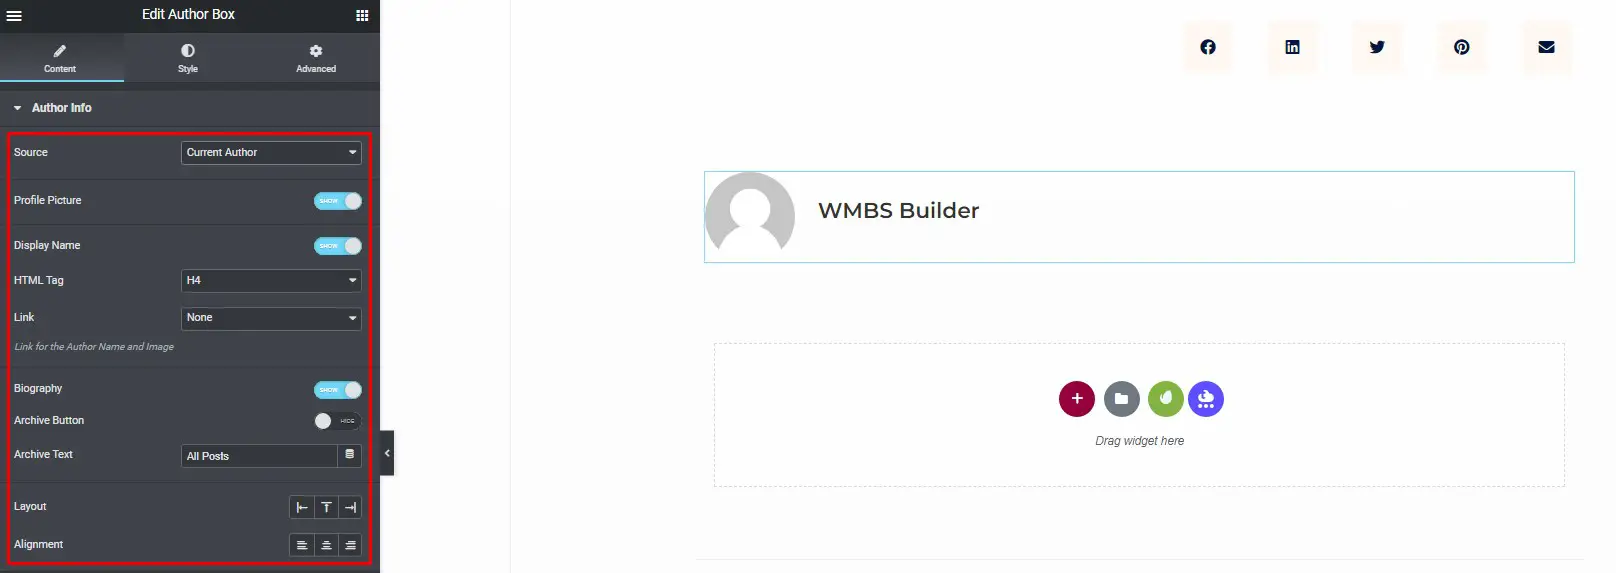
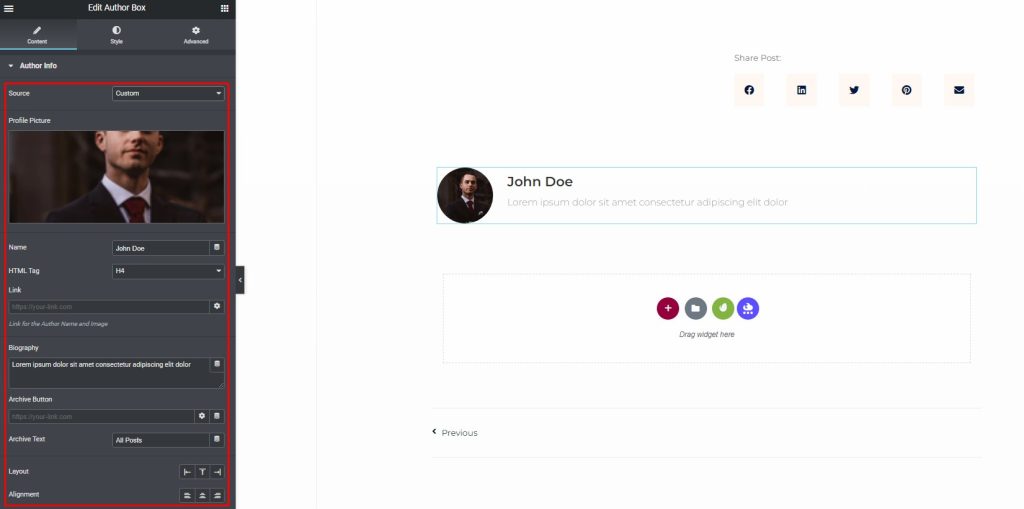
Step 2: Set the Elementor Author Box
Content > Author Info
- Choose Between Custom or Current Author: From the source, select whether you want to display information for a custom author or the current author of the post.
- Profile Picture: Decide whether to display or hide the author’s profile picture. If you choose “Custom,” you can upload your own image.
- Author’s Name: Determine whether to show or hide the author’s name. If you opt for “Custom,” enter the author’s name.
- Author’s HTML Tag: Select the HTML tag for the author’s name.
- Link to Your Website or Post History: Add a name and an image that links to your website or post history. In the “Custom” field, enter your desired link.
- Author’s Biography: Decide whether to display or hide the author’s biography. If you select “Custom,” provide a link to your own biography.
- Archive Button: Choose to display or hide the archive button, which takes visitors to the post archive. When using “Custom,” enter your preferred link.
- Customize Archive Button Text: Enter a value or use a Dynamic Tag to change the text displayed on the archive button.
- Set Layout and Alignment: Adjust the layout and alignment settings for your author box.
Step 3: Customize the Author Box Styles
Under the “Style” tab, you have the flexibility to personalize the appearance of your author box:
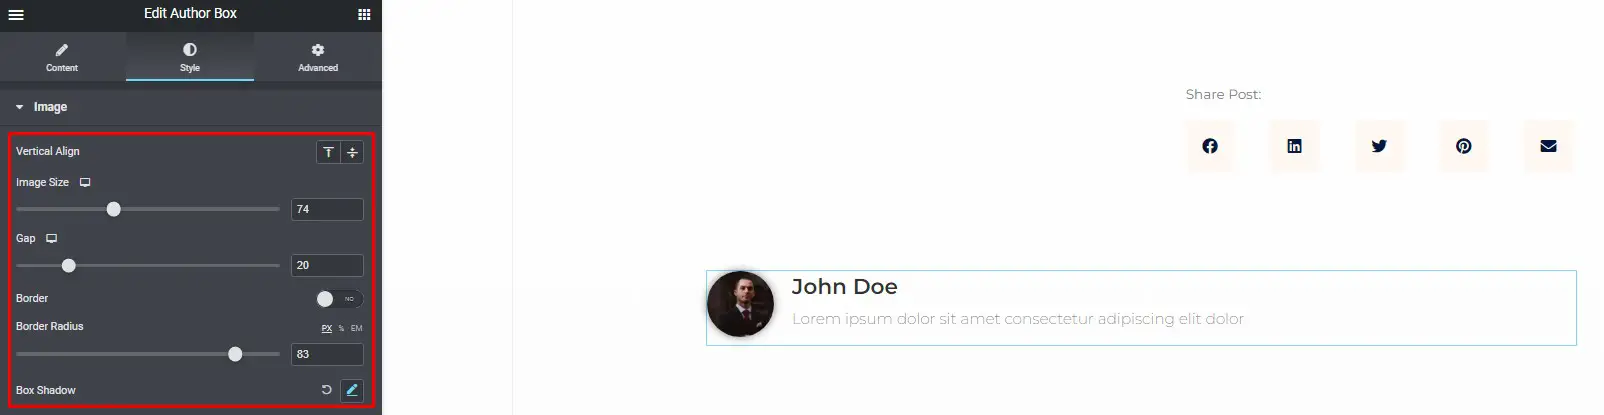
Image
- Align Your Author Image: Align the author’s image to the top or middle.
- Set Image Size: Determine the size of the image.
- Adjust Spacing: Modify the spacing between the image and text.
- Border: Enable or disable the border for the image.
- Border Radius: Set the border radius for the image.
- Box Shadow: Add a box shadow to the image.
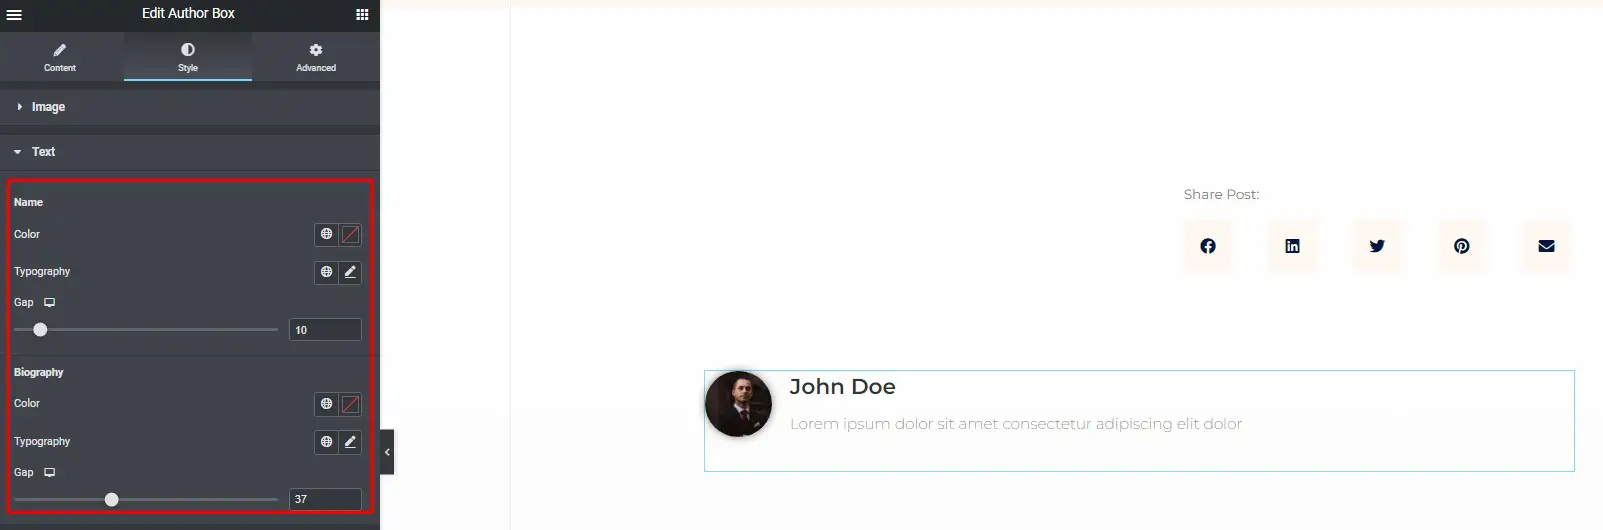
Text
To customize the text displayed in the author box, go to the “name and biography” section and:
- Set Text Color, Typography, and Gap.
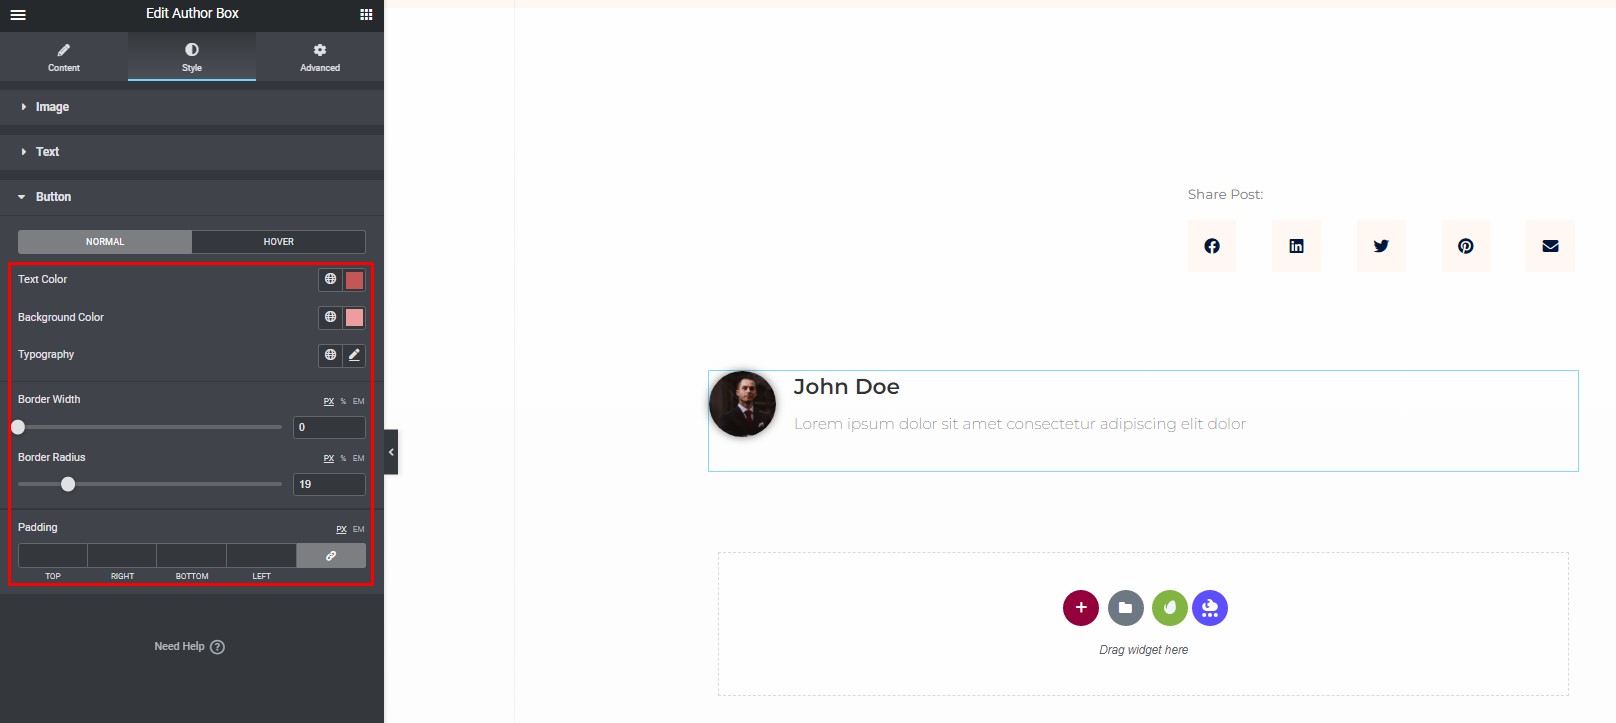
Button
To customize the appearance of the button, follow these steps:
- Set Text Color, Background Color, Typography, Border Width, Border Radius, and Button Padding.
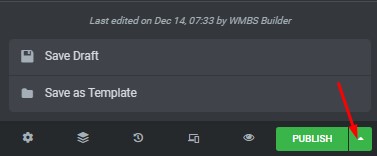
Step 4: Save Your Design
After you’ve finished customizing your Elementor Author Box Widget to your liking, remember to save your work as a draft. This ensures that your changes are preserved.
Now you’re ready to showcase your author information in a visually appealing and engaging manner using the Elementor Author Box widget. This feature is a great way to connect with your audience and add a personal touch to your website.
Customizing the Author Box Widget in Elementor: Tips and Tricks
Introduction
The Author Box Widget in Elementor is a valuable tool for bloggers and website owners. It provides a sleek and professional way to showcase the authors of your content. While the default settings are functional, customizing the Author Box can help you make a lasting impression and enhance your website’s overall aesthetic. In this article, we will provide a step-by-step guide on customizing the Author Box Widget in Elementor, along with some useful tips and tricks.
What is the Author Box Widget in Elementor?
The Author Box Widget is a feature in Elementor, a popular WordPress page builder. It allows you to display information about the author of a blog post or page. This information typically includes the author’s name, picture, and a brief description, along with links to their social profiles.
Why customize the Author Box Widget?
Customizing the Author Box Widget can set your website apart and create a memorable user experience. By personalizing the appearance and content of the Author Box, you can align it with your site’s branding, engage readers, and promote your authors.
Step 1: Access the Elementor Editor
To begin customizing the Author Box, access the Elementor Editor. You can do this by navigating to your WordPress dashboard, opening the page or post you want to edit, and clicking the “Edit with Elementor” button.
Step 2: Edit Your Post or Page
Edit the post or page where you want to include the Author Box. You can do this by clicking on the content you wish to edit or by adding a new block.
Step 3: Add the Author Box Widget
In the Elementor Editor, search for the “Author Box” widget and drag it to your desired location on the page.
Step 4: Customize the Author Box
- Change the Author’s Image: Upload or select an image for the author. Ensure it’s a clear and professional picture.
- Modify the author’s name and description: Edit the author’s name and provide a brief, engaging description. This is your opportunity to introduce your author to the readers.
- Customize Social Links: Add links to the author’s social media profiles. This helps readers connect with your authors on various platforms.
Step 5: Adjust styling
Modify the design of the Author Box to match your website’s aesthetics. You can change the background color, text color, and other design elements to create a cohesive look.
Step 6: Update and save
After customizing the Author Box to your liking, don’t forget to click the “Update” or “Save” button to save your changes.
Tips and Tricks for Author Box Customization
Customizing the Author Box Widget can be a creative process. Here are some tips and tricks to make the most of it:
Matching Your Website’s Aesthetics
Ensure that the Author Box design complements your site’s overall look and feel.
Showcasing Multiple Authors
If your website features multiple authors, consider creating a unique author box for each author.
Using Custom Icons
Experiment with custom icons for social links and other elements to add a unique touch to your Author Box.
Common Mistakes to Avoid
While customizing the Author Box, it’s important to avoid common mistakes:
Overloading with Information
Keep the author’s description concise and relevant, avoiding excessive details.
Ignoring Mobile Responsiveness
Ensure that your author box looks great on mobile devices for a seamless user experience.
Benefits of a Customized Author Box
A customized author box can benefit your website in various ways. It enhances brand identity, engages readers, and adds a personal touch to your content.
Conclusion
In conclusion, the Author Box Widget in Elementor is a fantastic tool for adding a personal touch to your website. By customizing it to align with your branding and using the tips and tricks mentioned in this article, you can create an author box that leaves a lasting impression on your readers.


