Table of Contents
Introduction
Visual Composer, a powerful page builder for WordPress, enhances the content creation experience. However, users may encounter challenges when the editor refuses to load. In this comprehensive guide, we will walk you through troubleshooting steps to resolve any issues, ensuring a seamless editing experience with Visual Composer
Accessing Visual Composer: Initial Steps
Go to your WordPress Dashboard and select the “Posts” section.
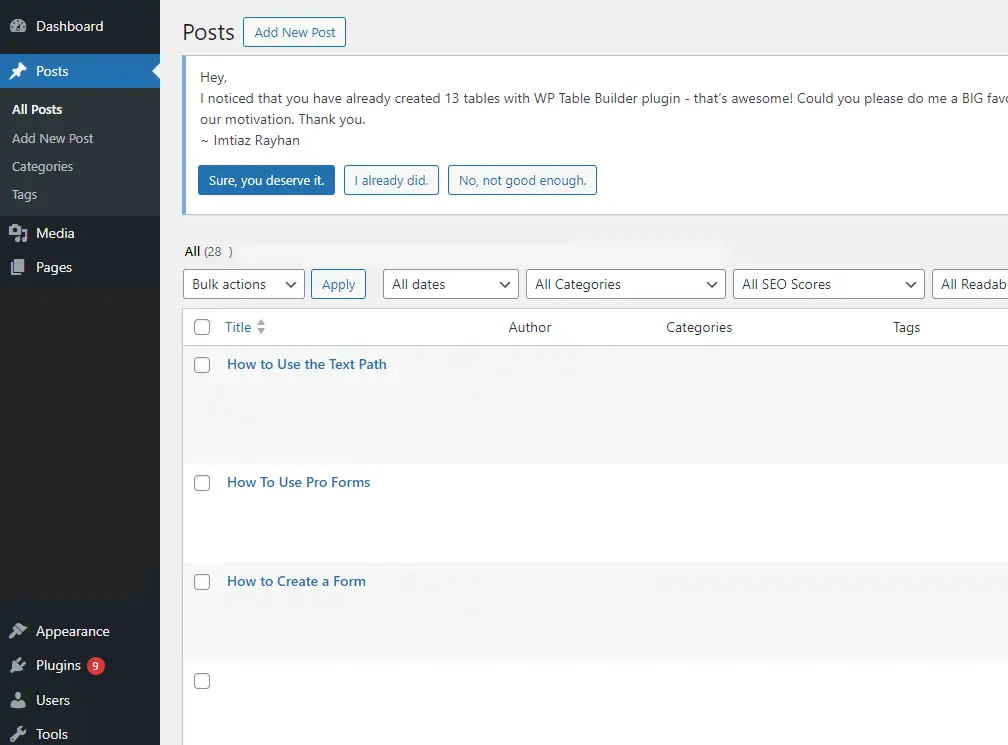
Choose the post you want to edit and click on “Edit with Visual Composer.”
No Load Situation: What to Do?
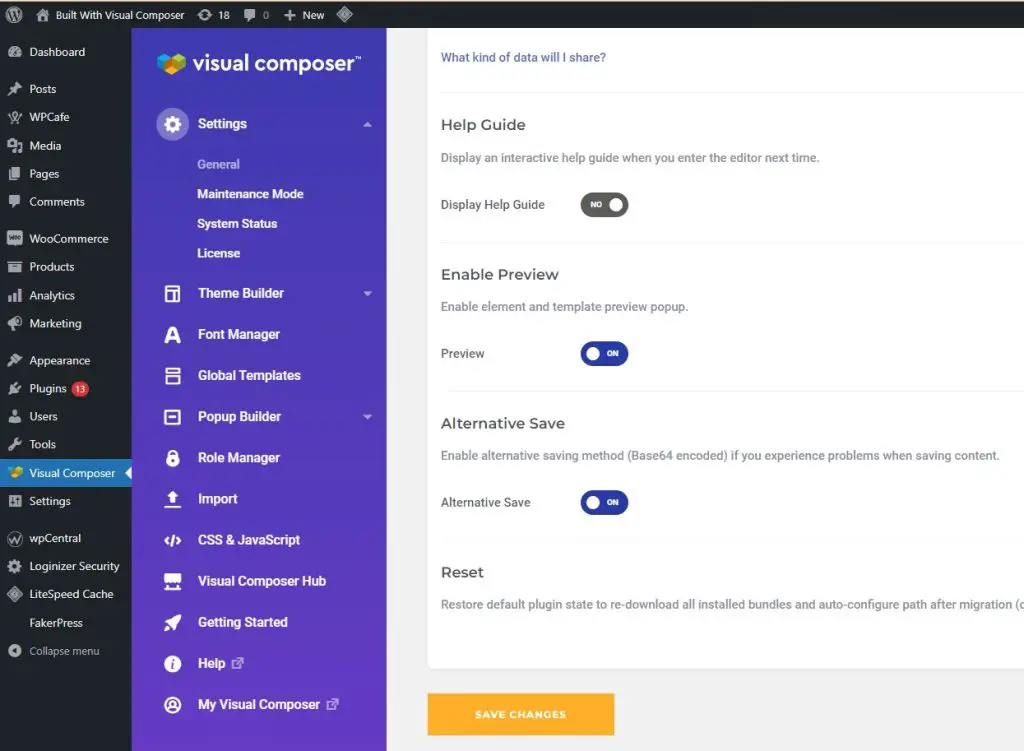
- If the editor fails to load or you can’t see any content, return to the WordPress Dashboard.
- In Visual Composer Settings, scroll down to “Alternative Save.”
- Toggle the setting to “ON” and save changes.
Frontend Editor Issues: Yoast SEO Considerations
- Ensure Yoast SEO’s “Redirect Ugly URLs” setting is disabled.
- Enabling this setting can disrupt the Frontend editor, causing Visual Composer problems. Disable it unless absolutely necessary.
Visual Composer Frontend Editor Not Loading: Troubleshooting Methods
Method 1: Refresh the Post or Page
- If Visual Composer isn’t loading, try refreshing the page.
- If the issue persists, clear your browser cache and refresh again.
- The editor may struggle if it attempts to access an outdated version of the page.
Method 2: Update the Plugin, Update WordPress
- Check if you’re using the latest version of Visual Composer.
- Navigate to the WordPress admin dashboard, go to plugins, and click “Update” for Visual Composer.
Method 3: Deactivate All Plugins
- Identify the latest plugin installed before the issue arose.
- Deactivate that plugin and attempt to access the Visual Composer backend editor.
- If unsuccessful, deactivate all plugins and reactivate them one by one until the problematic one is identified.
Access the editor again. If it’s working, activate your plugins one by one, and check whether Visual Composer is working in between each activation. Once you find the plugin that makes it stop loading, then uninstall that plugin.
How Can Visual Composer Insights Help You Improve Your Performance?
In today’s digital age, where attention spans are shorter than ever, having a website that loads quickly and efficiently is crucial. One key aspect of achieving optimal website performance is image optimization. In this article, we’ll delve into the step-by-step process of optimizing your website’s performance using Visual Composer Insights.
Understanding Visual Composer Insights
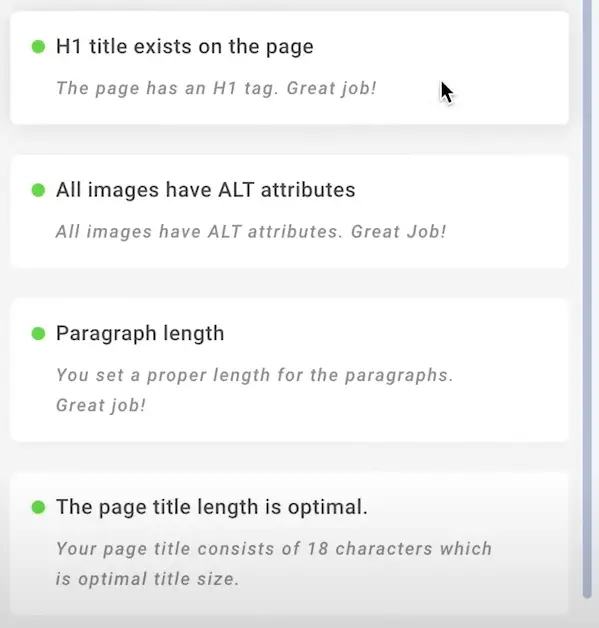
Before we dive into the nitty-gritty details, let’s understand what Visual Composer Insights is and how it plays a pivotal role in optimizing your website. This tool provides a comprehensive overview of your site’s performance, highlighting areas that need improvement. Keep a close eye on the Insight icon in the Visual Composer editor – if it’s green, you’re on the right track.
Best Practices For Image Optimization

1. Optimize While Creating
Start on the right foot by creating images in the correct size. If your website requires a pixel dimension of 600×400, ensure your images meet this criteria from the outset. Avoid resizing images after the fact, as this can lead to loss of quality.
2. Save Images as PNG
While JPEG images may load faster, PNG offers higher resolution and clearer pixels. In the long run, opting for PNG ensures your website maintains top-notch image quality.
3. Compress Images
Use image compression tools to reduce file size by up to 70% without compromising image quality. This step is crucial for enhancing website speed and user experience.
4. Add Metadata
Alt text, or alternative text, is vital for accessibility and SEO. Briefly describe what the image depicts, especially for situations where the image may not be visible. This enhances the overall understanding of your content.
5. Remove Unnecessary Images
Regularly clean up your WordPress media library to declutter and free up storage space. Removing unnecessary images not only streamlines your library but also contributes to improved website performance.
6. Use Lazy Load
Implement plugins like Visual Composer that offer lazy loading for media. This ensures that images are loaded only when they come into the viewer’s viewport, reducing initial page load time.
Image Optimization Tools
Explore various image optimization tools to streamline the process:

1. Canva
If you lack access to advanced design tools, Canva is a user-friendly option. Resize images online for free, catering to your website’s specific requirements.
2. TinyJPG
For JPEG image compression, TinyJPG is a reliable option. It efficiently reduces file size while preserving image quality.
3. Kraken Image Optimization
Supporting multiple formats, Kraken removes unnecessary data to reduce image size. It’s a versatile tool for optimizing JPG, PNG, SVG, and animated GIFs.
4. Tinypng Image Compressor
Optimize PNG images by 50-80% without sacrificing transparency. Tinypng ensures your images maintain quality while significantly reducing file size.
Wrap Up
In the quest for optimal website performance, finding the right balance between image size and quality is crucial. By choosing the correct file format, setting the appropriate image size from the start, utilizing image compression, and incorporating lazy loading, you pave the way for a faster website.
Image optimization isn’t just about speed; it directly impacts SEO rankings and user experience. Taking these steps not only reduces loading times but also increases the likelihood of conversions. Don’t underestimate the power of a well-optimized website – implement these best practices and tools to ensure your visitors have a seamless experience!
Conclusion
In conclusion, prioritizing image optimization is a game-changer for website performance. By implementing the outlined best practices and utilizing powerful tools, you’re on the path to a faster, more efficient website. Remember, a well-optimized site not only enhances user experience but also boosts SEO rankings and conversion rates.
