
Solving WordPress Plugin Upload Issues
Are you struggling with uploading a plugin to WordPress because the file size exceeds the allowable limit? This is a common challenge, especially on shared hosting platforms. The error message citing the upload max files directive in PHP ini can be perplexing but fear not! There are two ways to tackle this issue – the harder way and the remarkably easy way. In this guide, I’ll walk you through the steps of the latter, ensuring a swift resolution to your plugin upload problem.
Understanding the Error Message
Shared Hosting Challenges
Shared hosting environments often impose restrictions on file upload sizes to ensure fair resource distribution among users. This limitation can lead to the infamous error message, causing frustration for WordPress users attempting to enhance their site functionalities with new plugins.
PHP ini’s Upload Max Files Directive
The error specifically points to the PHP ini’s upload max files directive, indicating that the attempted upload surpasses the server’s predefined limit. While there are complex methods to address this, let’s focus on the easy way that guarantees a hassle-free solution.
The Easy Solution
Navigating File Manager
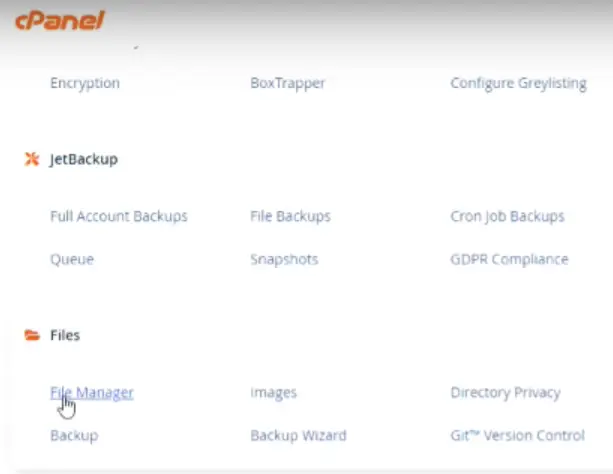
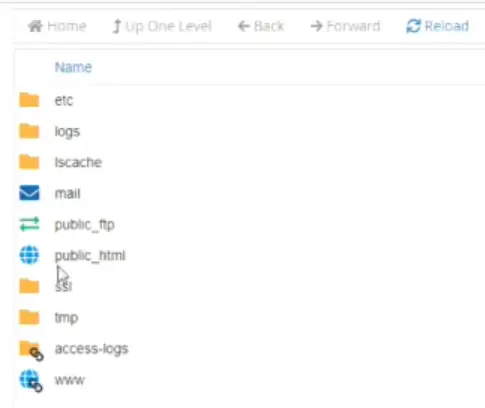
The straightforward approach begins with accessing your hosting account’s File Manager through cPanel. Once there, you’ll navigate to the public HTML directory, a crucial step in resolving the upload issue efficiently.
Accessing the Contents Folder
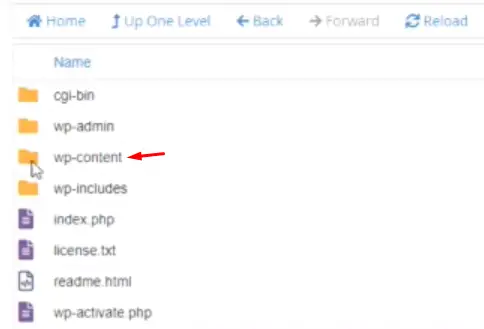
Within File Manager, locate the Contents folder. Choosing the correct directory is paramount to the success of this method. Selecting the wrong folder may result in an unsuccessful plugin upload.
Uploading the Plugin

Now that you’ve found the Contents folder, proceed to the plugin directory. Here, you’ll upload your plugin’s zip file. Ensuring the correct destination is vital for a seamless extraction process.
Extracting the Uploaded File
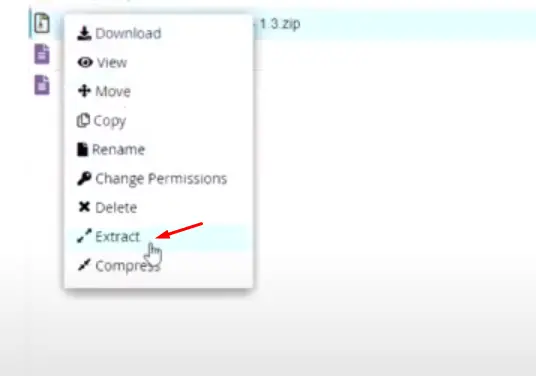
After the upload, extract the plugin file within File Manager. This uncomplicated step finalizes the transfer of the plugin into your WordPress installation. The process is visualized in the manager, allowing you to confirm the successful extraction.
Activating the Plugin in WordPress
With the plugin now in your WordPress system, return to your dashboard and activate the plugin. Your WordPress site is now equipped with the new functionality, all achieved through a quick and straightforward process.
Quick Recap
In summary, solving WordPress plugin upload issues doesn’t have to be complicated. By opting for the easy way – navigating File Manager, uploading, extracting, and activating – you save time and sidestep potential pitfalls associated with the harder alternative. Have questions or comments? Feel free to drop them below.