
Introduction
In today’s digital landscape, having a visually appealing and functional blog post template is crucial for engaging your audience and maintaining a professional online presence. A single post template serves as the standardized layout for each individual blog post on your website. In this guide, we’ll walk you through the process of creating a single blog post template using Elementor Pro, a powerful WordPress page builder.
Understanding the Single Post Template
Before diving into the creation process, let’s grasp the concept of a single post template. Essentially, it dictates the layout and design of individual blog posts on your website. Imagine it as the frame that encapsulates your content, providing a consistent and visually appealing presentation to your readers.
What is a Single Post Template?
The single post template is the standardized layout applied to each individual post. It ensures uniformity across your website’s posts, enhancing brand consistency and user experience.

Step-by-Step Guide to Building Your Single Post Template
To begin crafting your single post template, navigate to your Elementor Pro WordPress dashboard.
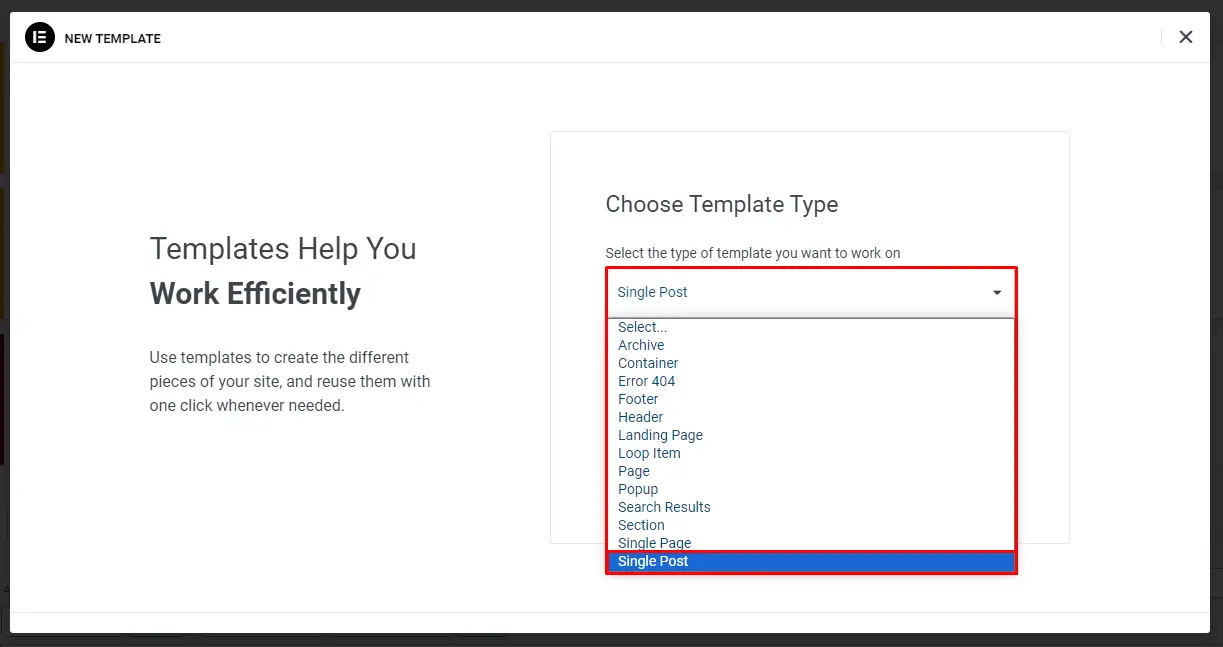
Step 1: Creating a New Single Post Template
Go to Templates and click the Add New button.
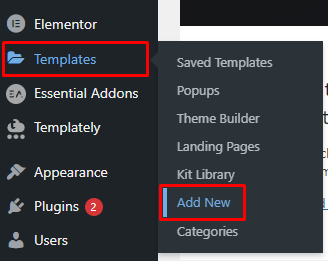
Choose the template type as Single Post.
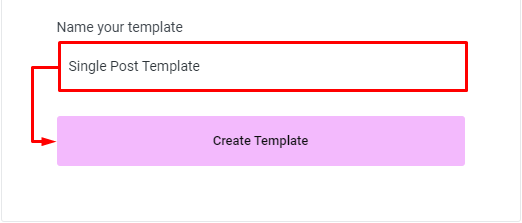
Give your template a unique name and click “Create template”.
Step 2: Customizing the Template Layout
Now that you’ve initiated the template creation process, it’s time to unleash your creativity and design prowess.
Step 3: Starting from Scratch
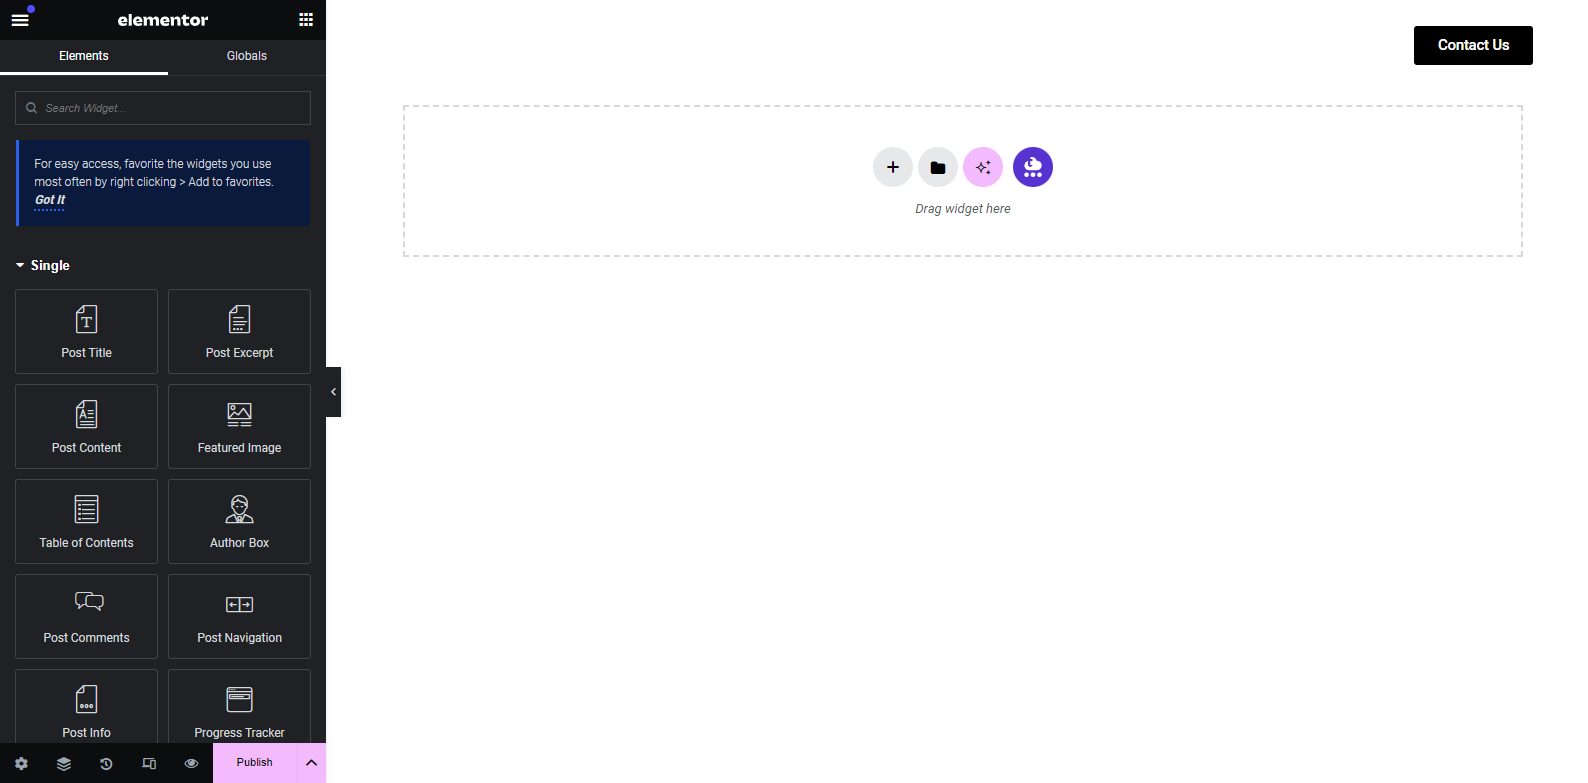
Open the Elementor editor, presenting a blank canvas for your design endeavors.
Opt for a 1-column layout and utilize Flexbox for flexible container management.

Step 4: Customizing the Template Layout
Set the Page Layout to ‘Elementor Canvas’ for distraction-free designing.
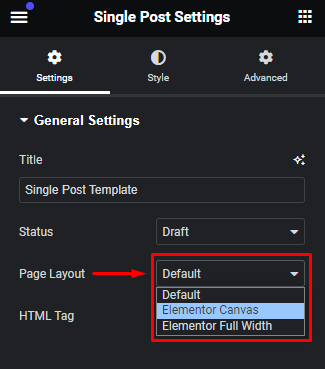
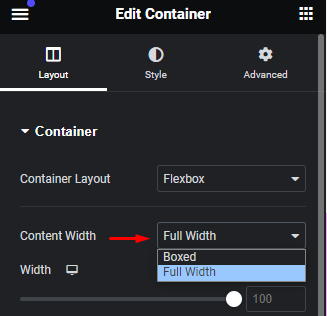
Select ‘Full Width’ to maximize your design canvas.
Step 5: Customizing Background
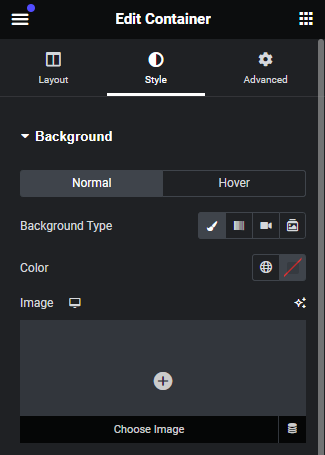
Under the Style tab, incorporate a Background Image and adjust settings as necessary for aesthetic appeal.
Step 6: Adding Form Element
Include a Form element using Elementor Pro’s strong form-building features.
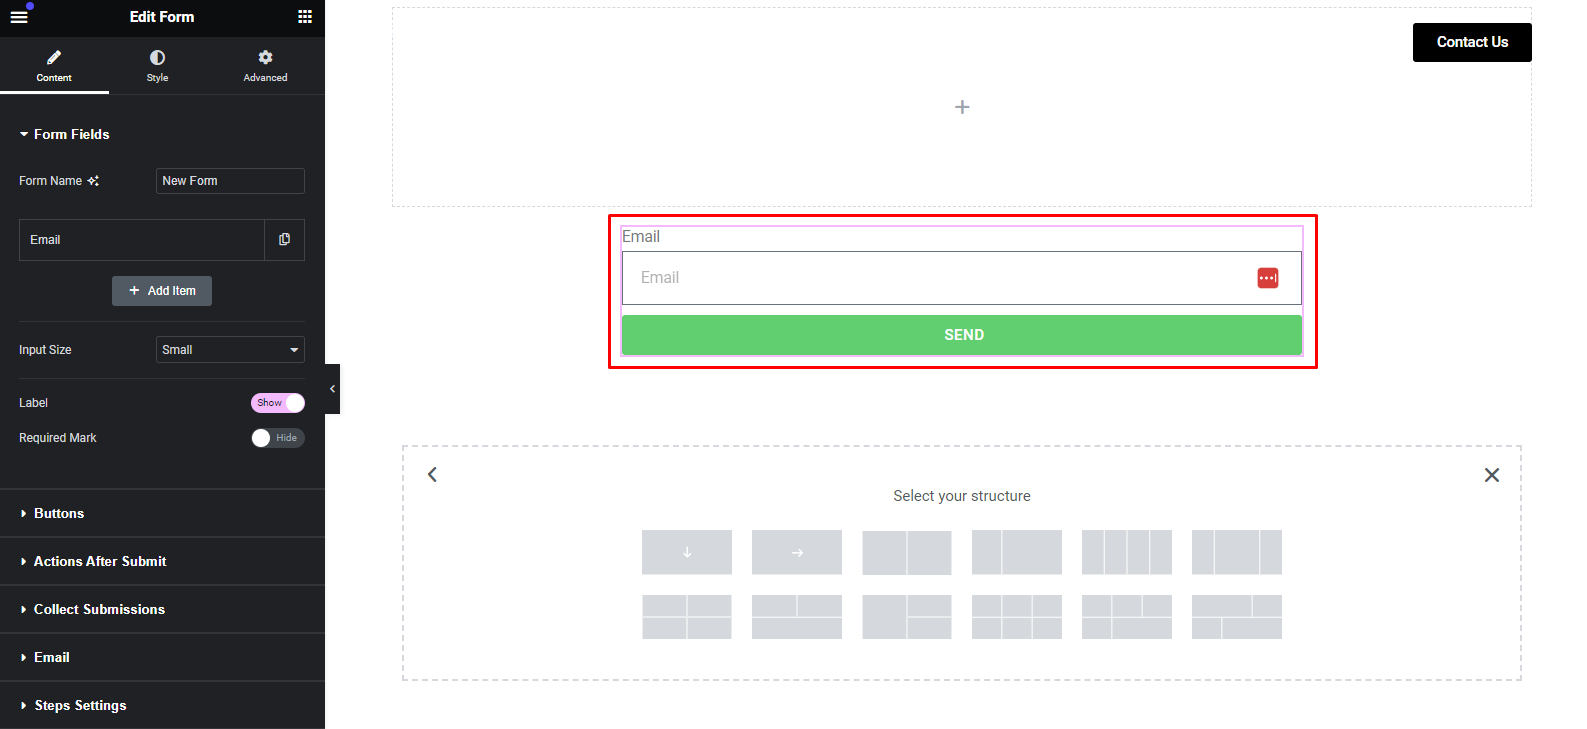
Make sure it connects well with your email marketing service so you can manage email subscriptions smoothly.
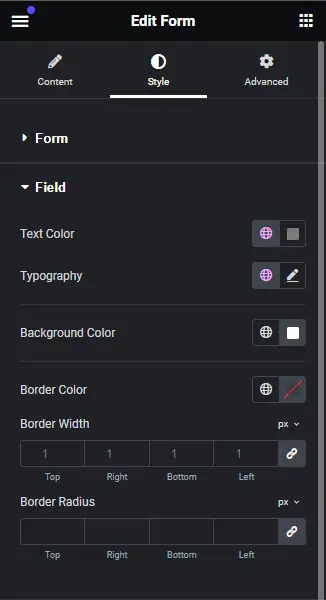
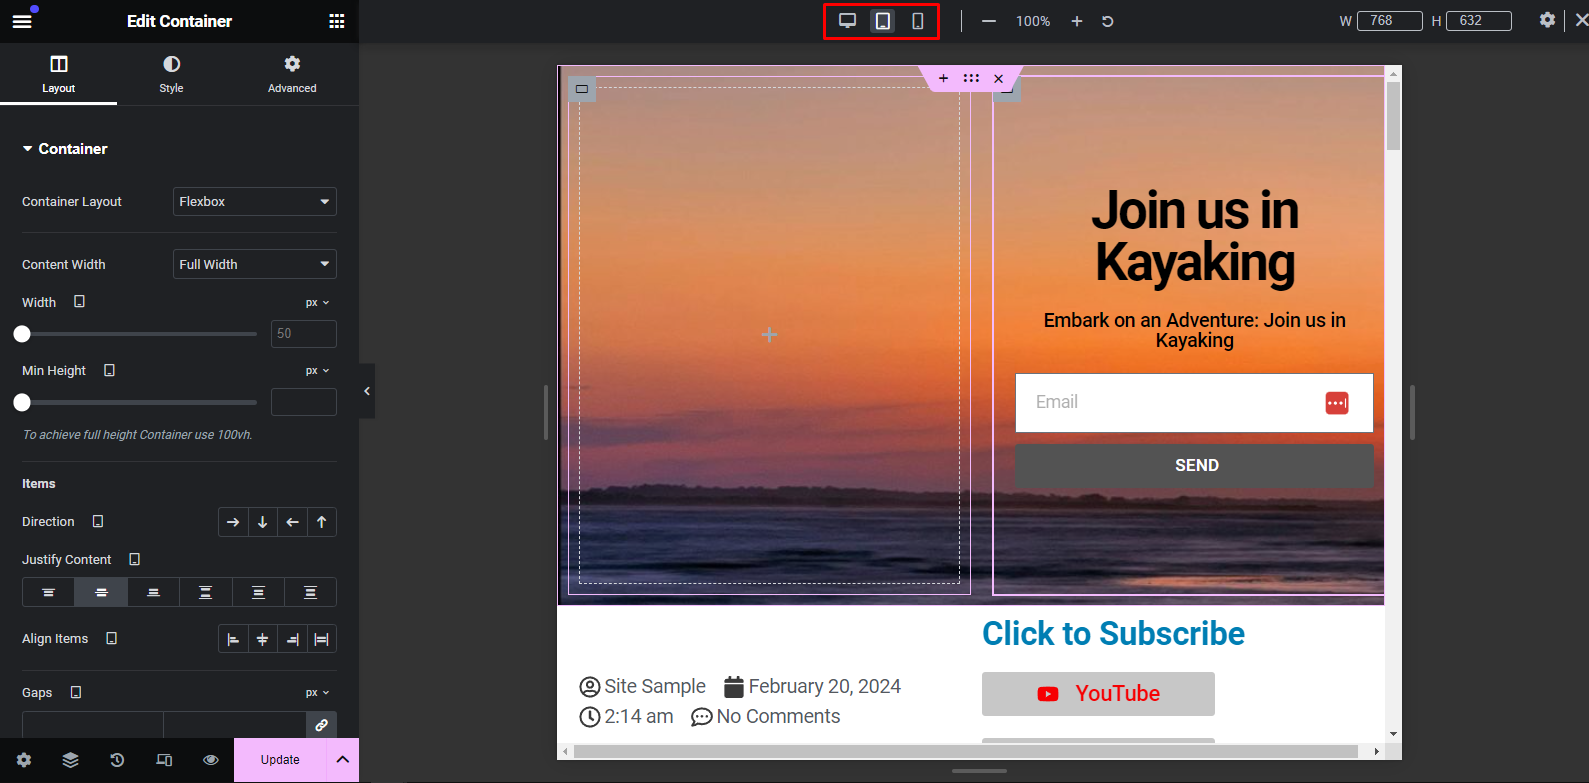
Step 7: Designing Form Container
Create a container for the form placement.
Enhance visual appeal with headings, subheadings, and typography adjustments.
Step 8: Structuring Content Layout
Opt for a 2-column layout using Flexbox.

Customize Post Info, including Author, Date, Time, and Comments sections.
Step 9: Incorporating Essential Post Elements
Add Post Title, Featured Image, and Post Content elements.

Ensure the presence of Post Content to avoid display errors.

Step 10: Enhancing Right-Side Column
Introduce ‘Click to Subscribe’ section with a personalized button.

Integrate social platform icons for enhanced engagement.
Step 11: Showcasing Related Posts
Query and display most popular or recent posts dynamically.
Alternatively, manually include links to posts for promotion purposes.

Step 12: Facilitating Social Sharing
Implement social sharing buttons for seamless content dissemination.
Encourage readers to share your valuable content across various platforms.
Step 13: Ensuring Responsiveness
Evaluate template responsiveness and make minor adjustments as needed.
Leverage Elementor’s automatic responsiveness for streamlined optimization.
Tips for Optimizing Your Single Post Template
Responsive Design: Make sure your single post template is responsive and looks great on all devices, including desktops, tablets, and smartphones.
Page Speed Optimization: Optimize your template for fast loading times by minimizing code, optimizing images, and using caching plugins.
SEO Best Practices: Ensure your single post template is optimized for search engines by adding meta tags, optimizing images, and using descriptive headings.
Troubleshooting Common Issues
Template Not Displaying Correctly
Check for any conflicting plugins or themes, and ensure the template is properly assigned to single posts.
Post-Content Alignment Problems
Adjust widget settings and layout elements to ensure proper alignment and display of post content.
Conclusion
In conclusion, building a single post template with Elementor Pro offers a customizable and efficient way to create engaging and visually appealing post layouts for your WordPress website. By following the step-by-step guide outlined above, you can effectively set up Elementor Pro, design your single post template, configure its display settings, and troubleshoot any issues that may arise. With a well-designed single-post template, you can enhance the user experience, maintain consistency across your website, and effectively showcase your content to your audience.